
 admin

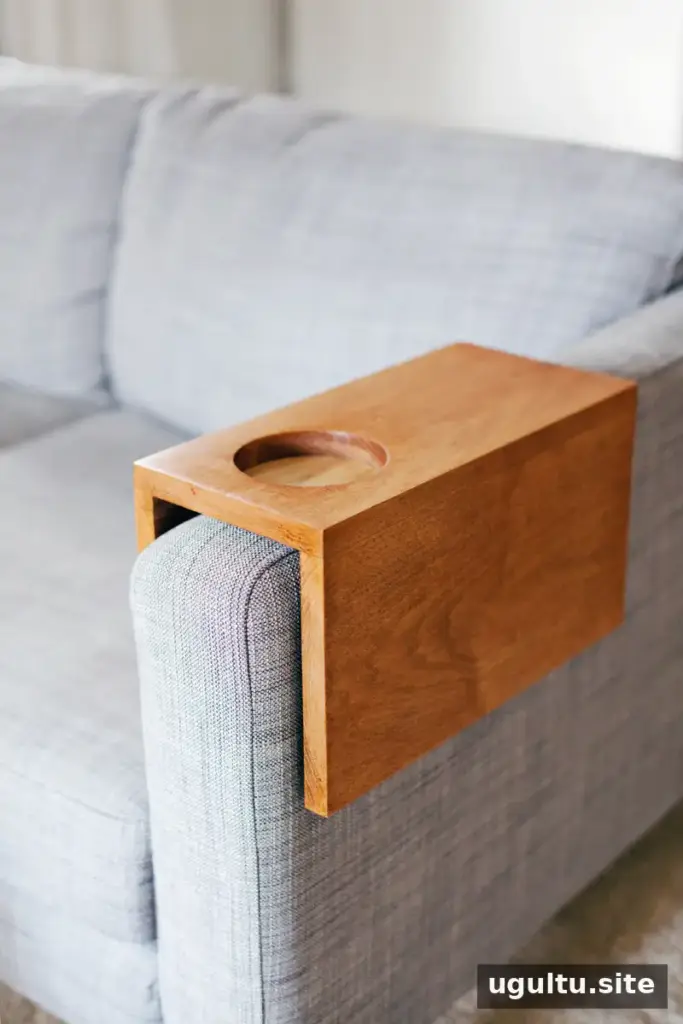
A wooden sofa sleeve with cup holder keeps a drink close while you relax, read, or watch a movie. This DIY project fits over a sofa or chair arm and can be sized to suit your furniture. With careful measurements, basic woodworking materials, and a protective finish, you can create a useful accessory that complements your room.

The instructions below explain how to measure, assemble, and finish the sleeve. Pocket-hole joinery is optional: wood glue can be sufficient for an accessory used gently. However, this project is not designed to support a person’s weight, so do not use it as a step or seat.
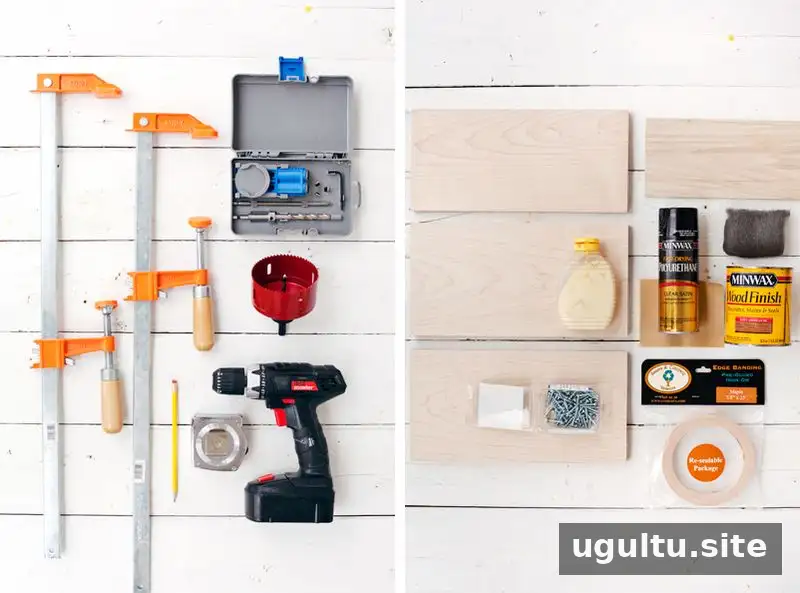
Tools and materials
Tools:
- Clamps at least 8 inches long
- A hole saw sized for your usual cup; a larger hole saw may require a drill press
- Tape measure and pencil
- Power drill, if using pocket screws or a hole saw smaller than 2.5 inches
- Optional pocket-hole jig for added reinforcement
Materials:
- Three equal-length wooden boards, sized for your sofa arm
- Thin 1/8-inch plywood
- Wood glue, wood stain, and polyurethane
- 150- or 180-grit sandpaper and grade 0000 steel wool
- Optional veneer tape for concealing cut edges, especially on softer lumber
- Optional 1.25-inch pocket-hole screws if adding pocket-hole reinforcement
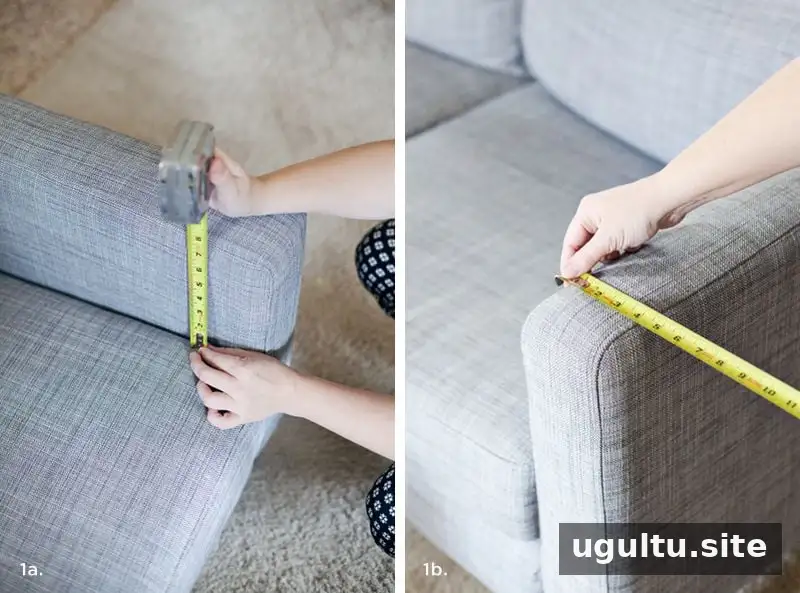
How to make a wooden sofa sleeve with cup holder
1. Measure and cut the boards
Measure the width of the furniture arm and its height from the cushion. The formulas below assume boards are 3/4 inch thick, the standard thickness for 1-by boards.
- Top board: 14 inches long; width equals the arm width plus 1.5 inches.
- Side boards: 14 inches long; width equals the arm height from the cushion, rounded down to the nearest board width.
- Plywood: Cut a square with sides equal to the arm width. It will cover the underside of the cup opening.
For the Ikea Karlstad sofa example, the project used three 14-inch lengths of 1-by-8 board. One board was trimmed to 6.25 inches wide for the top. Measure your own furniture rather than relying on these example dimensions.
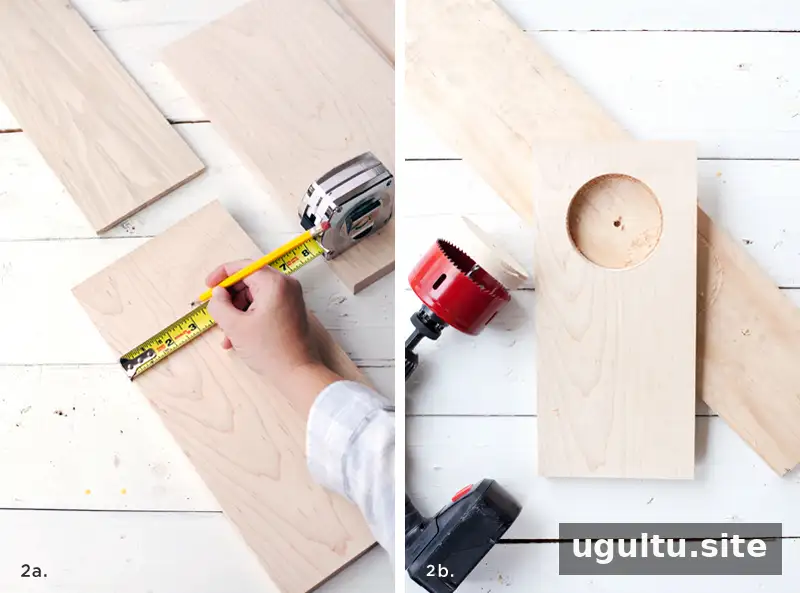
2. Cut the cup opening
Mark the center of the cup opening near one end of the top board, then mark where the hole saw’s pilot bit will begin. Choose a hole saw that suits the cups you use most often. A large hole saw can be difficult to control with a handheld drill and may damage the board’s surface. Secure the wood properly and use a drill press when needed. If you do not have access to one and need an opening larger than 2.5 inches, cut the circle with a jigsaw instead.
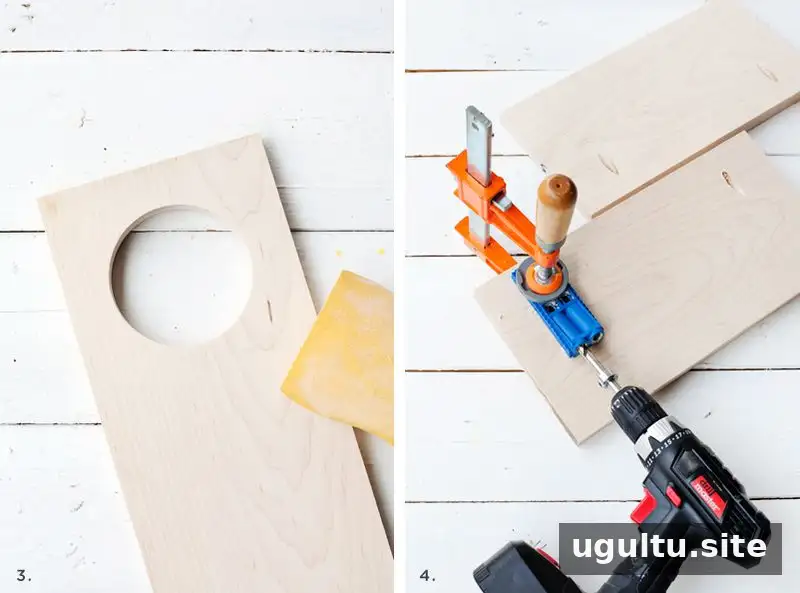
3. Sand and prepare the pieces
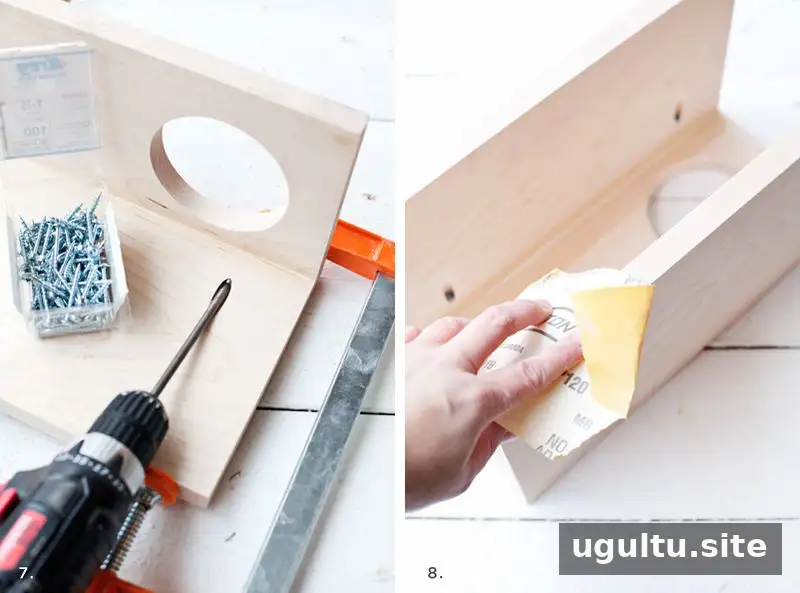
Sand inside the opening and the top and bottom surfaces of the boards. Avoid rounding the edges and corners: keeping them square helps the pieces meet flush during assembly. If you plan to use pocket holes, drill them into the ends of one side of each side board. This step is optional, and practicing on scrap wood first can help you check the placement.
4. Glue and clamp the sleeve
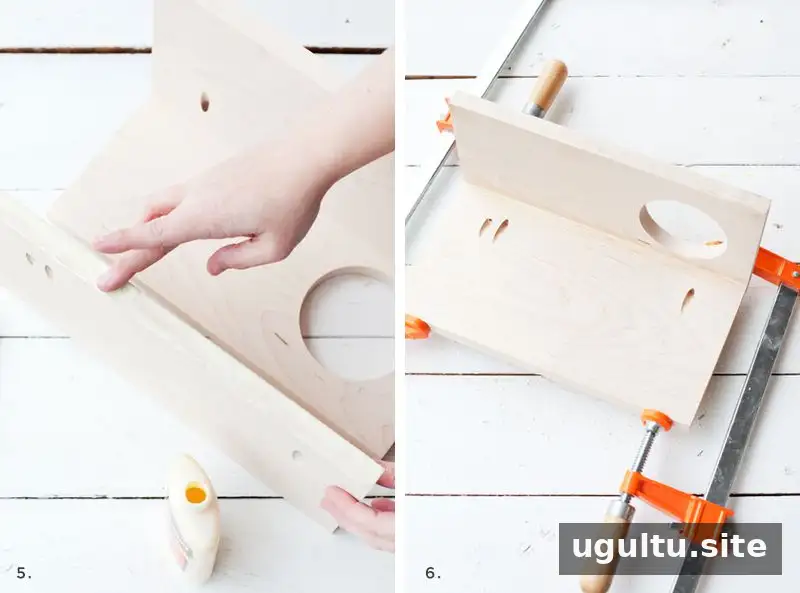
Spread a thin layer of wood glue along one long edge of a side board. Attach it to the underside of the top board, keeping the boards aligned at the ends and corners. If you made pocket holes, point them toward the inside of the sleeve. Wipe away squeezed-out glue promptly with a damp cloth, since dried glue can be difficult to remove and may show through the finish.
Clamp the joint securely and repeat with the second side board. Optional pocket screws can be added after the boards are aligned. If a board shifts or pulls away, wait until the glue has set according to its label before installing the screws.
5. Sand and stain
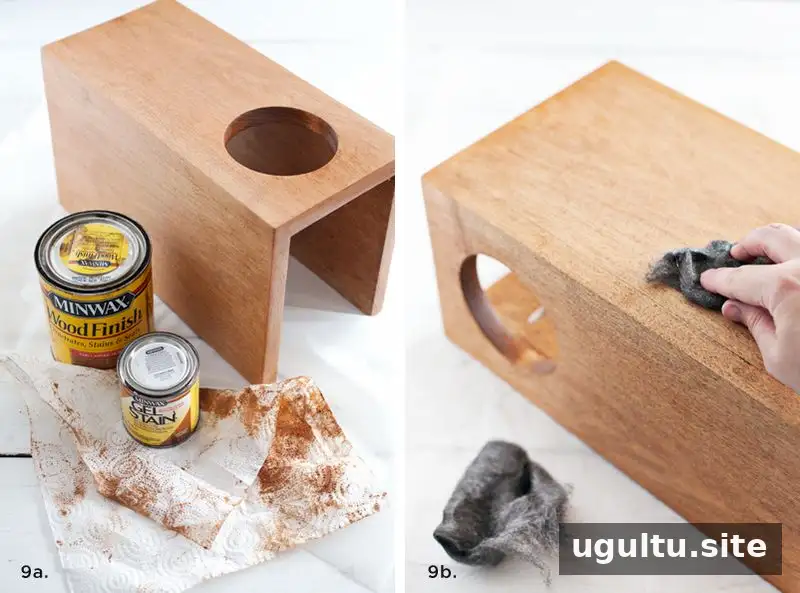
Once the assembly is secure, sand the entire piece. The original project used 150-grit sandpaper; softer woods such as pine may benefit from a finer final sanding near 200 grit to reduce visible scratches under stain. Apply the stain and let it dry for at least 12 hours. Lightly buff the surface with grade 0000 steel wool to smooth raised wood fibers. Add a light second coat if buffing leaves uneven or lighter areas.
6. Attach the plywood and seal the finish
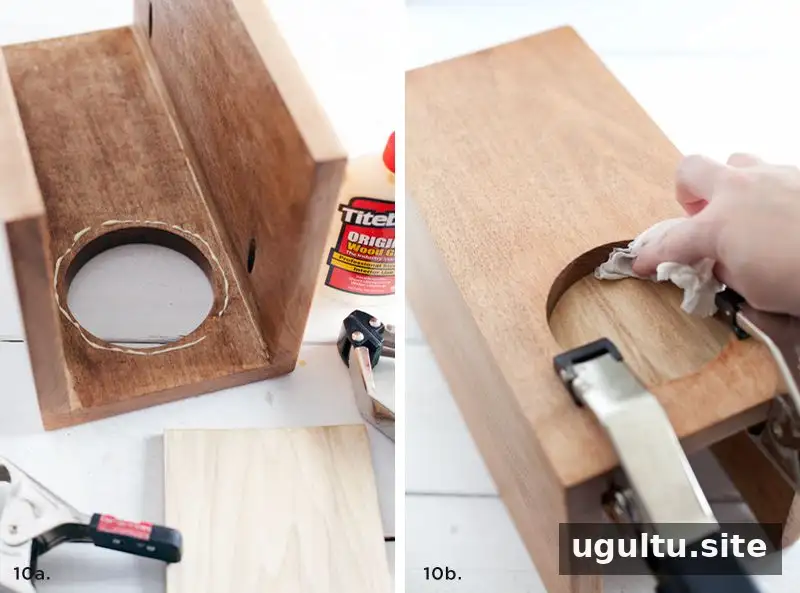
Glue the square piece of thin plywood beneath the cup opening. Use a small amount of glue to limit squeeze-out, then clamp it in place and wipe away any excess immediately. After the glue has set, apply two light coats of polyurethane. This finish helps protect the wood from moisture caused by condensation on a cold cup.
Using and customizing your finished sleeve
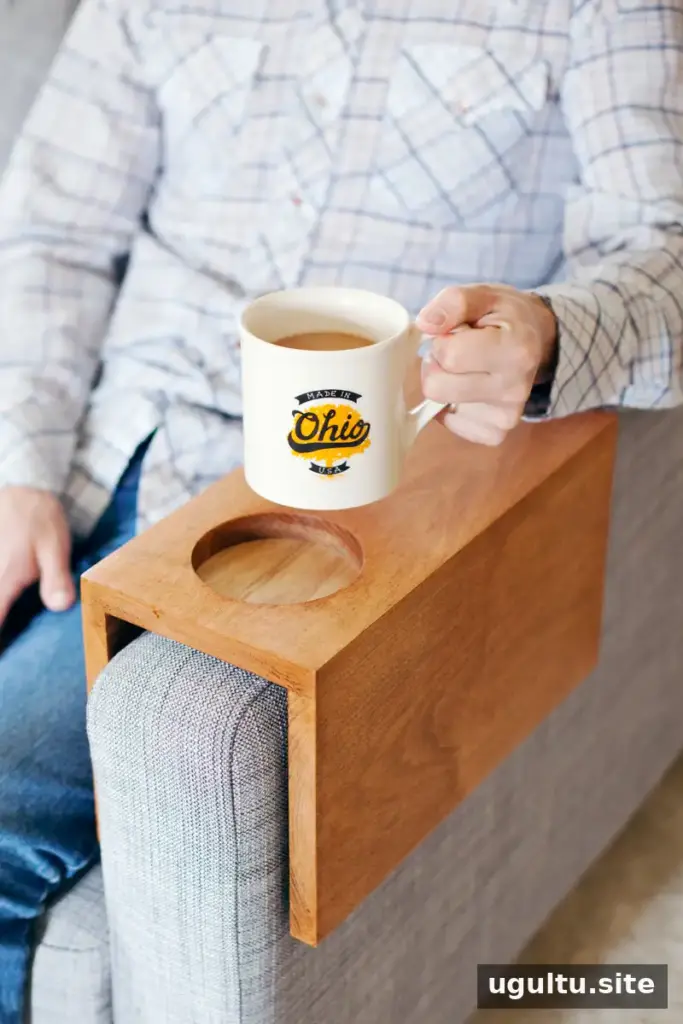
The completed sleeve provides a stable place for a cup and can also hold small snacks. Check that it sits securely on the arm before setting down a drink, and use coasters or wipe up spills to help preserve the finish. Custom sizing is the key to a comfortable fit: recheck the arm width and height before cutting, particularly if the arm has a rounded or tapered shape.

Conclusion
A wooden sofa sleeve with cup holder is a practical woodworking project that can be tailored to a sofa or chair. Accurate measurements, square joints, prompt glue cleanup, and a sealed finish all help create a neater, more durable result. Pocket screws are optional for gentle use, but the sleeve should never be treated as a step stool. Project by Mandi.


