
 admin


A Dutch braid tutorial can help you learn a versatile hairstyle that works for everyday wear, warm weather, and more polished occasions. Also known as an inside-out braid, the Dutch braid stands out because each section crosses under the middle strand rather than over it, as in a French braid.
Once you understand the under-crossing motion, the technique becomes easier to repeat. The finished braid can be worn close to the head or gently loosened for a fuller look. Start with one braid while practicing, then try a matching braid on the other side.
Dutch Braid Tutorial: What You’ll Need

Hair extensions are optional. Braiding your natural hair alone works well; extensions can add length or fullness if you already use them. If you choose extensions, ask a hair professional for help selecting a shade that matches your hair.
Gather a brush or comb, a clear hairband, and smoothing spray or cream. A little styling product can help control flyaways, but avoid applying so much that the hair becomes difficult to handle.
How to Make a Dutch Braid

Begin by brushing out tangles. Part your hair along the route you want the braid to follow. At the front, take a section about 3 inches wide and divide it into three even strands.
- Cross the front strand under the middle strand. The front and middle strands switch positions.
- Cross the back strand under the new middle strand.
- Before crossing the front strand under again, gather a small amount of loose hair beside it and add that hair to the strand.
- Gather a small section of loose hair beside the back strand and add it in. Cross the back strand under the middle.
- Continue adding hair to the front and back strands in turn, crossing each one under the middle as you work down the head.
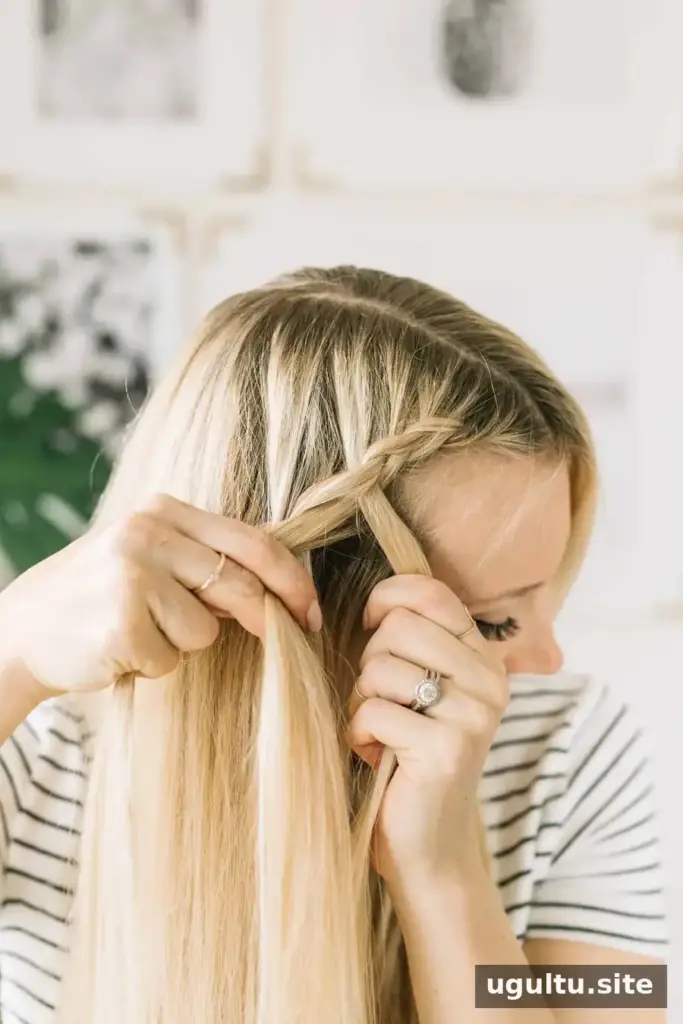
Keep the three sections distinct and use steady tension. Holding two strands securely while adjusting or gathering hair with the third can make the process easier. If the braid feels too tight, loosen your grip slightly rather than pulling sharply on the scalp.

Continue the pattern until the braid reaches the area behind your ear. At that point, keep braiding the remaining hair by crossing the outer strands under the middle, but stop adding new hair once there are no more sections to incorporate.

Braid to the ends and secure with a hairband. Repeat on the other side if you want a pair of Dutch braids. Check the back of your head in a mirror to make sure both braids sit as intended.
Finishing and Styling Tips

For a softer, fuller finish, ease the hairband down slightly—about 1 inch—and gently tug the edges of each braided section. Work gradually from the bottom upward so the braid stays secure. Use a small amount of plumping powder or hairspray if desired, following the product directions.
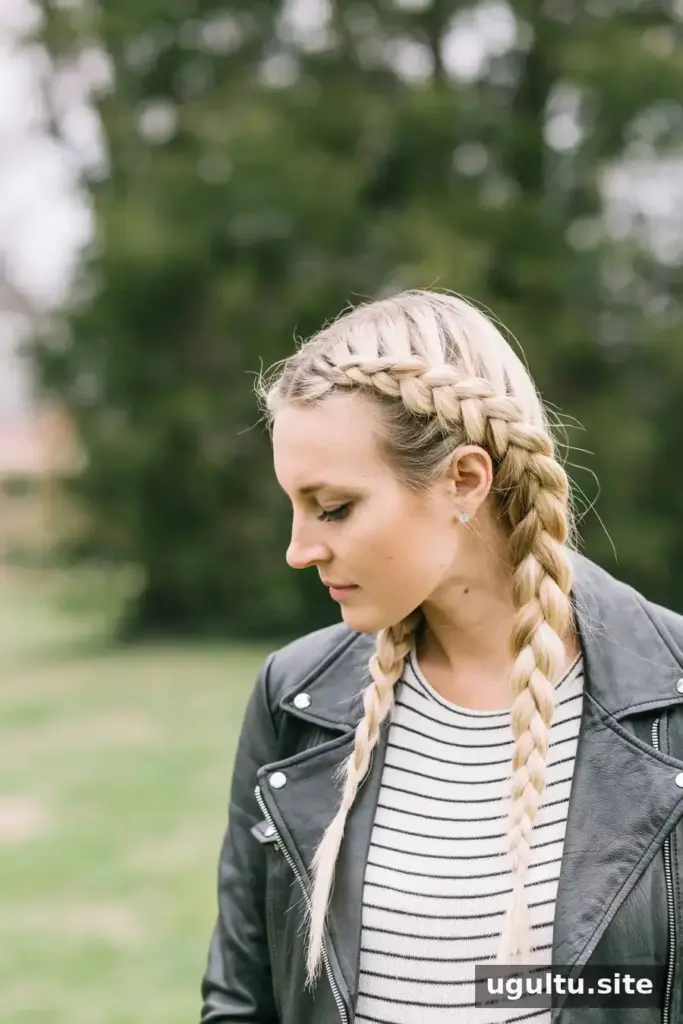

Smoothing cream applied sparingly along the hair can help control flyaways, especially in humid conditions. If using extensions, check that clips or tracks are covered by the braid and are not visible near the ends. Adjust them carefully before finishing if needed.
When you take the braids out, the hair may have a soft wave. For best results, avoid braiding hair while it is very wet, and allow it to dry fully before undoing the style.
Practice Makes the Dutch Braid Easier
The Dutch braid can feel unfamiliar if you are used to French braiding, because the outer strands pass under rather than over the middle. Practice slowly and focus on the crossing direction first; speed comes with repetition. If the first attempt looks uneven, secure it and try again with smaller, more consistent sections.
By Laura
This Dutch braid tutorial covers the basic technique, from dividing the hair into three strands to securing and gently loosening the finished braid. With a little practice, you can adapt the style for a single braid or a matching pair.


