
 admin


An easy rope braid is a practical hairstyle for keeping hair away from your face, especially on warm days or when you have a fringe. It uses two sections of hair rather than three, so the technique is straightforward once you get the direction of the twists right. Follow these steps to create a neat side braid, then loosen it slightly for a fuller finish.
How to Make an Easy Rope Braid
Prepare and section your hair
Step 1: Begin with clean, brushed hair and create a deep side part. Gently detangle the sections so they are easier to handle and less likely to snag as you braid.
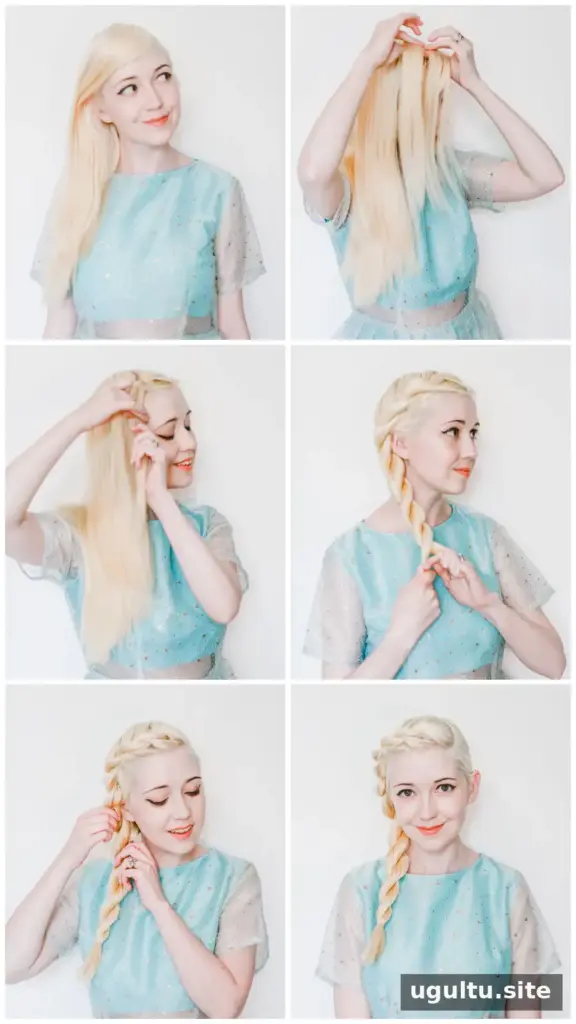
Step 2: Near the top of the part, take a small section of hair and divide it into two equal pieces. Hold one section in each hand.
Twist and cross the sections
Step 3: Twist both sections in the same direction. For example, turn each section toward the front of your face. Keep the twists consistent; twisting one section in the opposite direction can make the braid less secure.
Step 4: Cross the two twisted sections over each other in the opposite direction. If you twisted them toward your face, cross them toward the back of your head.
Step 5: Add a small amount of loose hair to each section, then twist both sections in the same direction as before.
Step 6: Cross the sections in the opposite direction again. Keep the braid close to your head as you work, but avoid pulling so tightly that it feels uncomfortable.
Continue the braid and finish
Step 7: Repeat the process, adding a small piece of hair to both sections before each twist and crossing. Continue until you reach the ends of your hair, then secure the braid with a small elastic.
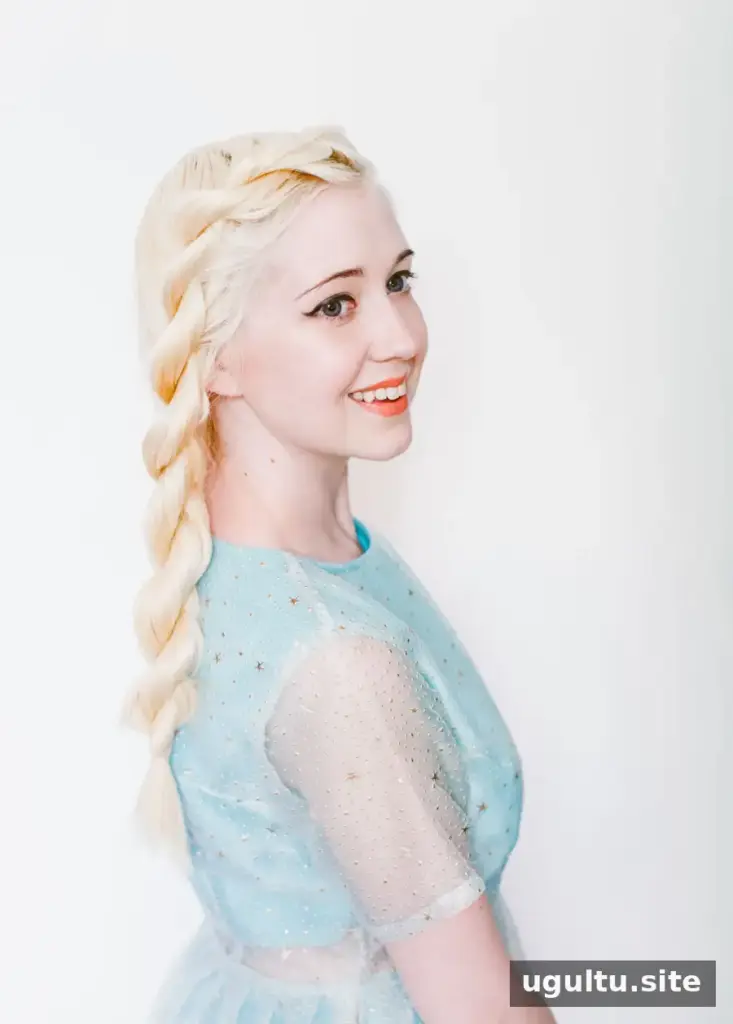
Step 8: For a wider, softer look, gently pull at the braid from the top downward. This technique, often called pancaking, loosens the edges and adds visible volume. Pull a little at a time to avoid undoing the braid.
Tips for a Neater, Longer-Lasting Braid
The key to a rope braid is simple: twist both sections in the same direction, then cross them in the opposite direction. Keep the sections similar in size and maintain the same pattern as you add hair. If short fringe pieces slip out, work with smaller sections near the hairline and keep the braid close to your head.
Once you are comfortable with the basic method, you can adapt rope braids into different styles, such as a twisted ponytail, a crown braid, or a pair of milkmaid braids. Secure the finished style with an elastic that holds without pulling, and use a mirror to check that the braid sits evenly.
Conclusion
This easy rope braid is a useful option when you want a simple style that keeps hair away from your face. Remember the opposite-direction rule—twist both sections together one way, then cross them the other way—and adjust the braid’s tightness to suit your preferred finish.


