
 admin
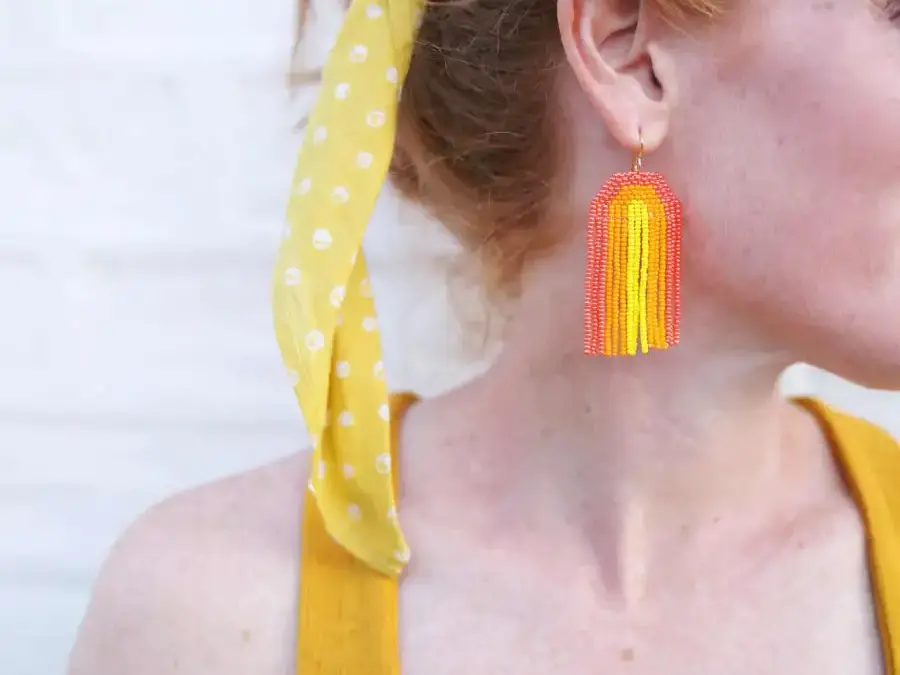

DIY beaded earrings are a fun way to add a bright, handmade accent to everyday outfits. This seed-bead rainbow design uses three colors and combines ladder stitch with brick stitch to create a small, curved statement earring.
The pattern can be made in the listed yellow, light orange, and rose pink colors, or adapted with other shades. Before starting, arrange the beads in order and keep them on a bead mat so they are easy to pick up and count.

DIY Beaded Earrings: Supplies
Gather the following materials for the project:
- Round seed beads in yellow, size 11/0
- Round seed beads in light orange, size 11/0
- Round seed beads in rose pink, size 11/0
- Collapsible-eye needle, 6.4 cm (2.5 in)
- White nylon thread, size D, 64 yards
- Bead mat
- 20 mm earring connectors
- Scissors

For easier stitching, cut a manageable length of thread and leave the specified tail. Keep the thread smooth as you work; pulling it snug helps the rows sit neatly without distorting the beadwork.
Build the Beaded Rainbow with Ladder Stitch
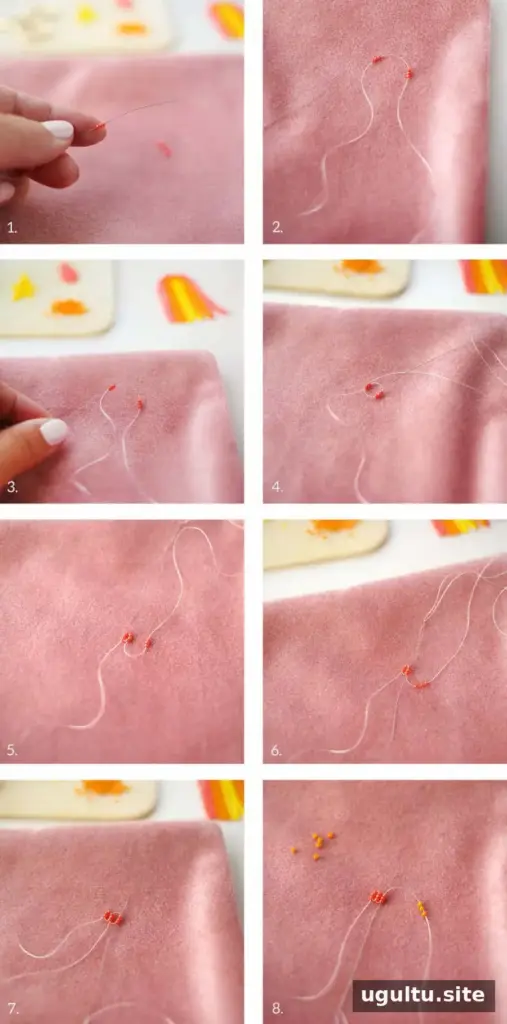
- Start the first row. Place 5 feet of thread on the needle. Pick up three beads in the outer color and slide them along the thread, leaving a 4-inch tail.
- Pick up three more beads in the same color, leaving a small gap between the first and second groups. Pass the needle up through the bottom of the first group, then down through the second group. Pull gently so the two groups sit side by side.
- Pick up three beads in the same color. Stitch down through the second group, then up through the third group, and pull the thread snug.
- Pick up three beads in the next color. Stitch through the bottom of the third group and pull taut, then stitch back down through the new group.
- Add three more beads in the second color. Stitch down through the previous group, then back up through the next group. Repeat the ladder-stitch movement as directed by the pattern, keeping the bead groups aligned.
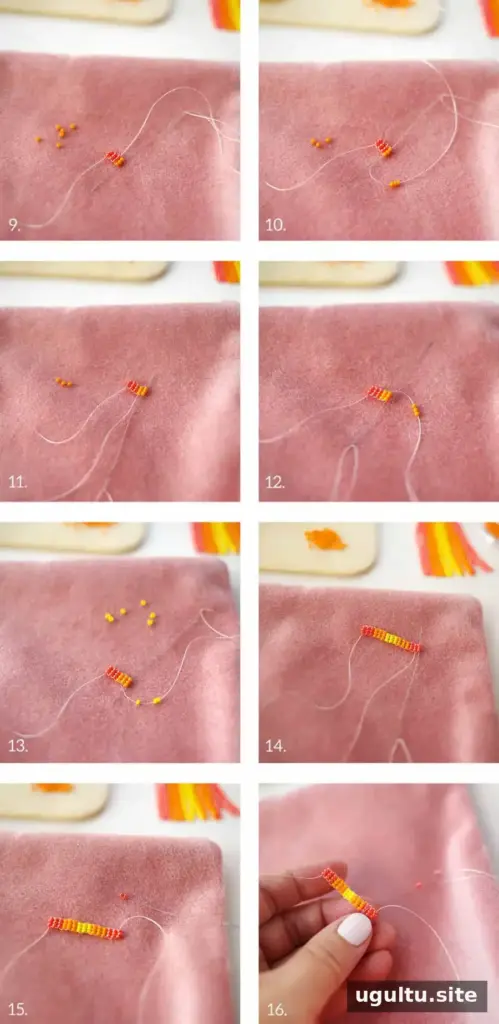
- Pick up three beads in the third color and stitch down from the top of the sixth row. Continue the color sequence, adding two more groups in the third color, then three more in the second color and three more in the first color. Finish by stitching up through the top of the final three-bead group.
Shape the Earring with Brick Stitch
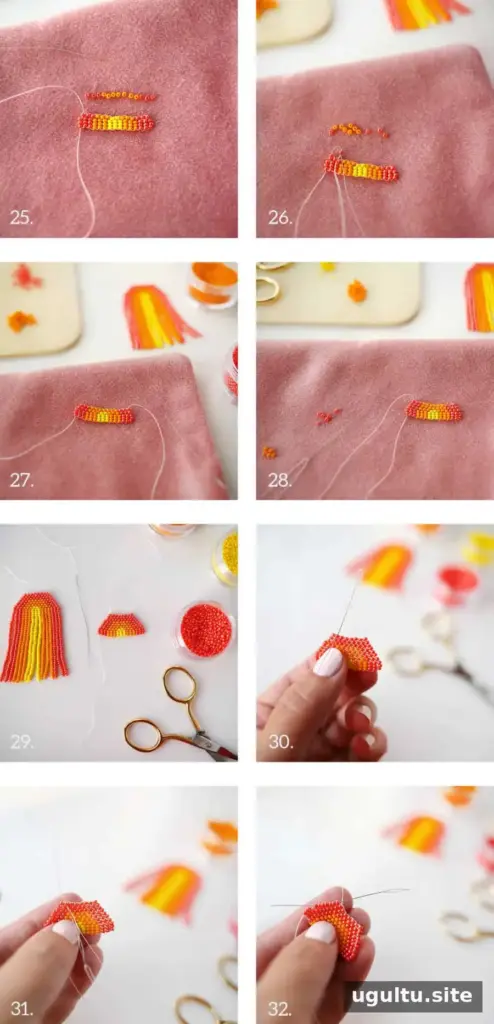
- Begin the brick stitch by picking up two beads in the outer color. Pass the needle under the thread between the second and third bead from the edge in the previous row. Stitch from back to front if that makes the thread bridge easier to reach.
- Pull the thread nearly taut, then pass back up through the second bead in the new row. Stitch down through the first bead and pull snug. Stitch up through the second bead once more to secure the start of the row.
- Pick up a third bead in the same color. Pass the needle under the thread bridge between the two beads below, then stitch back up through the new bead. Pull taut so the beads sit between those in the row underneath.
- Add three beads in the second color, followed by two beads in the third color. Continue the color pattern across the row; the middle section decreases to two beads in this row.
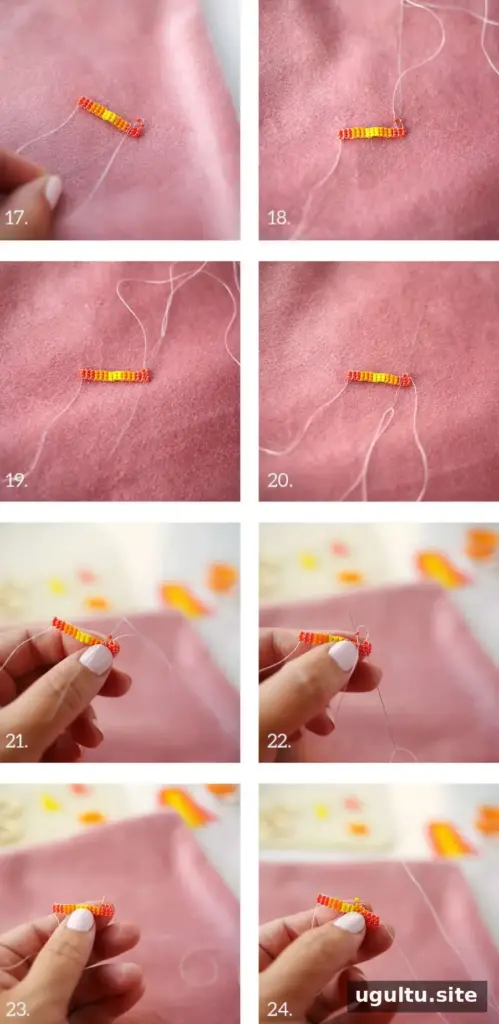
- For the next brick-stitch row, use three beads in the first color, seven in the second color, and three in the first color. Start by attaching two beads under the thread bridge between the second and third bead of the previous row, then continue across.
- Make the third brick-stitch row with three beads in the first color, six in the second color, and three more in the first color. Add three further rows using only the first color.
Secure the Thread and Add the Earring Connector
To finish the short tail, thread it through the needle and stitch up through the second group of three beads. Pass through the second bead in the first brick-stitch row, down through the neighboring third bead, and back up through the second bead. Pull the thread snug and trim it close. This secures the end and helps prevent the beadwork from loosening.
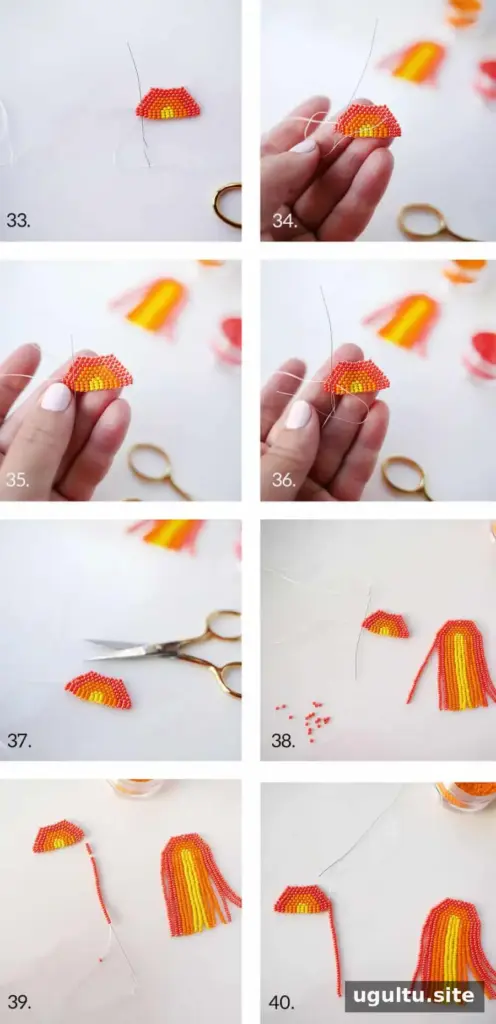
Re-thread the longer end and stitch down through the first stack of three beads. Pick up 35 beads in the first color. Leave the bottom bead unstitched, then pass back up through the other 34 beads. Continue up through the stack of three beads directly above, leaving a little movement in the loop rather than tightening it completely.
Repeat this 35-bead loop along the earring so each loop aligns with a stack of three beads. At the opposite side, secure the thread by following the same finishing method used for the short tail. Attach the 20 mm earring connector by slipping it under the thread between the two center beads in the top row.
Finishing Tips for DIY Beaded Earrings
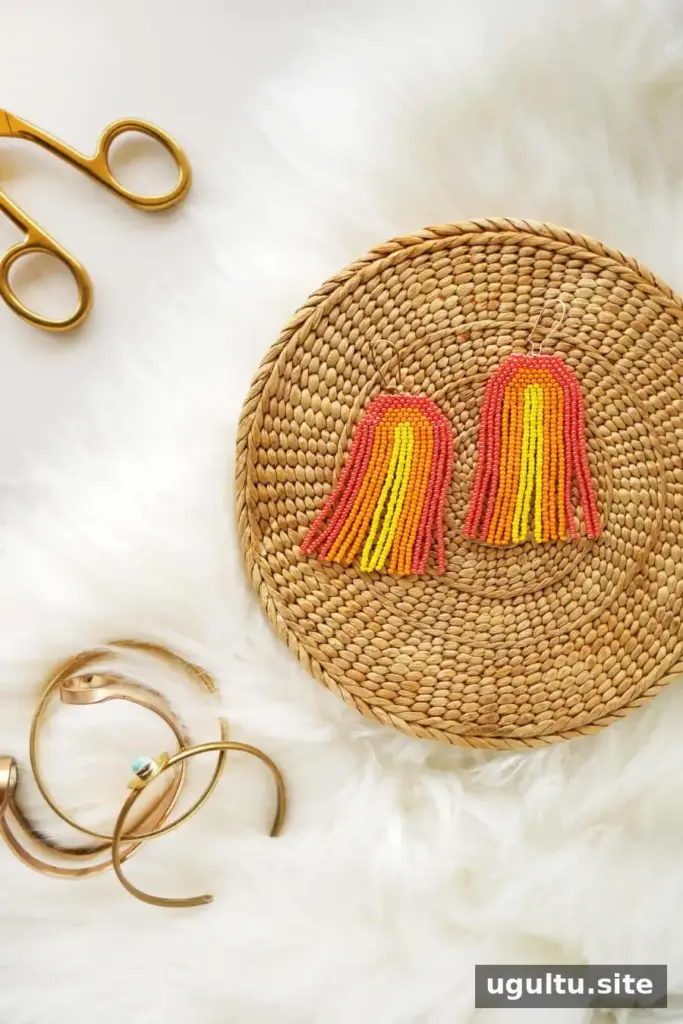
The first earring may take longer as you learn the stitch sequence; the second is usually easier once the pattern is familiar. Check that both pieces have matching color placement and loop length before trimming the final threads. Keep the tension consistent, but avoid pulling so tightly that the beads or loops lose their shape.

These colorful earrings make a cheerful accessory for warm-weather outfits or any look that could use a pop of color. Project by Rachel.
Conclusion
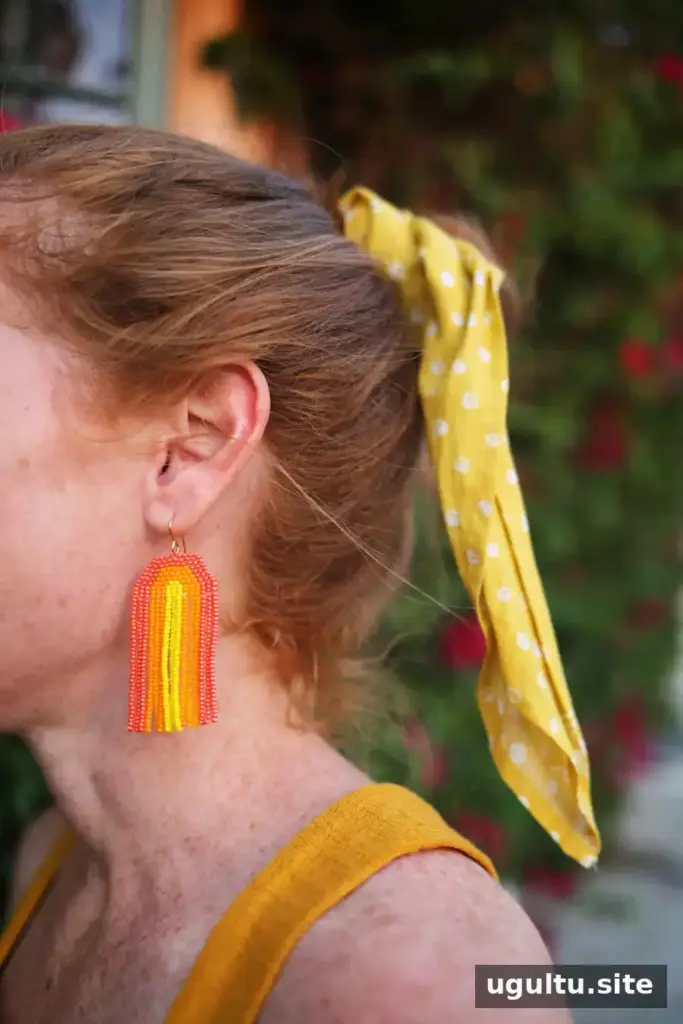
With three colors of size 11/0 seed beads, ladder stitch, and brick stitch, these DIY beaded earrings form a distinctive rainbow-inspired design. Follow the bead counts carefully, secure both thread ends, and leave a little flexibility in each loop for a neat, wearable finish.


