
 admin

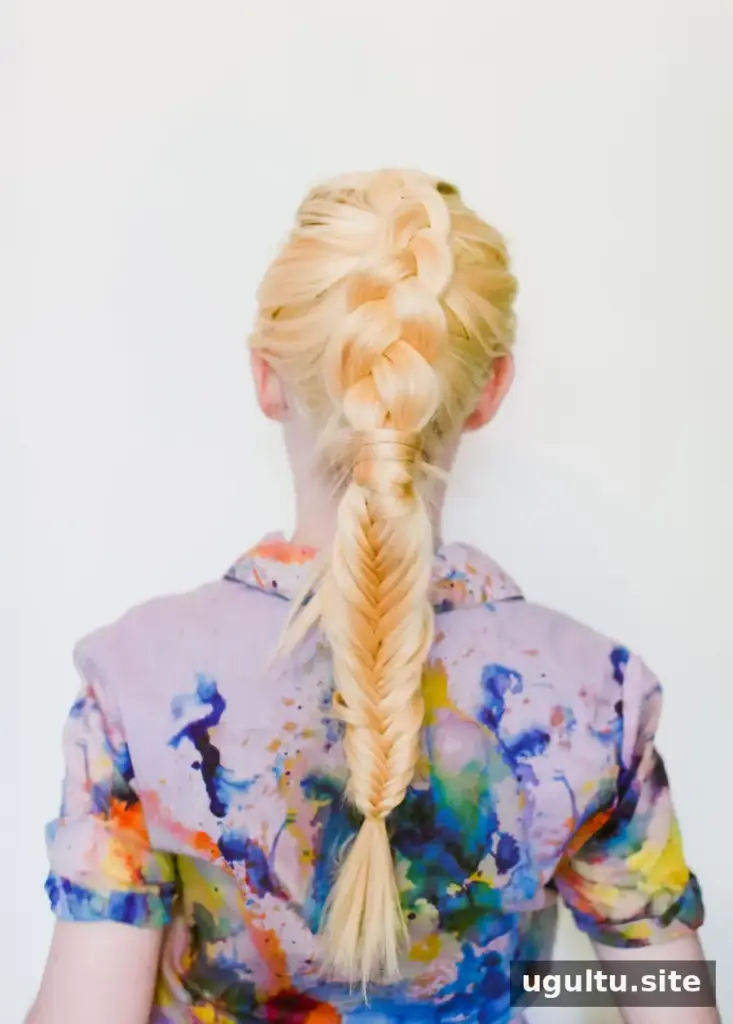
A summer braid can keep long hair gathered and off the neck while adding texture to a warm-weather look. This style combines a Dutch braid at the crown with a fishtail braid through the ponytail. The result looks detailed, but it uses two techniques that are easier to manage when completed one at a time.
For best results, begin with detangled hair and have a small elastic and a few bobby pins nearby. If your hair is very smooth, a little texture can make sections easier to hold, but the style can also be made on clean, brushed hair.
How to Make This Summer Braid
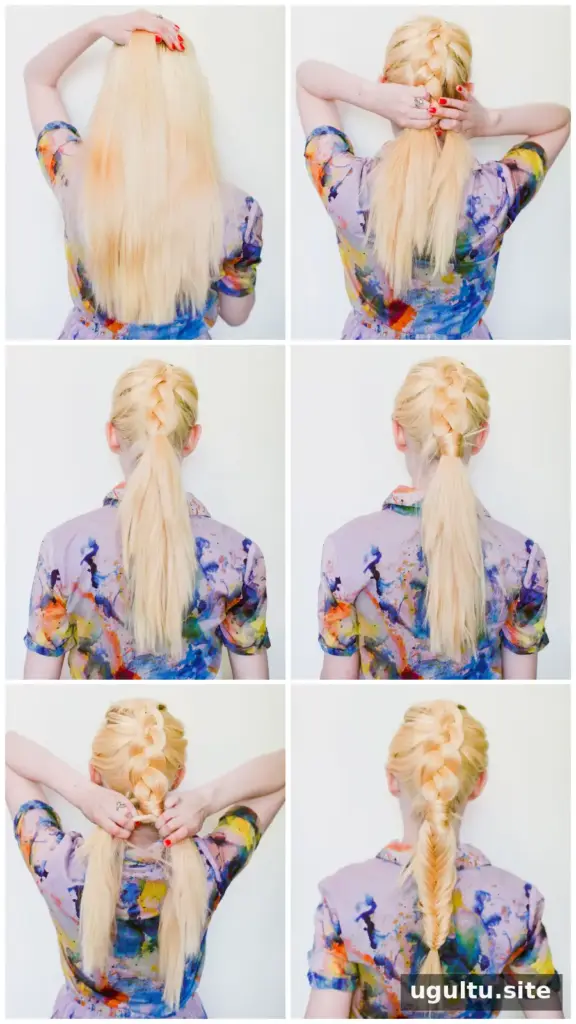
Step 1: Start a Dutch braid
Take three small sections of hair near the front hairline. Cross the sections under one another, adding a little hair to each section as you work toward the back of the head. This under-crossing motion creates the raised appearance of a Dutch braid, which is sometimes described as an inside-out French braid.
Keep the sections similar in size and use even tension. This helps the braid sit neatly against the head without pulling uncomfortably.
Step 2: Secure the braid at the nape
Continue braiding until you reach the nape of the neck. Gather the remaining hair into a ponytail and secure it with an elastic. Check that the Dutch braid feels comfortable and that the elastic holds the hair firmly.
Step 3: Hide the elastic
Separate a small strand from the ponytail and wrap it around the elastic. Tuck the end underneath the wrapped strand and secure it with a bobby pin, pointing the pin vertically toward your head. Add another pin if the wrap feels loose, and make sure the pins do not poke or pull the scalp.
Step 4: Braid the ponytail into a fishtail
Divide the ponytail into two even sections. Take a small piece from the outside edge of the right section and cross it over to join the left section. Pull gently to keep the weave defined. Then take a small piece from the outside of the left section and cross it over to the right.
Repeat these alternating movements down the length of the ponytail. Smaller pieces create a more detailed-looking fishtail; slightly larger pieces make the process quicker. Secure the end with an elastic.
Step 5: Loosen the fishtail
Gently tug the outer edges of the braid to make it look fuller. Work gradually from top to bottom, loosening only a little at a time so the braid stays secure. If any shorter layers fall free, smooth them back or leave them out for a softer, relaxed finish.

Simple Tips for a Neater Finish
- Use a mirror to check the Dutch braid as you work, especially if you are braiding the back of your head.
- Keep the two fishtail sections separate with one hand while crossing strands with the other.
- If traditional braiding feels difficult, a pull-through braid can be an alternative way to create a similar textured effect.
- For comfort in warm weather, avoid making the braid so tight that it pulls at the hairline.
Final Look
This summer braid brings together a Dutch braid and a fishtail for a practical style with plenty of texture. Once each technique feels familiar, the steps are straightforward to repeat, and the finished braid can be worn smooth or gently loosened for a more relaxed appearance. A few flyaways are normal, particularly after a full day outdoors.
— Rebecca


