
 admin

Porcelain holiday tree lights make a charming seasonal decoration, and you can create your own set using air-dry porcelain or modeling clay and LED tea lights. This project uses cardstock cones as templates and supports while the clay takes shape. The finished trees work well on a mantel or as part of a holiday table display.
Project by Mandi.
Materials for porcelain holiday tree lights

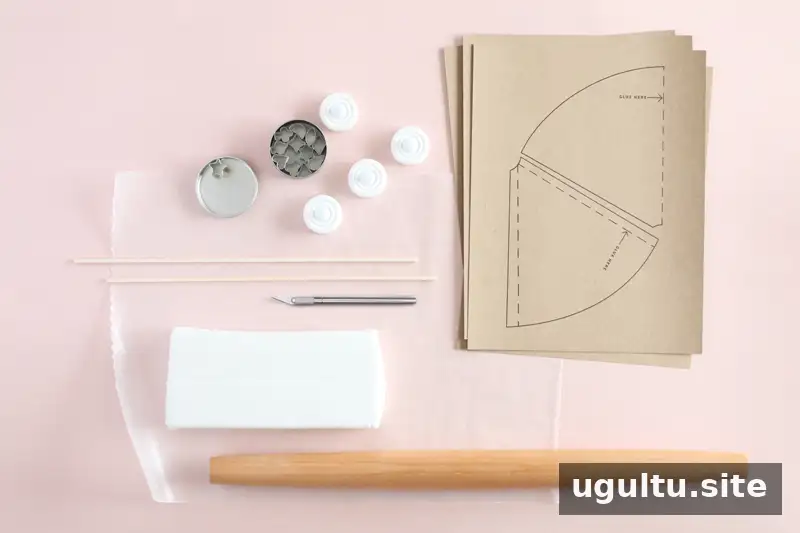
- 8″ cone template (left + right), 6″ cone template, and 4″ cone template
- 4 pieces of heavyweight cardstock
- Parchment paper
- Non-stick rolling pin
- Small blade
- Star-shaped aspic cutter
- Air-dry porcelain or modeling clay
- 4 LED tea lights
- Wet rag, paper towel, or small sponge
- Glue or tape
Use LED tea lights rather than open flames: the trees are made from clay, and their cardstock supports are used during construction. Keep the lights accessible so they can be switched off or removed easily.
How to make the clay trees
1. Prepare the cone templates
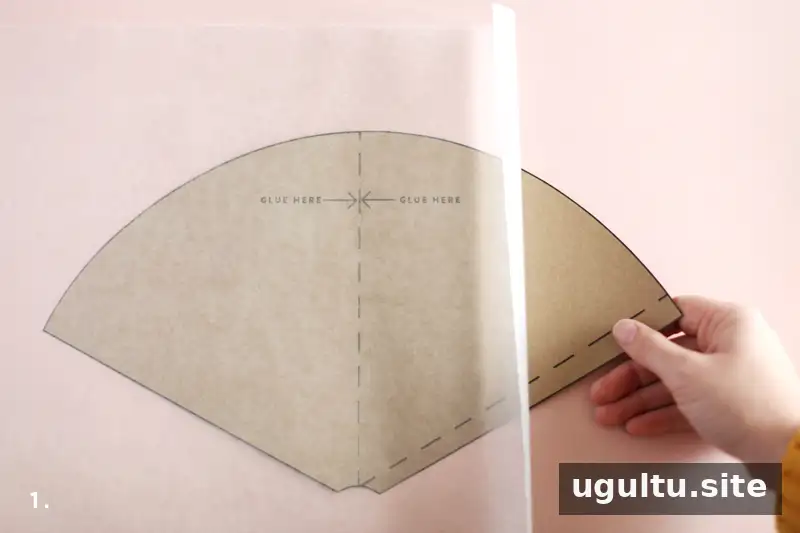
Print the templates onto 8.5×11″ cardstock without resizing them, so they do not become cropped during printing. Cut out and join the large 8″ and medium 6″ templates. The two smaller 4″ templates are already in one piece. Keep each flat template unfastened until after the clay has been cut.
2. Roll out the clay
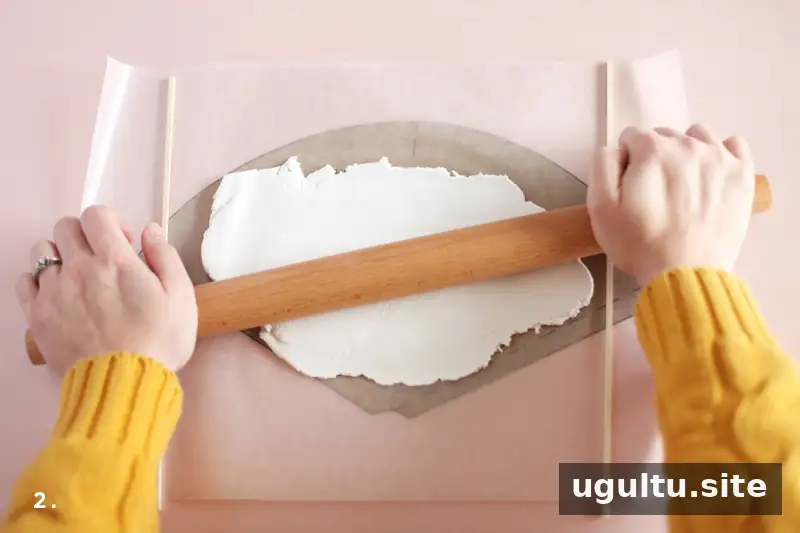
Set parchment paper over a flat template and roll the clay on top to a thickness of 1/8″. Avoid wax paper, which can stick to the clay. Aluminum foil may leave a grey tint; if it is your only option, orient the tinted side toward the inside of the finished cone.
3. Cut and shape each cone
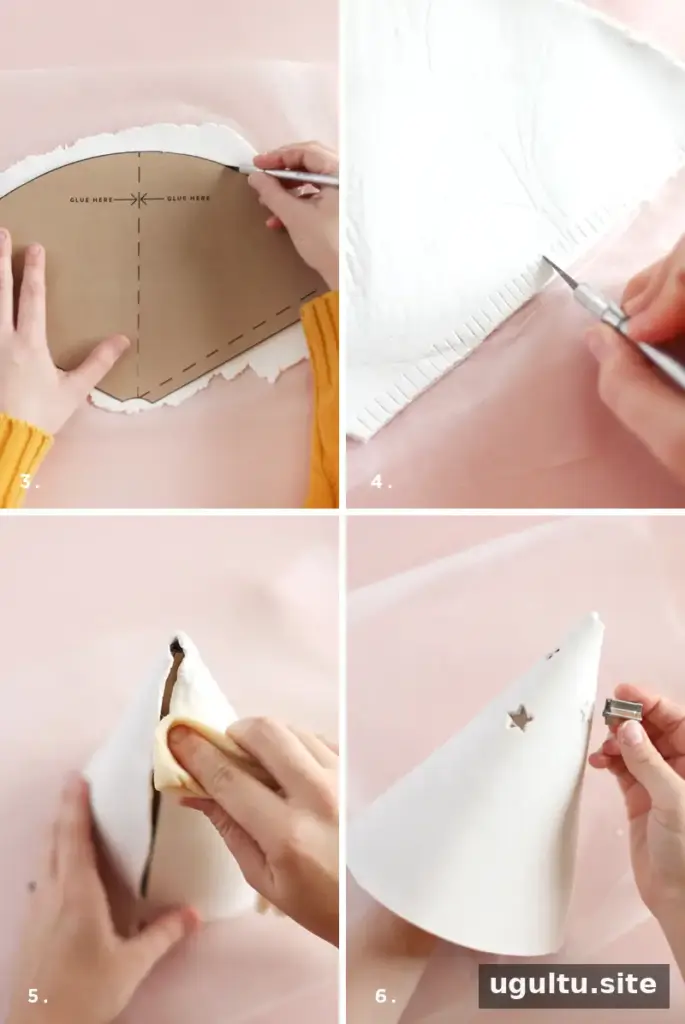
Once you have rolled enough clay to cover the template, remove the template from beneath the paper and place it on top of the clay. Cut around its outline with a small blade. Cover leftover clay with a wet paper towel to help keep it from drying out while you work.
Assemble the cardstock template into a cone. Score one clay edge on the side that will face inward, making crosshatch marks. Wrap the clay around the paper cone. If the edges do not meet, lay the clay back on the paper and roll the edges outward slightly to create enough overlap.
Crosshatch the overlapping edge as well, then dampen both scored areas with a wet paper towel or small sponge. Place the first scored edge over the second. This score-and-slip method helps join the seam. Support the cone from inside as you smooth the seam from the outside with a damp paper towel.
4. Cut out the star-shaped openings
Hold the cone from the inside and press a finger against the spot where you want an opening. Push the star-shaped cutter firmly against the clay from the outside, using your finger inside the cone for support. A gentle wiggle can help release the cutout. If an opening is uneven, tidy its edges with the blade. If the clay becomes badly misshapen, remove it from the cone, reshape it into a ball, and start again.

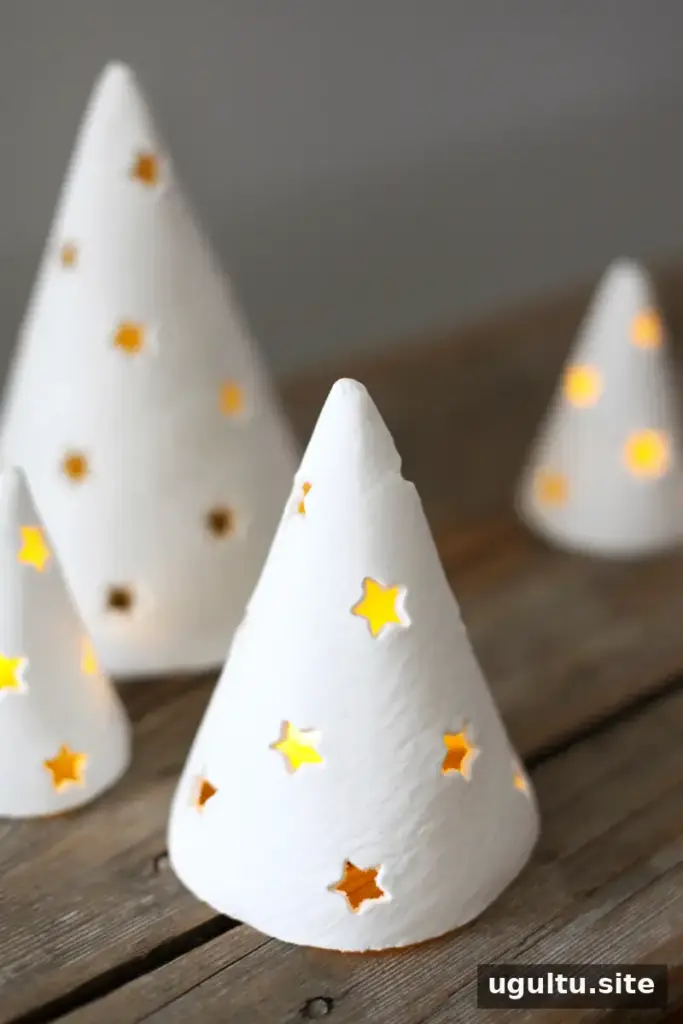
Drying and displaying your porcelain holiday tree lights
After cutting all the openings, leave each cone on its cardstock support for six hours. Carefully remove the cardstock, then allow the clay to dry for another 24 hours before handling it. Keep the trees undisturbed while they dry, and follow any additional instructions supplied with your clay.
You can paint or glaze the trees for a more colorful display. For a simple look, leave them white and place an LED tea light inside each one to let the light shine through the star openings. Fairy lights can also be used to create several points of light. Arrange the trees on a mantel or group extra pieces into a winter-themed holiday tablescape.
Final tips
For an even result, roll the clay to a consistent thickness and support each cone while cutting the openings. Make sure the seam is joined and the clay is fully dry before moving the trees into their display position. With those steps in mind, porcelain holiday tree lights are a practical handmade decoration for a seasonal home display.


