
 admin
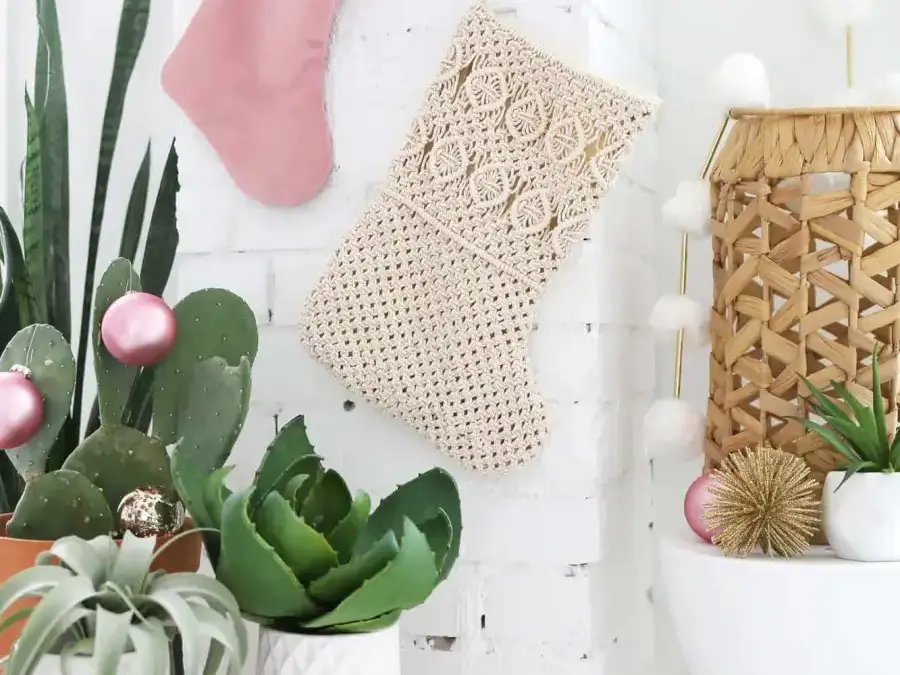
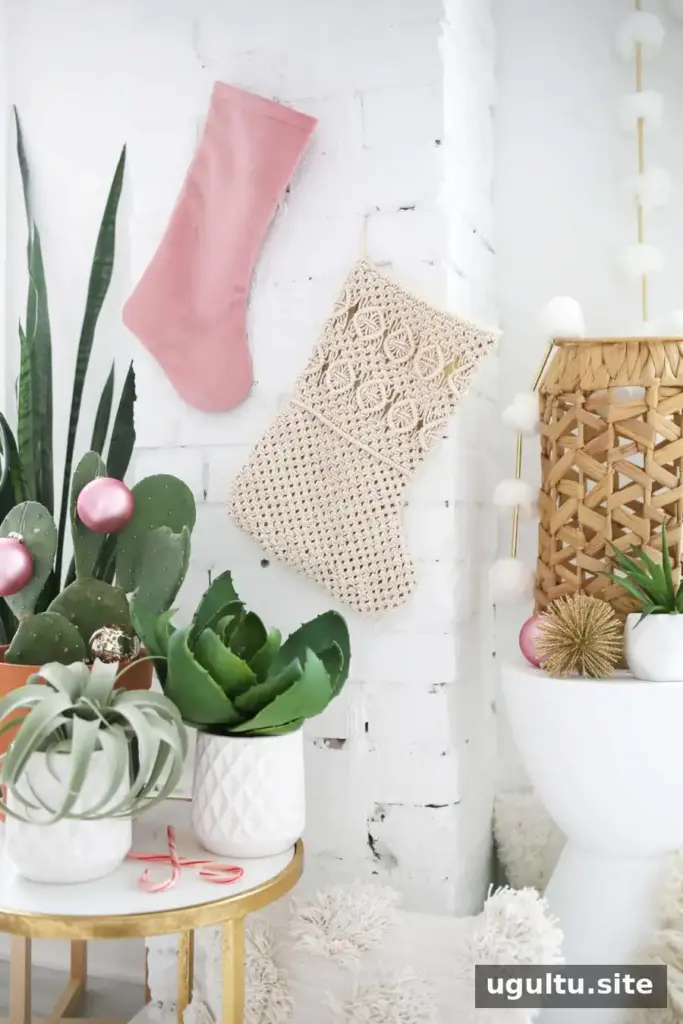
This macrame Christmas stocking tutorial explains how to create a decorative knotted front with a felt backing that forms a usable pocket. The design uses basic macrame knots, including square knots and double half-hitch knots, to build the stocking shape and diamond pattern. Plan for a few hours of work, and set up your dowel at a comfortable height before you begin.
The neutral cotton rope and off-white felt suit many holiday color schemes. For a different look, you can dye the rope; using a thicker cord is also possible, but may require adjusting the design. Make a small test section first if you change the cord size, since thicker rope can affect the finished proportions.
Materials for the Macrame Christmas Stocking Tutorial
- 500 feet of 3mm cotton rope
- 12-inch wooden dowel
- 3mm cotton macrame cord
- 1/2 yard of off-white wool felt
- Over-the-door hooks with at least 10 inches between the outer hooks, or a standing clothes rack
- Sewing machine and thread, or supplies for hand stitching
- Sharp tapestry needle
- Scissors
- Straight pins
Keep the rope, scissors, and needle within easy reach. A stable hanging setup helps maintain even tension as you work across the piece.
Make the Knotted Macrame Stocking Front
Attach the cords and make the first rows
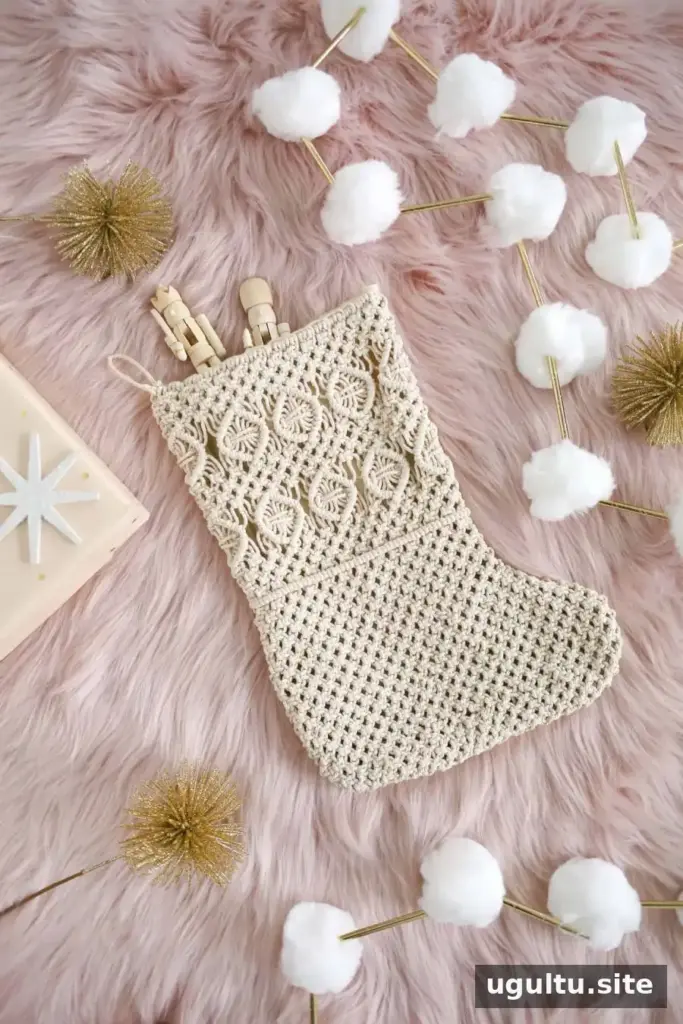
If you already know basic macrame knots, you can substitute your own patterns while following the stocking outline and backing instructions.
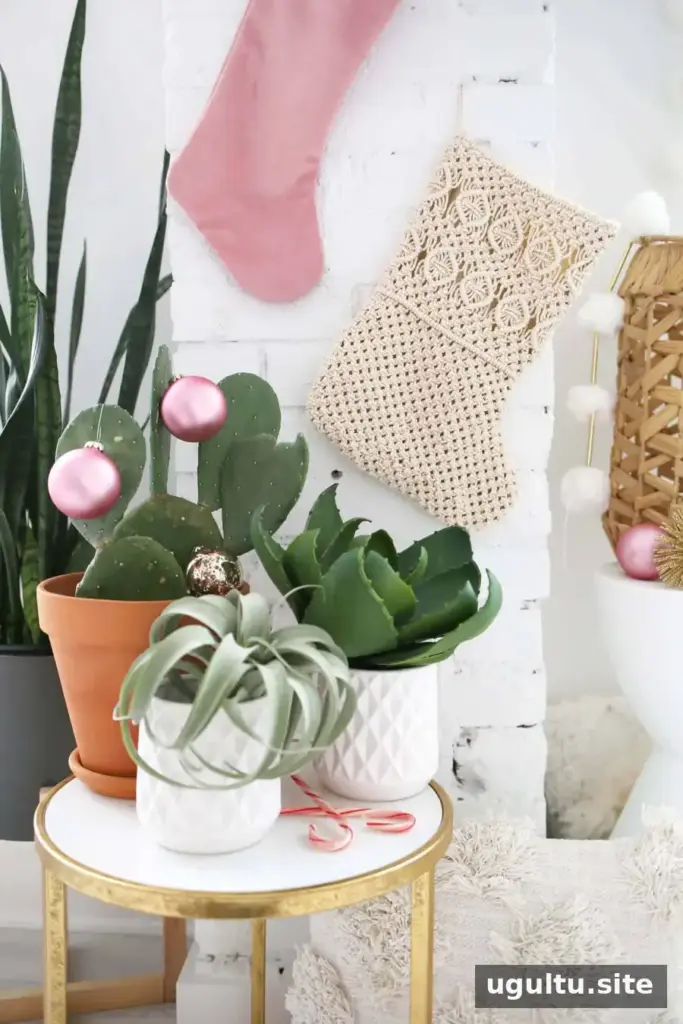
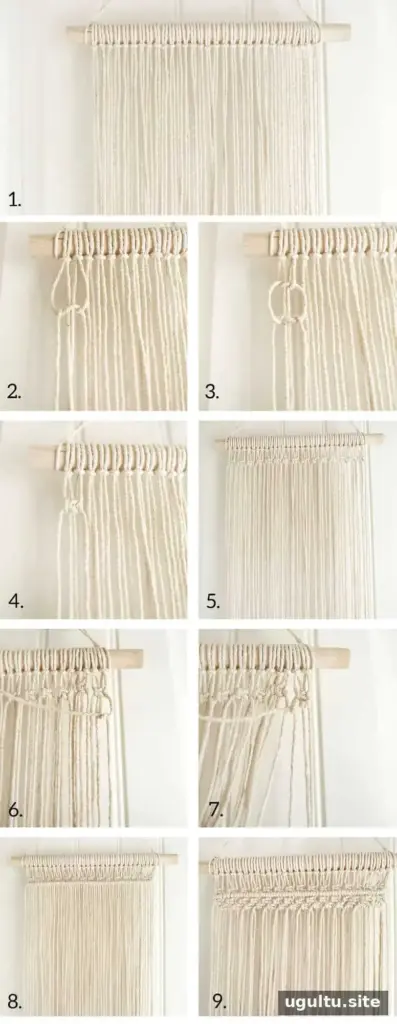
- Prepare the cords. Cut 30 strands of rope, each 15 feet long. Attach each strand to the dowel with a lark’s head knot. Even up the ends and space the cords along the dowel, leaving about 1 inch of open space at each end. Tie an additional piece of rope to both ends of the dowel to make a hanger, adjusting it so the work hangs comfortably from your hooks or rack.
- Start the first square knot. Use the first four strands on the left. Tie a half knot by bringing the outer left strand across and under the outer right strand, while the two center strands stay in place. Take the outer right strand behind the center pair and through the bend in the left strand. Leave about 1/2 inch between this knot and the dowel.
- Complete the square knot. Make a second half knot with the overlap reversed: bring the outer right strand over the center strands and under the outer left strand. Pass the left strand behind the center pair and through the bend on the right. Pull the second half knot snugly against the first.
- Work across the dowel. Repeat the two half-knot motions with each group of four strands until you have made 15 square knots.
- Add a horizontal row. Bring the outer right strand across the front of the other cords toward the left and drape it over a coat hook. Use the second strand from the right to tie a single knot around this horizontal cord. Continue with the third strand from the outside, then the next, keeping each knot snug against the previous one. Work across the full width without pulling so tightly that the edges draw inward.
- Build the next rows. Make another row of 15 square knots below the horizontal row. For the next row, leave the first two outer strands on the left unused, then make square knots in groups of four. This alternating-square-knot pattern also leaves two extra strands on the right.
Form the diamond pattern
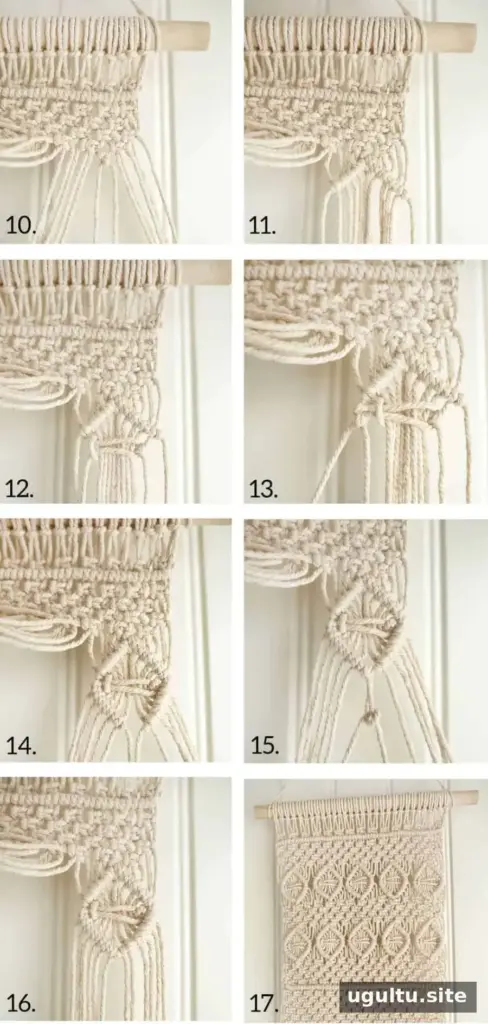
- Begin a diamond. After four rows of square and alternating square knots, use 12 strands on the right side of the work. Move the unused strands aside to reduce tangling. Using the sixth strand from the left as a guide, tie a double half hitch around the seventh strand to form the top point.
- Shape the upper sides. Make double half-hitch knots with strands five, four, three, two, and one around strand seven to form one side. Then use strands eight through twelve around strand six to form the other side.
- Work across the middle. Use the 11th strand and the second strand from the right to tie a square knot around the strands between them. Keep it relaxed enough for the cords to sit neatly along the diamond edges.
- Complete the lower sides and point. Use the 12th strand as the guide for a double half hitch with strand 11, then wrap strands 10, nine, eight, and seven around strand 12. On the other side, wrap strands two through six around strand one. To form the bottom point, use the new sixth strand from the right around the new seventh strand with a double half hitch.
- Continue the motif. Repeat to make the remaining diamonds in the row. Add four more rows of square and alternating square knots, then another full row of diamonds. Make another section of four rows of square and alternating square knots, followed by a horizontal row like the one described earlier.
Shape the foot and toe
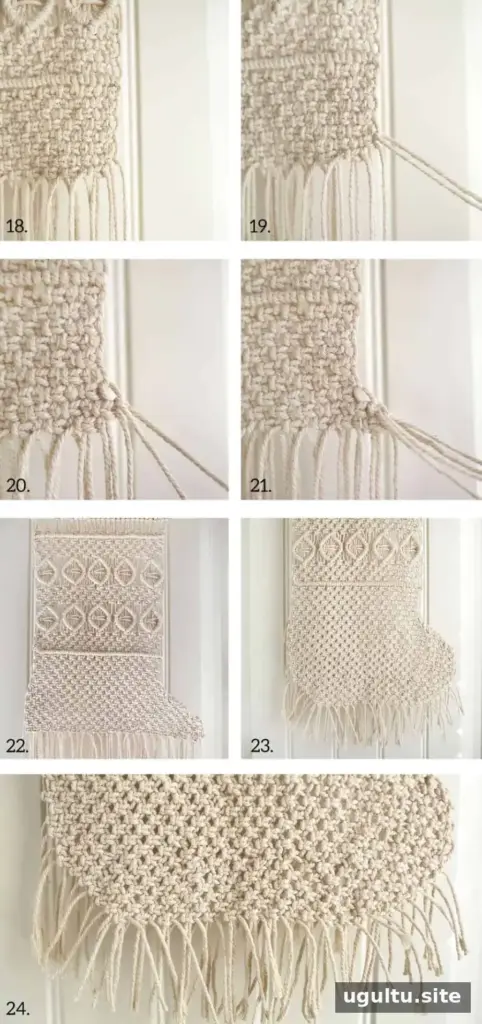
- Extend the stocking. Tie eight more rows of square and alternating square knots. At this point, two extra strands should remain on the right. Slip a 4-foot length of rope through the loop above those strands, centering it to create two additional working strands. Use the four free strands to tie another square knot in the eighth row.
- Widen the toe. Make a ninth row of square knots across the piece. With two extra strands still on the right, add another 4-foot rope section through the loop above them, as before. After completing the ninth row, add two strands of 4-foot rope through the loop above the outer knot to widen the toe area.
- Finish the main shaping rows. Continue the same process until you have 14 rows of square and alternating square knots. Add two strands to each even row and only two strands to each odd row. Work rows 15 through 19 without adding strands.
- Taper the bottom. For rows 20 through 25, decrease by two strands at each outer edge on every row. The working cords will be shorter near the bottom; trim them to about 2 inches if needed, but avoid cutting them so short that they begin to unravel.
Add the Felt Backing and Finish
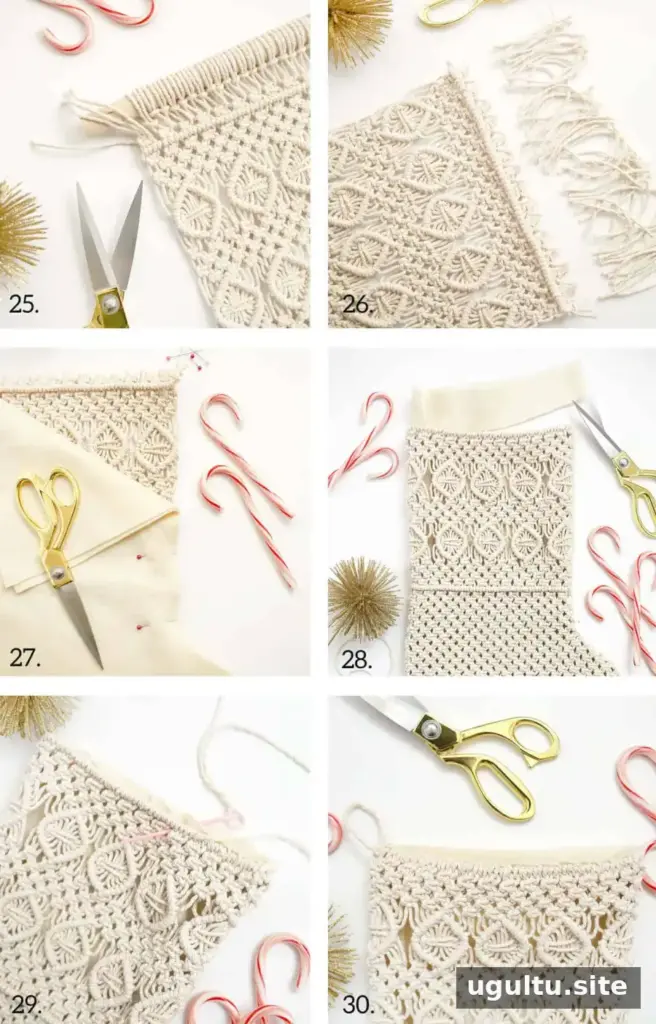
- Remove the work from the dowel. Loosen the lark’s head knots and cut them off. Trim the strands so about 1/2 inch remains above the first row of square knots.
- Cut the felt pieces. Place the finished macrame piece over two layers of wool felt. Use it as a template and cut the felt into the same shape, leaving about 1/2 inch around the perimeter. Wool felt is useful here because it does not require a hem to prevent fraying.
- Pin and sew the layers. Place both felt pieces behind the macrame and pin all three layers together, leaving the top of the stocking open. Stitch from the top right corner, around the toe and heel, and back to the top left corner. You can sew by machine or hand; do not sew the opening closed.
- Neaten the top edge. Turn the stocking right side out so the macrame is on the front. Tuck the square knots at the top between the macrame and the middle felt layer. Trim excess felt so it aligns with the top edge of the macrame.
- Secure the lining. With a sharp tapestry needle and thread or leftover rope, stitch the middle felt layer to the horizontal macrame row. Tie off the thread at both ends. A blanket stitch or whip stitch can be used.
- Add a hanging loop. Attach a 3-inch loop on the left side of the stocking.
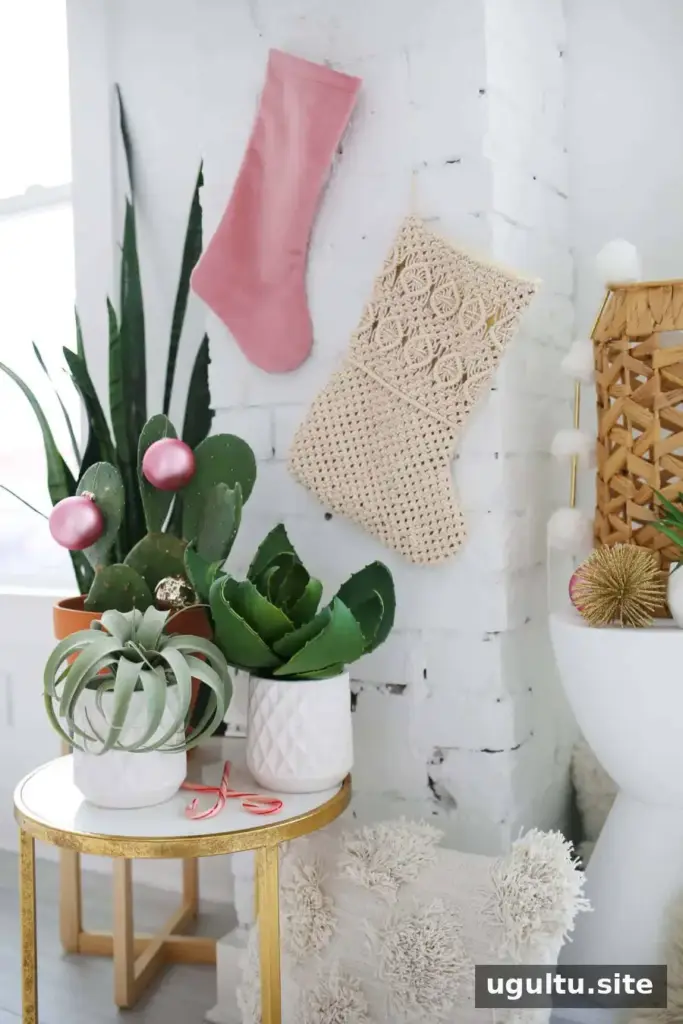
The felt layers create the pocket, while the macrame front reinforces the outside. Wool may shrink, so spot-clean the stocking if it gets crumbs or other marks rather than washing it. Test any cleaning method on an inconspicuous area first.
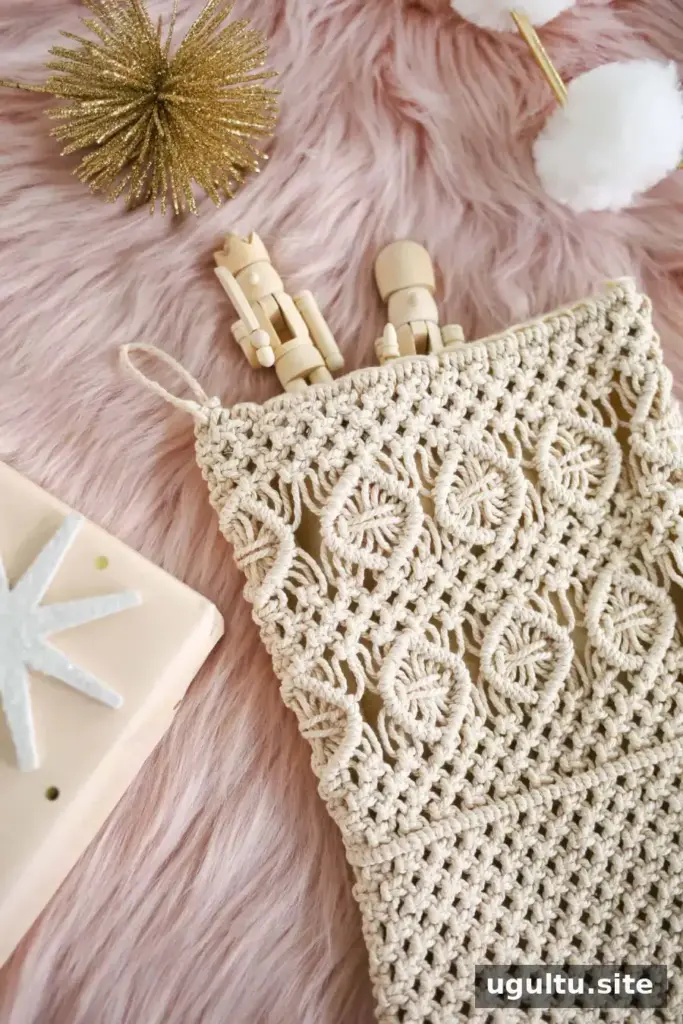
Macrame Christmas Stocking Tutorial: Final Tips
This macrame Christmas stocking tutorial can also be adapted into smaller pieces for a garland or ornaments. Keep your knot tension consistent, check the silhouette as you work, and leave the top open when sewing the lining so the stocking remains usable. Tutorial and design by Rachel.


