admin
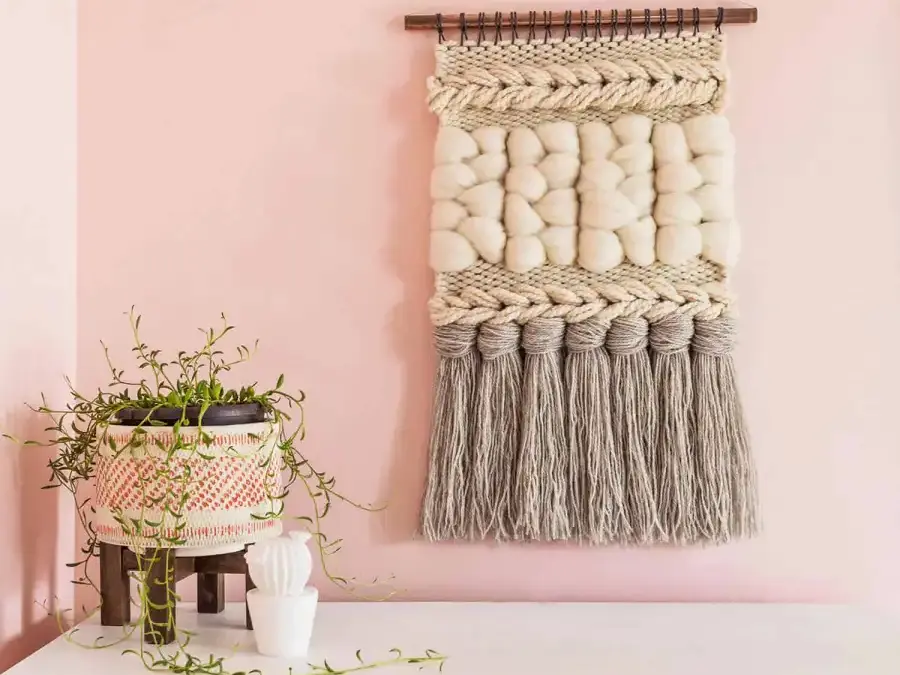
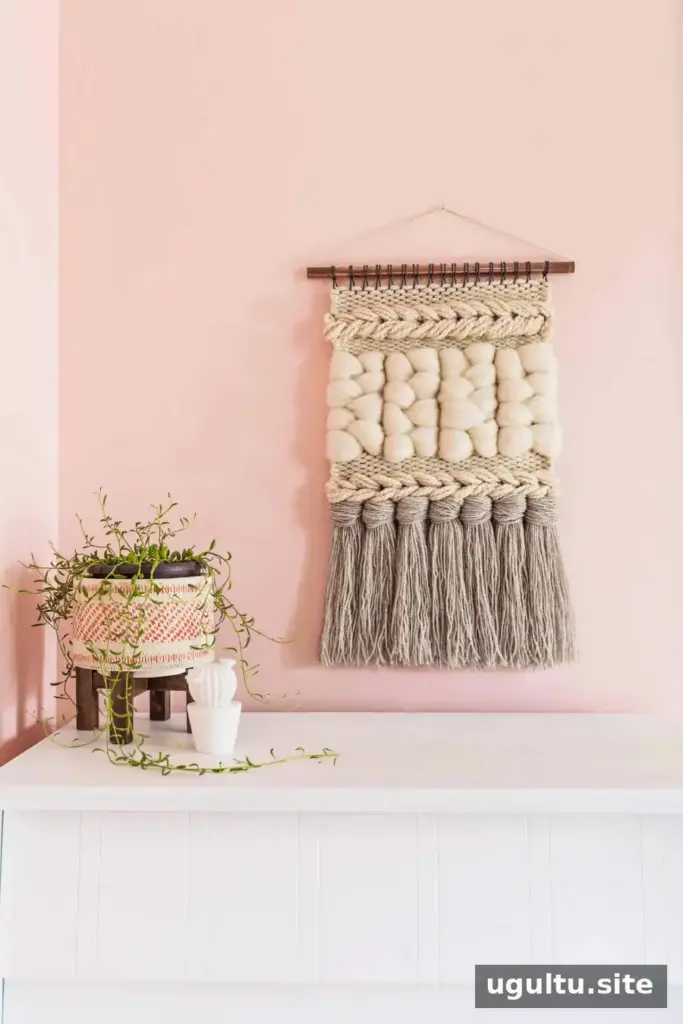
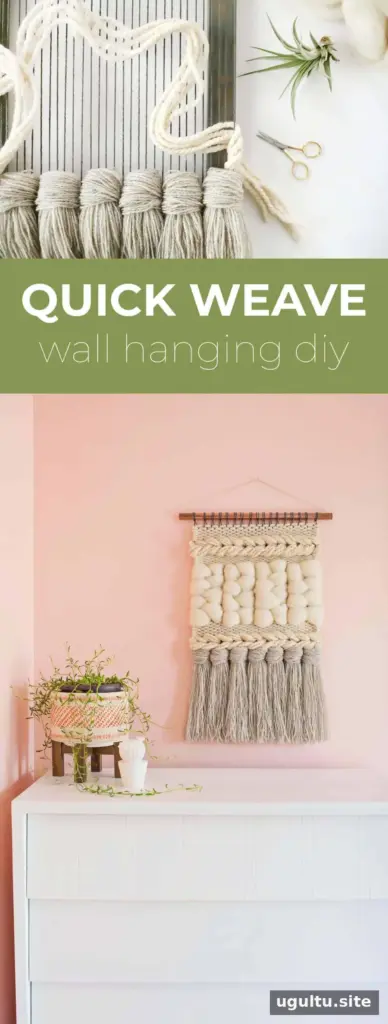
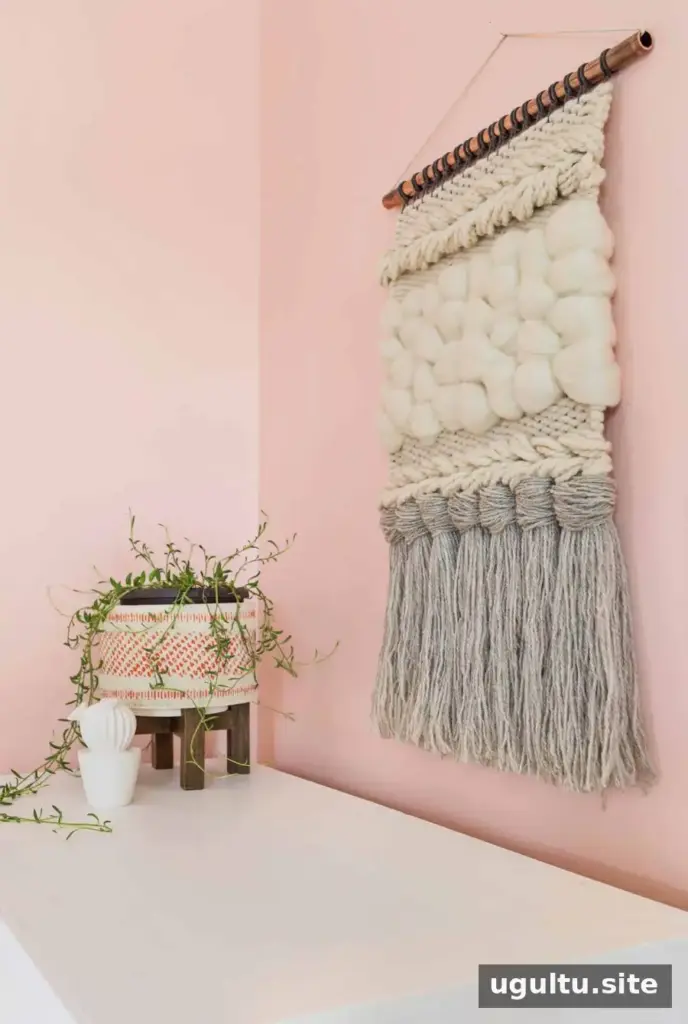
A DIY woven wall hanging can add texture and color to a room without requiring a large loom or fine yarn. This project uses chunky fibers and a mix of plain weave, rya knots, soumak and braided merino roving to create a layered design. The stated loom size is 13″ x 18″, and the pattern can be adapted to a narrower loom by adjusting the number and placement of warp rows.
The chunky materials help cover the loom more quickly than finer yarns, though weaving time will vary with your pace and the size of your design. Choose yarn colors that suit your space, and check the supplies before beginning so you have enough fiber for the fringe and textured sections.
Supplies for a DIY Woven Wall Hanging
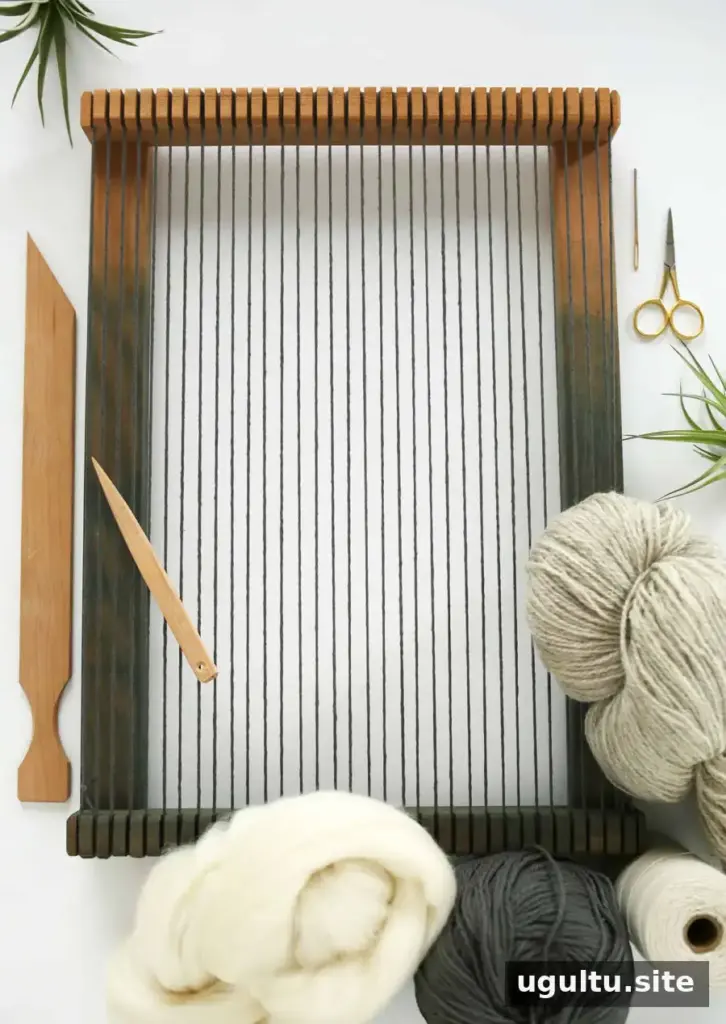
- Lap loom (the example uses a 13″ x 18″ loom)
- Weaving sword or ruler
- One skein of super chunky cream yarn, 90+ yards
- One skein of neutral worsted-weight yarn for the bottom fringe, 140+ yards
- 8 oz. of merino wool roving
- Cotton yarn for the warp
- Scissors
- 3″ tapestry needle
A copper pipe or wooden dowel is used to hang the finished piece. It is not listed in the supply quantities above, so have one ready if you plan to follow the hanging instructions.
How to Weave the Wall Hanging
1. Warp the loom and make the fringe
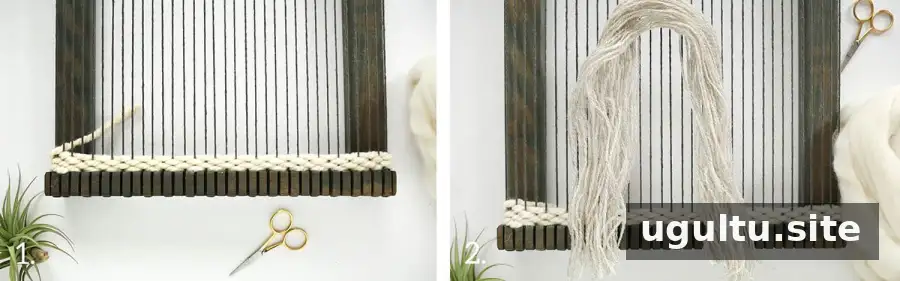
Warp the loom across its full width, beginning and ending with the knots at the bottom so the warp rows are even. Weave four rows of plain weave to create a firm base. If you are new to warping or plain weave, learn those techniques before continuing.
Cut about 20 strands of neutral worsted-weight yarn, each approximately 20″ long. They do not need to be perfectly even because you will trim the fringe later. Plan on one bundle of rya knots for every five warp rows; adjust the spacing to suit a narrower loom.
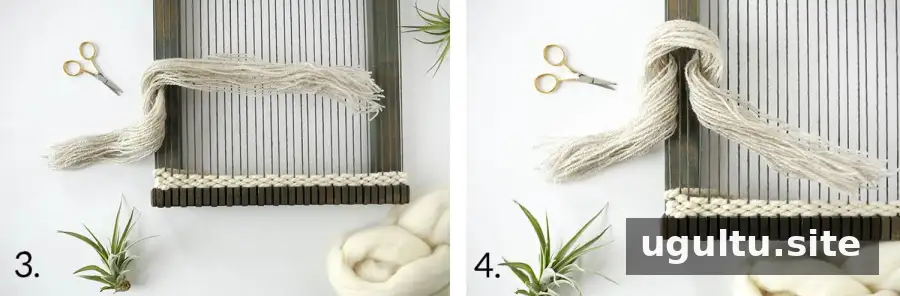
Find the middle of a yarn bundle and place it over the warp. Wrap one end around the outer warp row. Skip the next two warp rows, then wrap the other end around the fourth row, bringing both ends toward one another. Center the bundle and gently pull it down so the knot rests on the plain-weave foundation.
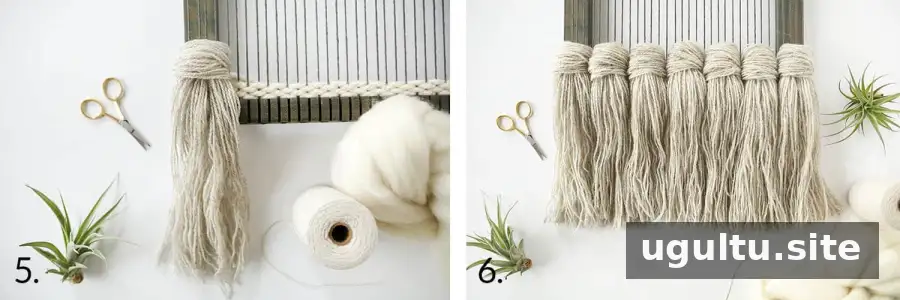
Skip the fifth warp row and repeat the sequence: wrap around the sixth row, skip the seventh and eighth, then wrap around the ninth in the opposite direction. Continue across the loom to form a full, chunky fringe.
2. Add the soumak braid
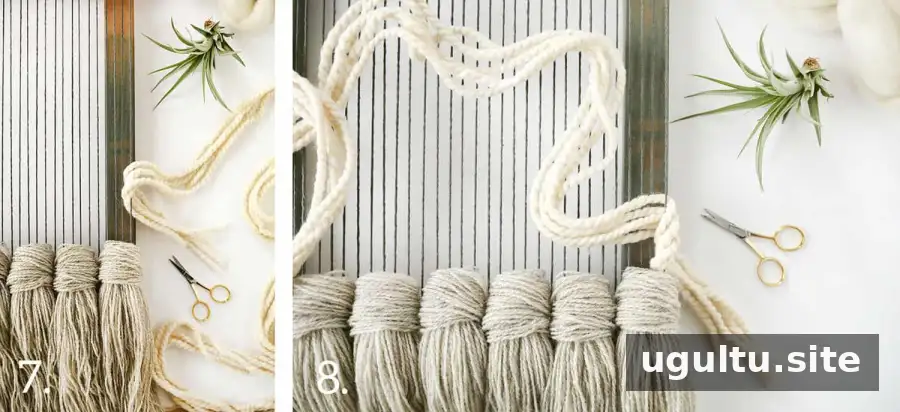
Cut five strands of chunky yarn, each about 8′ long. Tuck one end between the outer warp row and the next row, leaving a 4″ tail at the back. Wrap all five strands around the outer row and bring them back up through the same gap.
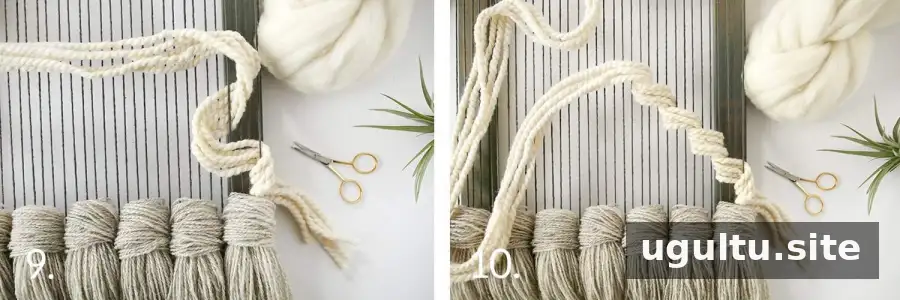
Skip two warp rows, then take the bundle over the top and around the fourth row. Keep bringing the yarn above the previous wrap as you work. Continue skipping two rows and wrapping the next one; the yarn should form a stepped line.
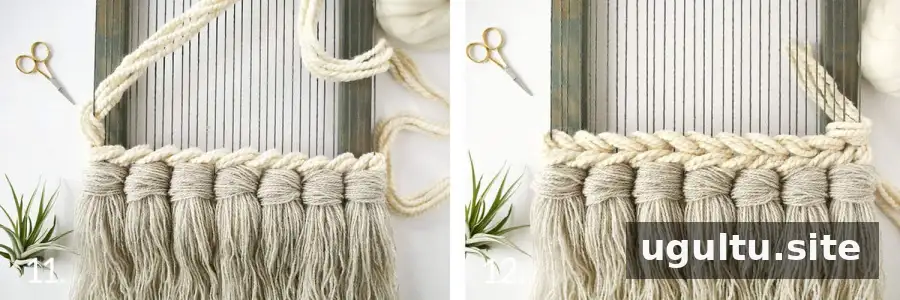
Gently push the soumak down until it sits above the rya knots. Keep the spacing and tension even. At the far edge, wrap the bundle around the outer warp row twice to build height for the return row.
Work back in the opposite direction, again skipping two rows before wrapping the next. The new line should slant opposite to the first, creating a braided effect. When you reach the starting side, tuck the yarn ends around the outer row and weave them over and under like a regular weft row. Leave a 4″ tail.
3. Weave the merino roving braid
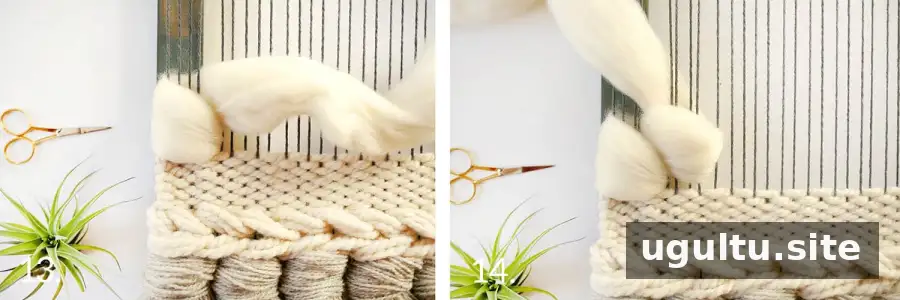
Count the warp rows and divide them into groups of eight. Each section uses four rows on one side and four on the other; distribute any extra row or two among the groups. Allow about 24″ of roving for each braided section.
At the left side, tuck about 3″ of roving between the fourth and fifth warp rows. Wrap the long end around the four rows nearest the edge and bring it back through the gap between rows four and five. Then wrap the roving around warp rows five through eight and return through that same gap. Alternate between the two groups to form a vertical figure-eight braid.
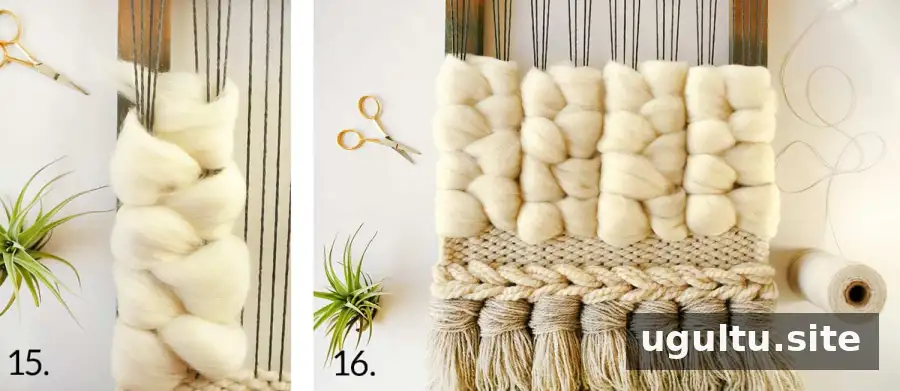
Finish after wrapping both groups an equal number of times. To secure the tail discreetly, tuck it up between the sixth and fifth rows, then bring it back down between the fifth and fourth. Repeat the same number of wraps for the remaining vertical sections, fluffing the roving lightly to even out the texture.
4. Complete the woven design
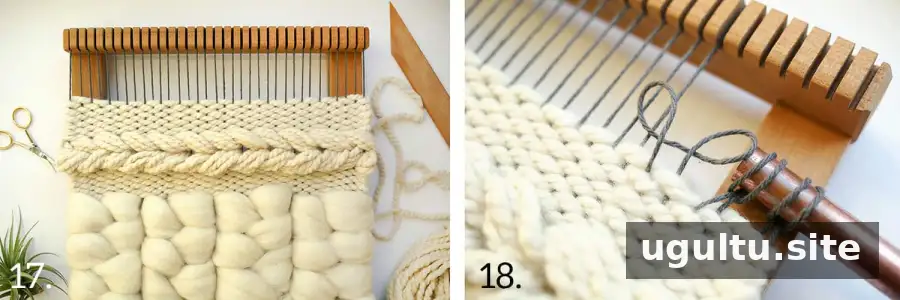
Above the roving, weave about 10 rows of plain weave. Add two more rows of soumak using five strands of chunky yarn, following the earlier technique. Finish the other side of this braid with 10 or 12 additional plain-weave rows in the same chunky yarn. Keep the rows consistent for a balanced look.
If you do not need to weave all the way to the top of the loom, gently remove individual pairs of warp rows from the upper notches. Fold each warp yarn back behind itself to make a lark’s knot.
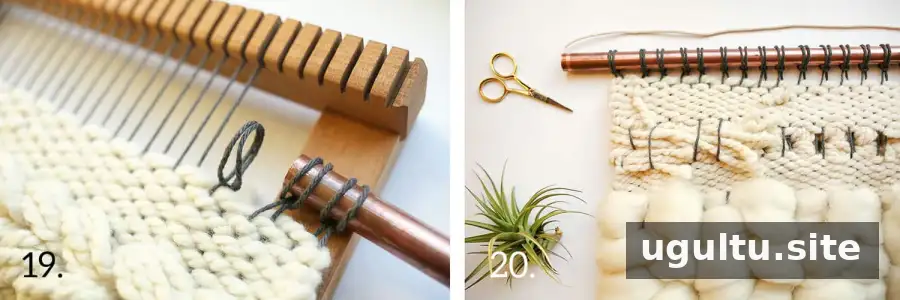
Bring the loops forward and slip them over a copper pipe or wooden dowel, working one pair at a time. Avoid pulling the warp too firmly, which can shift the weaving. Remove the piece from the bottom of the loom and tie small knots in the lower loops to help keep the rows in place.
Use a 3′ length of cotton yarn to make a hanger by passing it through the pipe or dowel and tying a double knot. Hide the knot near the center. Turn the wall hanging over, tuck the soumak tails behind exposed warp rows, and trim the roving tails to reduce excess fluff.
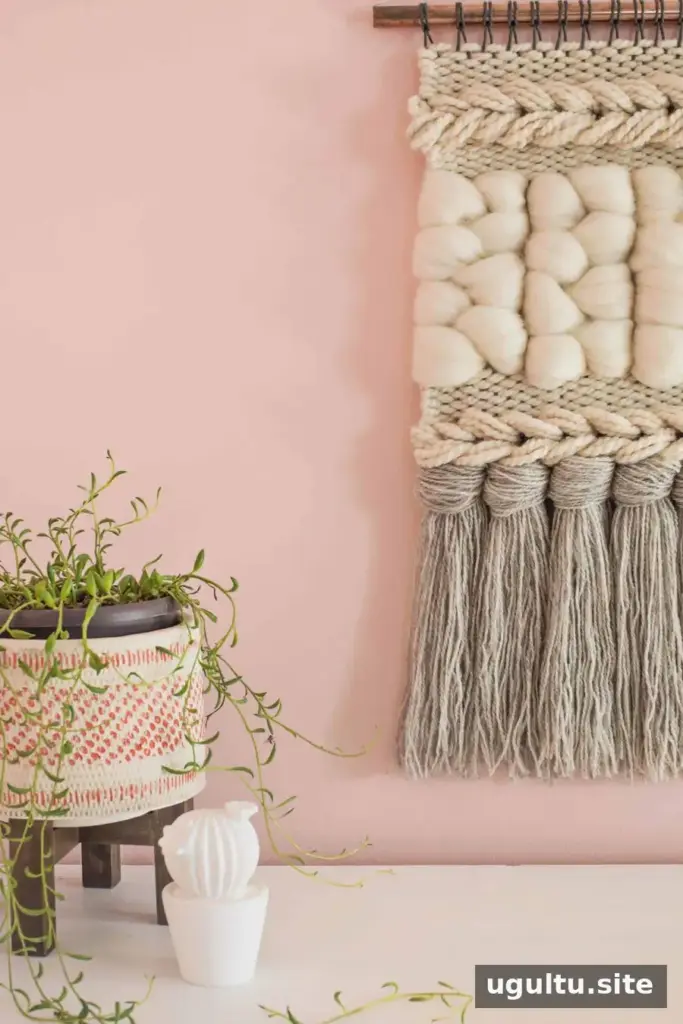
Hang the piece and gently straighten the rya knots with your fingers or a weaving comb. Trim uneven fringe ends for a neat finish, taking care not to cut the knots or warp.
Finishing Your DIY Woven Wall Hanging
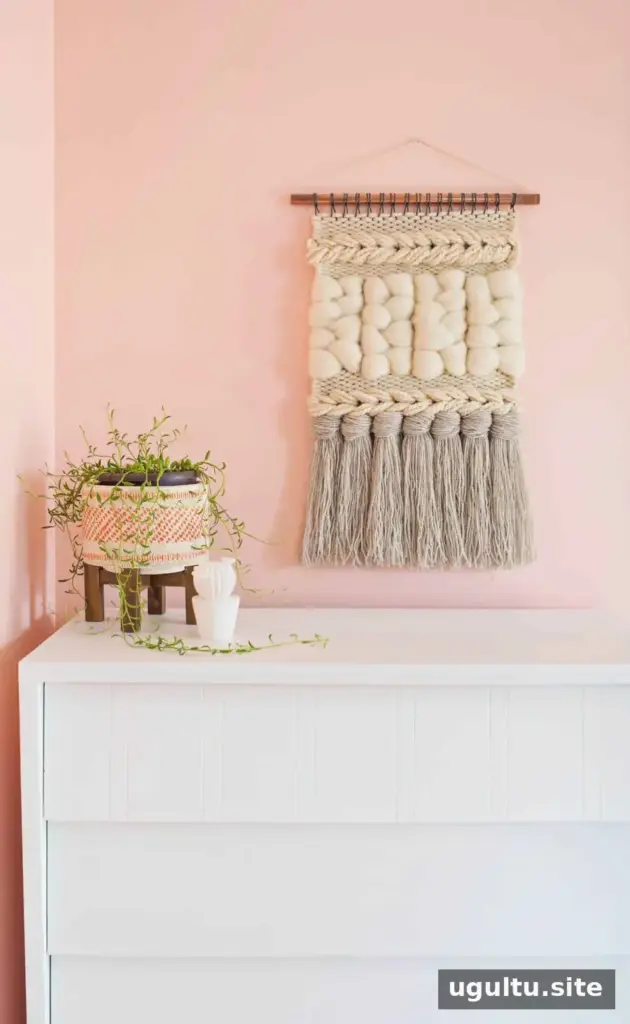
Your textured wall hanging is ready to display. Choose a place where the fringe and woven details can hang freely. Project instructions credited to Rachel.