
 admin
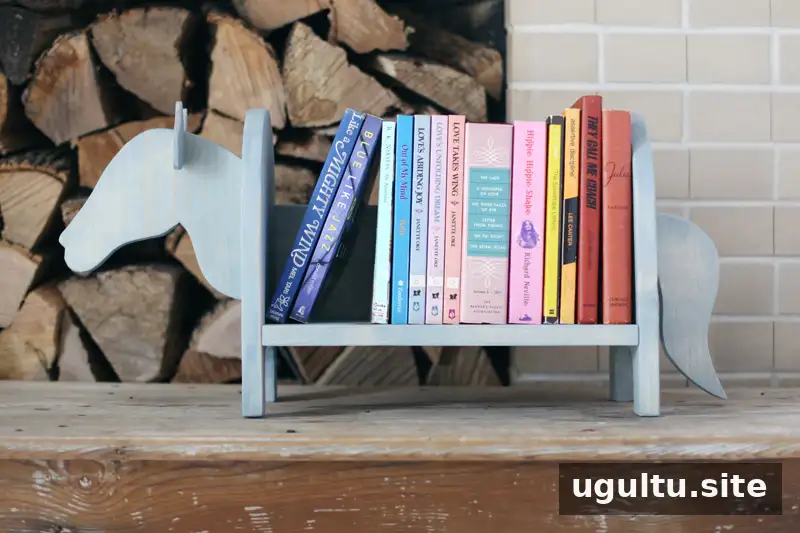
A mini horse bookshelf combines a small storage shelf with a playful horse silhouette, making it a distinctive handmade addition to a child’s room, reading nook, or book lover’s home. This woodworking project uses common lumber, craft plywood, a jigsaw, and a pocket-hole jig. Review the measurements and prepare the templates before cutting so the pieces fit together smoothly.
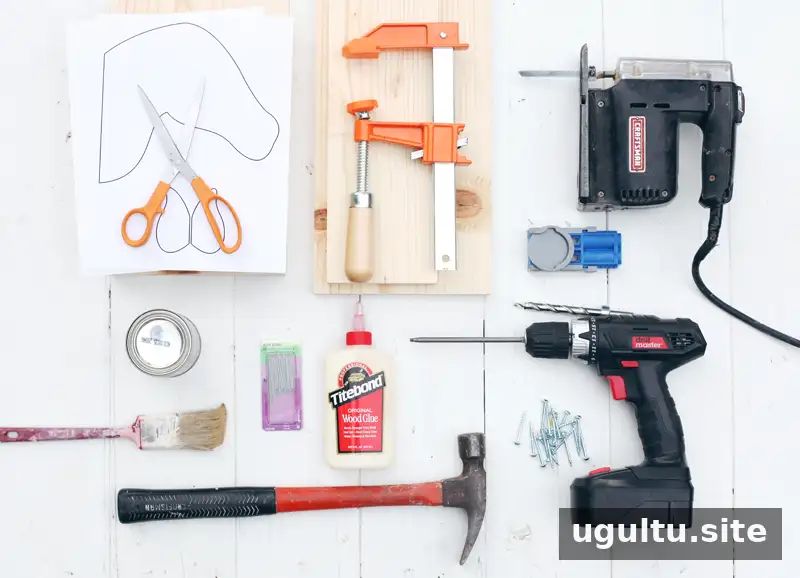
Materials and tools for a mini horse bookshelf
Materials:
- Twenty pocket-hole screws
- 1-inch wire brads (optional)
- Wood glue
- One 8-inch by 6-foot piece of common board
- A small piece of craft plywood for the ears
- 120-grit sandpaper
- Steel wool (optional, but recommended for smoothing the finish)
- Tinted wood stain
- Printer paper and template parts 1, 2, and 3
Tools: A pocket-hole jig with a step bit and driver, two clamps, a power drill, a jigsaw with a clean-cutting blade, a paintbrush, scissors, and a pencil. A hammer is needed only if using wire brads, and a printer is required for the templates.
Prepare and measure the lumber
The board should have a finished width of 7 1/4 inches and a thickness of 3/4 inch. Have the lumber cut at a lumber yard or hardware store, or cut it yourself if you have access to a table saw. Set aside two 12-inch lengths and one 14-inch length. Trim another piece to 4 1/4 inches wide by 14 inches long. Use the remaining board for the horse’s head and tail.
How to build the mini horse bookshelf
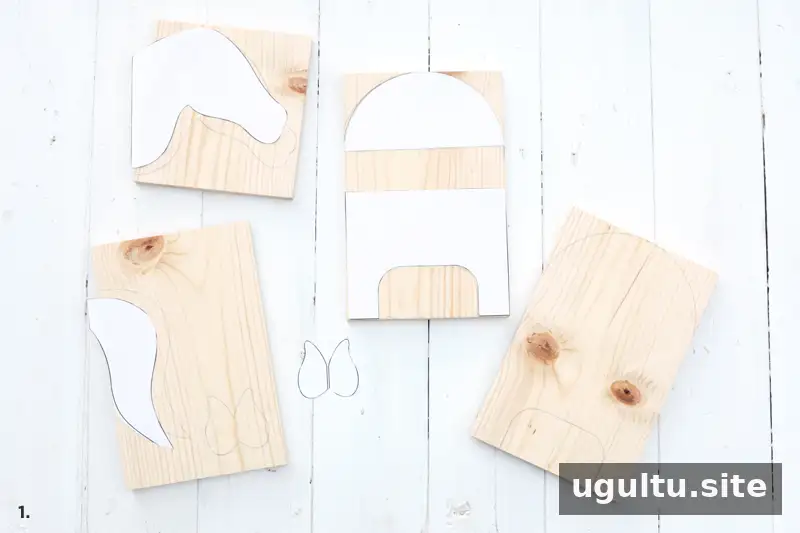
1. Print and position the templates
Print all three template parts at their original size. Each page is designed for 8 1/2-by-11-inch paper with margins, so do not select a print setting that shrinks the artwork. Cut out the stencil pieces and position them on the lumber. The two 7 1/4-by-12-inch pieces form the shaped sides, with curved tops and cut-out legs. Use craft plywood for the ears rather than trying to cut them from the thicker board.
2. Cut and sand the pieces
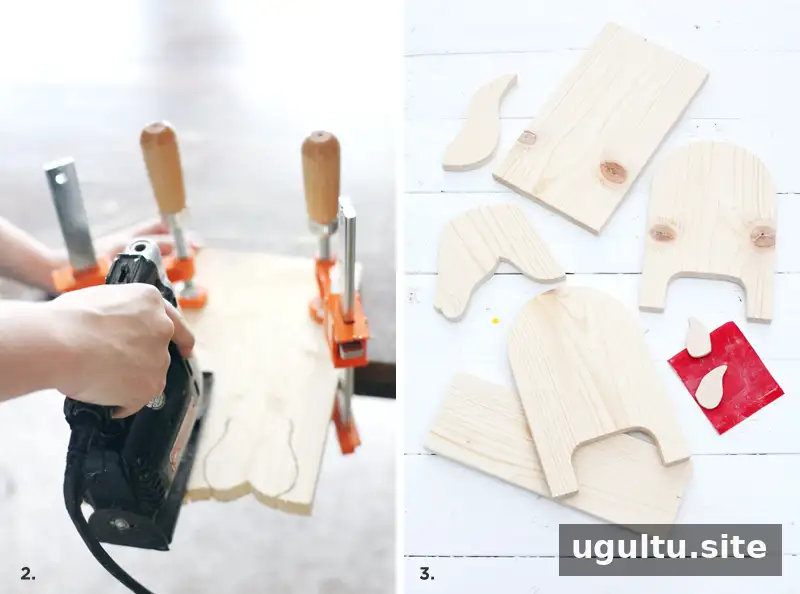
Secure each board with clamps at a stable work surface and cut along the outlines with a clean-cutting jigsaw blade. A sharp, suitable blade can help reduce splintering. Keep hands clear of the cutting path and support the offcuts so they do not bind the blade.
Sand the cut edges to remove rough spots and blend any uneven areas. A rotary sander can speed up this step, but hand-sanding is also suitable. Smooth edges make the parts easier to assemble and help create a more consistent finish.
3. Drill pocket holes
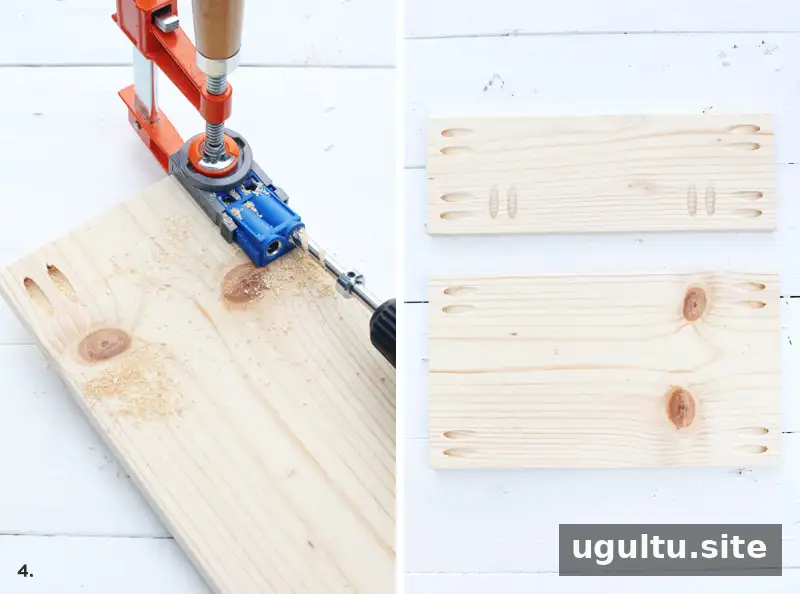
Drill pocket holes in the 14-inch pieces. The wider piece forms the bottom of the shelf, and the narrower piece forms the back. Follow the hole positions shown in the project reference. Adjust the jig and drill-bit collar for the wood thickness and screw length so the screws do not break through the opposite face.
Test the setup on scrap wood before drilling the project pieces. In the original build, 1 1/4-inch screws protruded during a test, so shorter screws may be needed depending on the setup. This quick check can prevent visible damage to the finished boards.
4. Stain and smooth the finish
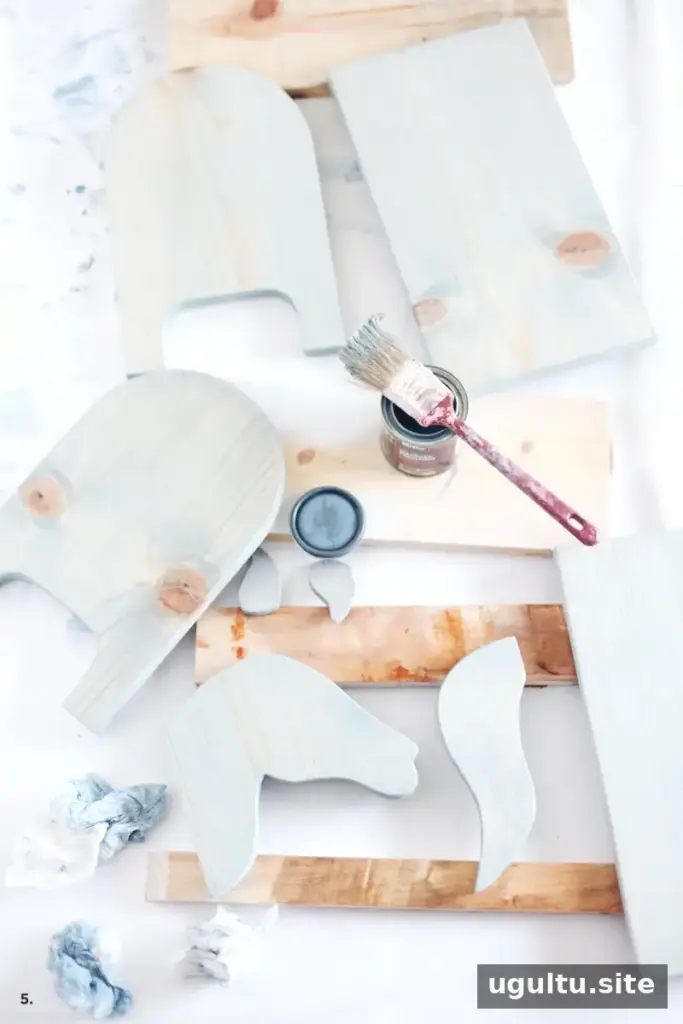
Brush a coat of tinted stain onto each wooden piece, then wipe away excess stain. Let the pieces dry for the length of time stated on the product label. Follow the stain manufacturer’s safety and ventilation instructions.
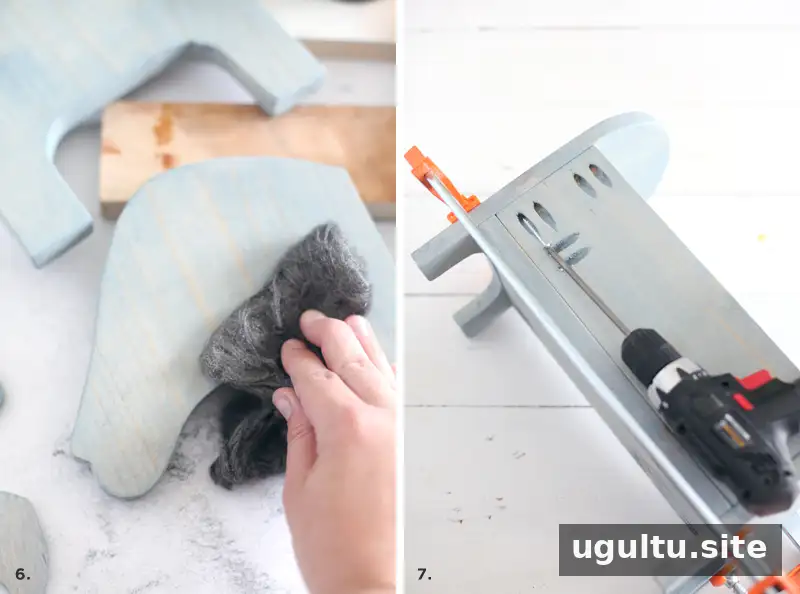
After the stain has dried, lightly smooth the surfaces with steel wool if desired. Moisture can raise fine wood fibers, making a stained surface feel less smooth than it did after sanding. Work gently and remove any residue before assembly.
5. Assemble the shelf
Clamp the shelf pieces in position and drive in the pocket-hole screws. Avoid overtightening the clamps, which can leave marks in the wood. For softer lumber such as pine, place a scrap piece of wood between each clamp and the shelf to help protect the surface.
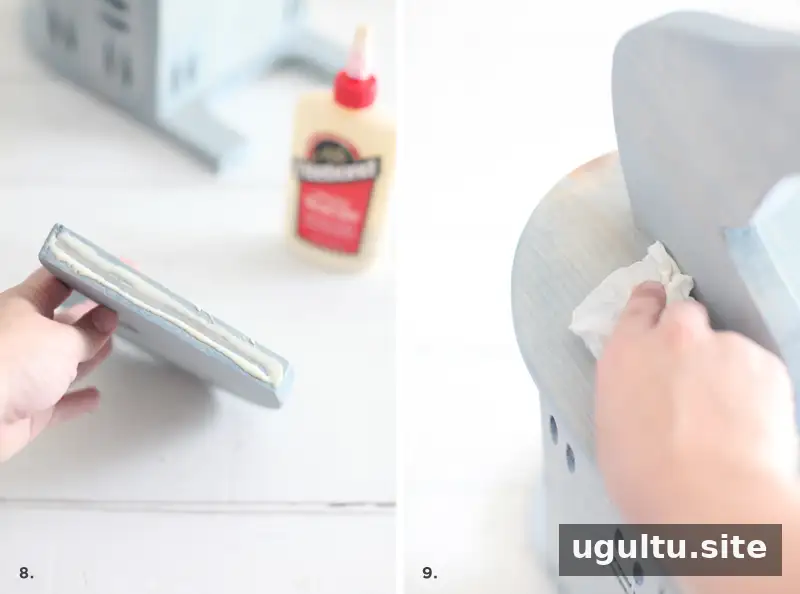
Apply a thin line of wood glue along the edge of the horse’s head and attach it to one of the bookshelf sides. Choose which side will display the head. Optional wire brads can provide additional fastening, but the piece can also be held in place while the glue dries. Wipe away excess glue before it sets, since dried wood glue can leave a visible mark.
Repeat the gluing process for the tail and ears. Allow the adhesive to dry fully according to its packaging before moving or loading the shelf.
Grain direction and finishing tips
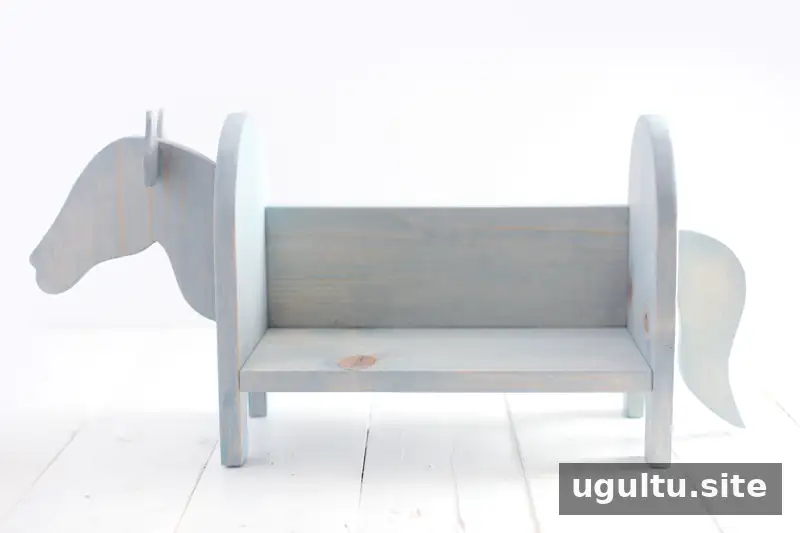
When tracing the head, tail, and ear shapes, orient each piece so the wood grain runs vertically through the shape. Besides creating a cohesive look, this matters for the glued joints: wood glue does not bond effectively to end grain, so apply it to the side grain where the pieces meet.
Ways to use the finished shelf

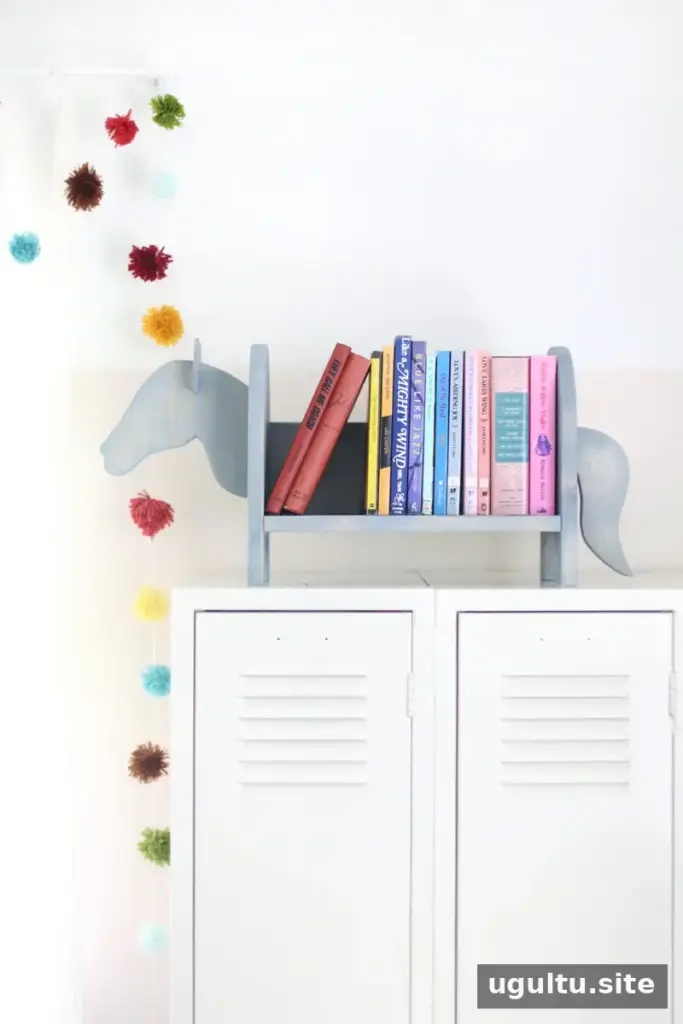
This project can make a thoughtful gift for a nursery or a young child’s room. For board books, the shelf section can be made a little smaller, with the finished piece placed on a side table near a rocking chair. It can also suit an adult’s reading space. Check that the shelf is stable and use it only for the books and objects it can safely support. —Mandi


