
 admin


Invisible bookends keep books upright without adding bulky or distracting objects to a shelf. This DIY project hides a thin metal bookend inside the cover of a hardback book, giving the shelf a neat appearance while reusing a damaged or unwanted book. It is a practical option when space is limited or you want the books themselves to be the focus.
How Invisible Bookends Work
A piece of wood fits inside the book cover, while a thin metal bookend is attached to the wood. Once the book is closed around the assembly, the metal support is concealed. Choose a book with a sturdy spine and dimensions that can accommodate the wood and bookend.
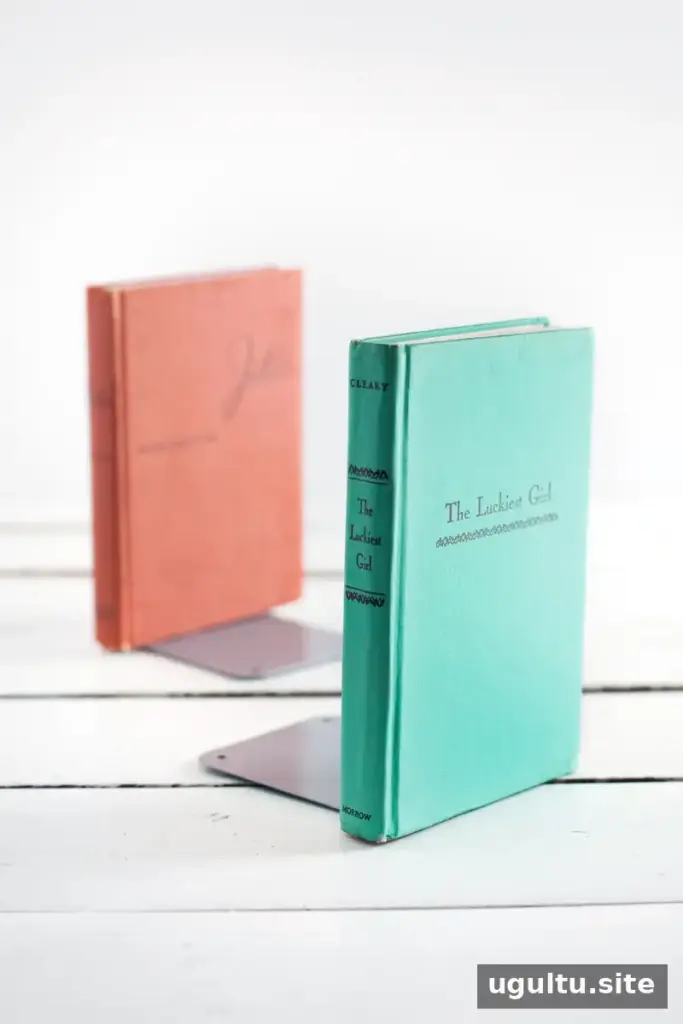
When positioned at the end of a row, the finished book blends with the other books while supporting them. Before starting, check that the selected book is one you are comfortable repurposing, since its pages will be removed.
Supplies for Two Invisible Bookends
Gather the following materials and tools:
- Two books with 1-inch spines
- Two thin metal bookends
- A 1×6 board, or lumber sized to fit inside the books
- A strong adhesive suitable for the materials
- Clamps
- A sharp craft blade or razor
Choose a Book and Board That Fit
The books used for this project measured about 5.75 inches deep, 8.25 inches high, and 1 inch thick. The 1×6 board measured approximately 0.75 by 5.75 inches, matching the inside dimensions of the books. Lumber sizes can differ from their stated dimensions, so compare the actual board measurements with the book before cutting. Taking the book along when selecting lumber can help you find a close fit.
If the book needs a thicker insert, thinner boards can be stacked and glued together to reach the required thickness. Make sure the assembled wood fits inside the cover without forcing it open.
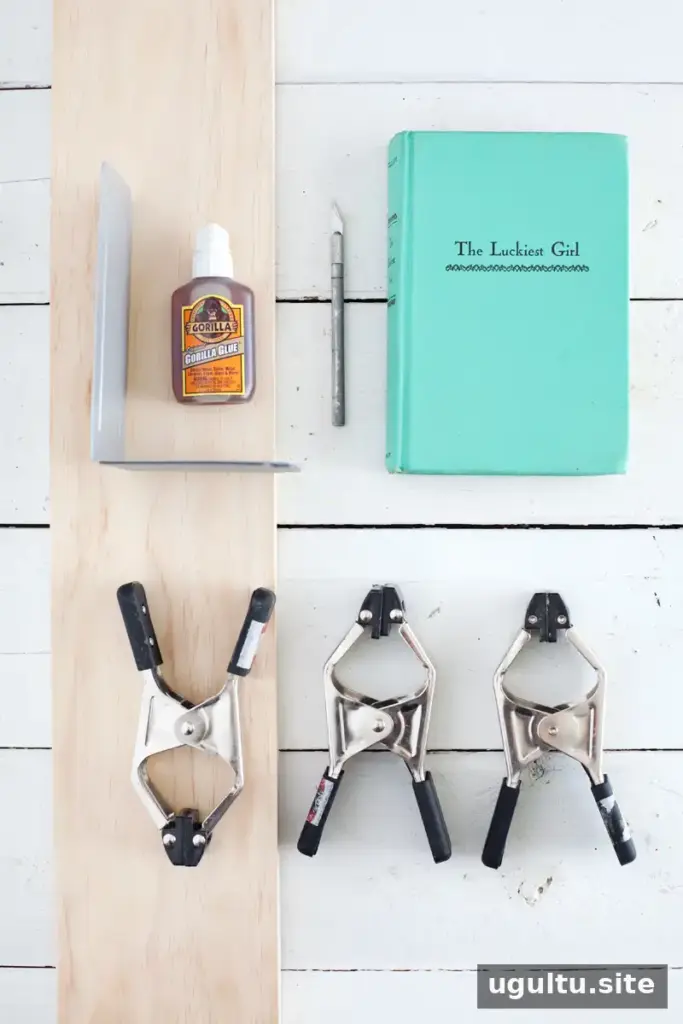
Lay out the book, board, and metal support before applying adhesive. A dry fit makes it easier to confirm the size and placement of each part.
How to Make Invisible Bookends
1. Remove the Pages
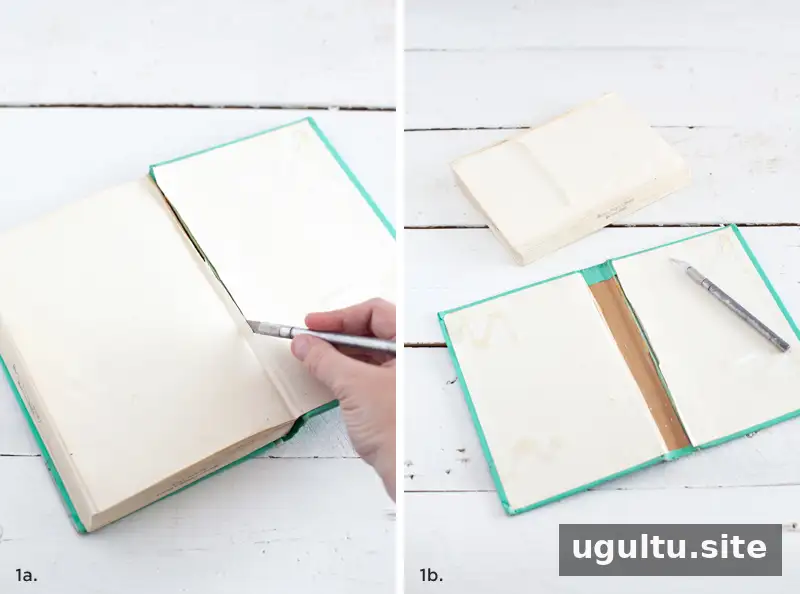
Using a sharp craft blade, carefully separate the pages from the spine so that the book cover remains intact. Work slowly and keep your hands clear of the blade. Set the pages aside for reuse or dispose of them as appropriate.
2. Mark the Board
Wrap the book spine around the board to mark the length needed. Leaving about a 1/8-inch gap at the top can help the finished piece look more like a complete book. Check the fit before cutting.
3. Cut the Board to Size
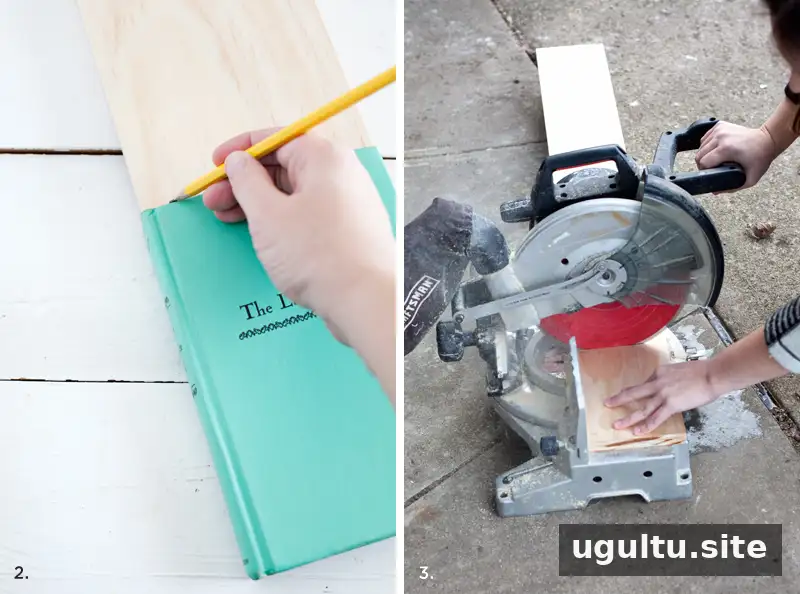
Cut the board to the marked length with a suitable saw, or ask the lumber supplier whether they can make the cut. Smooth any rough edges if needed so the wood sits neatly inside the cover.
4. Attach the Wood and Metal Bookend
Apply a moderate amount of adhesive to the contact surfaces of the wooden insert and metal bookend. Keep it away from the edges to reduce squeeze-out. If the adhesive expands while setting, using too much can make a mess or interfere with the fit. Follow the product directions, including its recommended setting time.
5. Clamp the Assembly
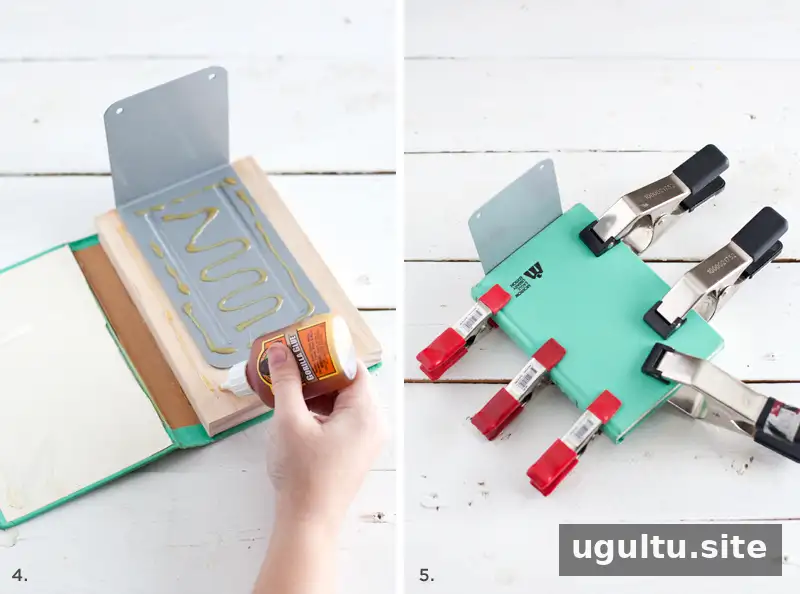
Position the wood and metal support inside the book, then clamp the pieces together while the adhesive sets. Place scrap wood between the clamps and the book cover to help prevent dents or pressure marks. Check that the book remains aligned before tightening the clamps.
Finishing and Using the Bookends
Allow the adhesive to cure fully before placing the bookend on a shelf. Set it at the end of a row and arrange the books against it. If the support feels loose or the book does not sit flat, check the fit and adhesive bond before relying on it to hold heavier books.

The finished supports provide a subtle way to keep books upright while preserving a simple, coordinated shelf. —Mandi


