
 admin


A DIY emoji marquee combines a cheerful painted face with the glow of battery-powered LED lights. This heart-eyes design is a beginner-friendly way to make a decorative sign, and the same steps can be adapted to other simple emoji faces. Choose a wooden round that suits your space, then match the printed template and light size to the sign before you begin.
Supplies for a DIY Emoji Marquee
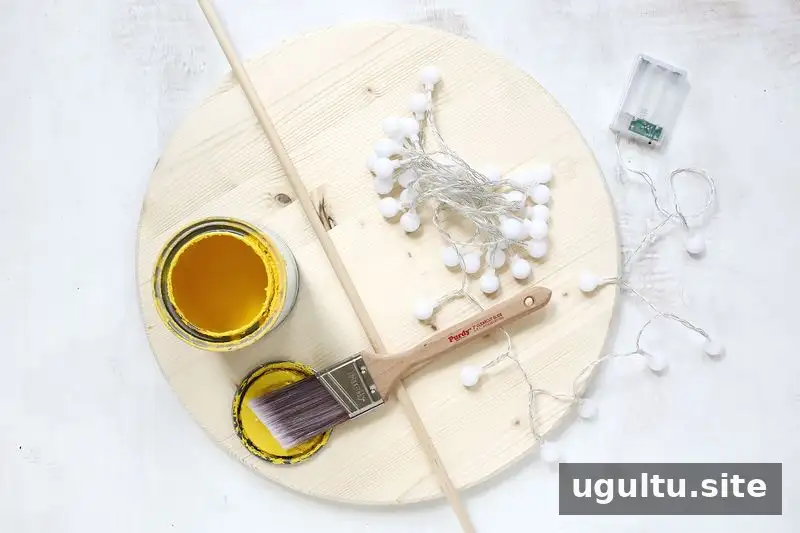
Gather your materials before painting or drilling. Check that the light string is battery-operated and intended for indoor use.
- A round wooden top in your preferred size
- A drill and drill bits in suitable sizes
- Battery-operated globe string lights; choose LEDs, which produce less heat than traditional bulbs
- Yellow, black, and pink acrylic paint, plus paintbrushes
- A printable emoji template, scaled to fit the wooden round
- Duct tape or gaffer tape
- Picture hangers and wire for mounting
- Dowel rods, if you want to add spacers on the back
Paint and Prepare the Emoji Face

Apply a few even coats of bright yellow acrylic paint to the front of the wooden round. Let each coat dry as directed on the paint container before adding another. A fully dry surface helps the details look neat and makes it easier to trace the design.

Print the template at a size that fits your wooden round, then cut out the mouth and heart shapes. Position them on the painted surface and lightly trace around them with a pencil. Fill in the mouth and heart eyes with black and pink paint, respectively, and let the details dry before drilling.
Drill Holes for the LED Lights
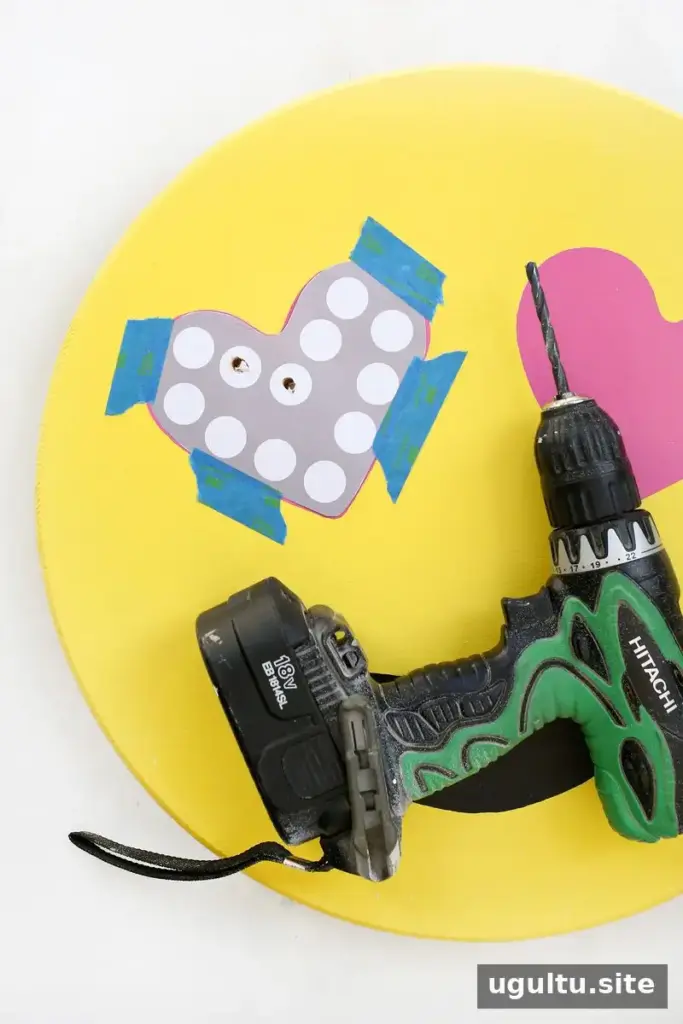
Place the eye template over the painted design and secure it so it cannot shift. Drill through the marked white dots using a bit sized for the light sockets; the project uses a 5/8-inch bit, but the correct size depends on your particular lights. For cleaner openings, begin with a smaller bit and gradually work up to the final size. Wear eye protection and keep the workpiece stable while drilling.
Install the Lights and Prepare the Back

Carefully remove the bulb caps from the string lights if the design of your light set allows it. From the back of the sign, guide each light through a hole, then reattach its cap from the front. Make sure each light is seated securely without forcing it into an opening that is too small.
Use duct tape or gaffer tape to keep excess wire and the battery pack in place on the back. Position the switch near an accessible edge so you can turn the sign on and off easily. Attach picture-hanging hardware and wire, and check that the hanging parts are firmly secured before mounting. Because the sign is battery-powered, it does not need to be positioned beside an electrical outlet.
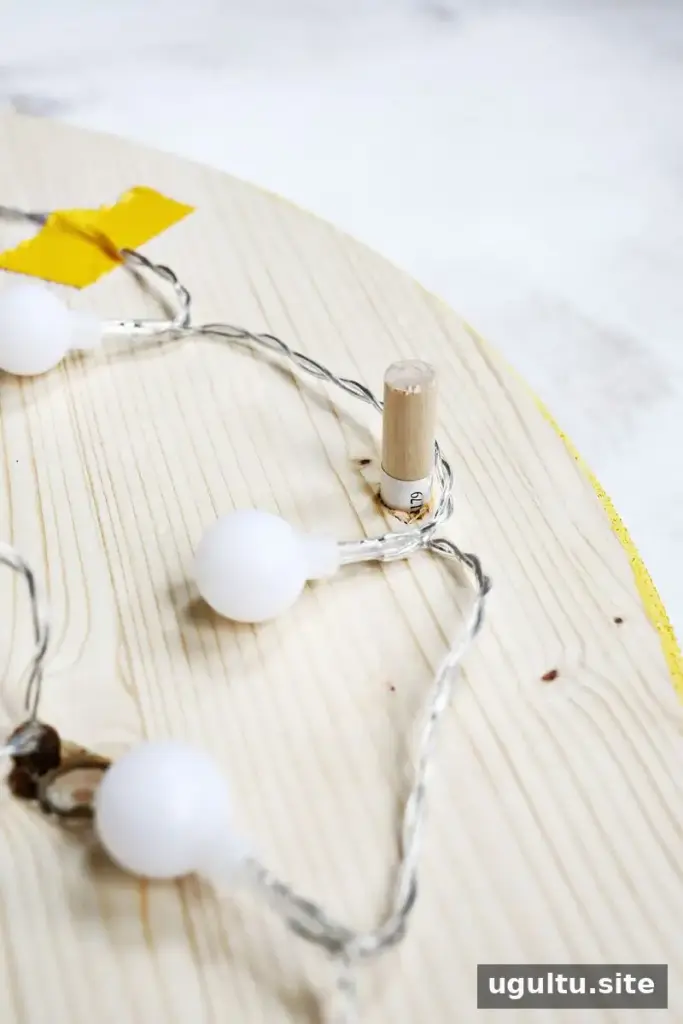
As an optional way to help the sign sit more evenly against a wall, drill four shallow holes in the back near the top, bottom, and sides. Glue in four pieces of dowel rod, each 1 1/2 inches long, using rods that fit the holes. The spacers can help the sign clear the battery pack and wires. Allow the glue to dry fully and make sure the rods are secure before hanging the marquee.

Lighting and Safety Tips

The finished marquee can brighten a coffee station, craft room, or other indoor area. Some string lights include a blinking setting, so check the light set’s instructions if you plan to use that mode. Before displaying the sign, test the lights and confirm that the battery pack remains reachable.
- Choose lights with a label from an independent testing laboratory and use a set rated for indoor use.
- Do not use a light string with frayed or damaged cords, or with loose or broken bulbs.
- Follow the manufacturer’s instructions for installing and operating the lights.
- Turn the lights off when leaving home or going to bed.
For a safe, tidy result, inspect the wiring and mounting hardware before each use. This DIY emoji marquee is easy to customize with another face or paint colors, provided the template, holes, and light sockets are sized to work together.
Project by Laura.


