
 admin


A DIY tassel dress is an easy way to bring color to a simple outfit without dyeing the fabric. Small handmade tassels can brighten the hem and sleeves of a plain dress, while letting you choose a palette that suits your style. Embroidery floss is available in many colors, so you can create a coordinated trim or a cheerful rainbow effect.
What You’ll Need for a DIY Tassel Dress
Gather embroidery floss in your chosen colors, a needle, sewing thread, and scissors. Choose a dress with a hem and sleeves that can accommodate small decorative additions. Before starting, check the fabric and care label; delicate materials may need a finer needle or gentler handling.
- Embroidery floss in one or more colors
- Sewing thread, ideally in a color that blends with the dress or tassel
- A needle suitable for the dress fabric
- Scissors for trimming the floss
Try placing a few loose strands of floss against the dress before making the tassels. This simple color check helps you decide whether to use a single shade, alternate colors, or arrange several hues in a rainbow.
How to Make the Embroidery-Floss Tassels
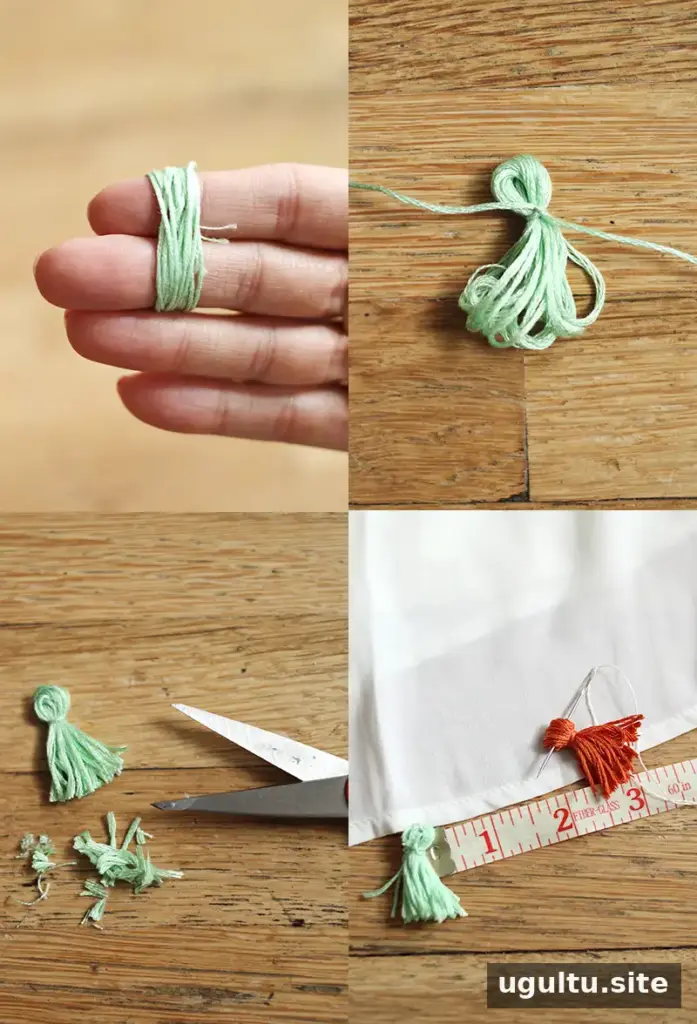
Start by selecting a color of embroidery floss. Wrap the floss around your fingers until the loops reach the thickness you want for the tassel. Keep the wraps even so the finished pieces have a consistent appearance. For tassels of different sizes, vary the number of wraps while keeping their overall shape in mind.
- Slide the wrapped floss carefully off your fingers without letting the loops unravel.
- Tie a separate piece of thread in the same color around the top of the looped floss to secure it.
- Cut through the loops at the bottom, then trim the ends so they look even.
- Make additional tassels in the colors and quantities needed for the hem and sleeves.
Attach the Tassels to the Dress
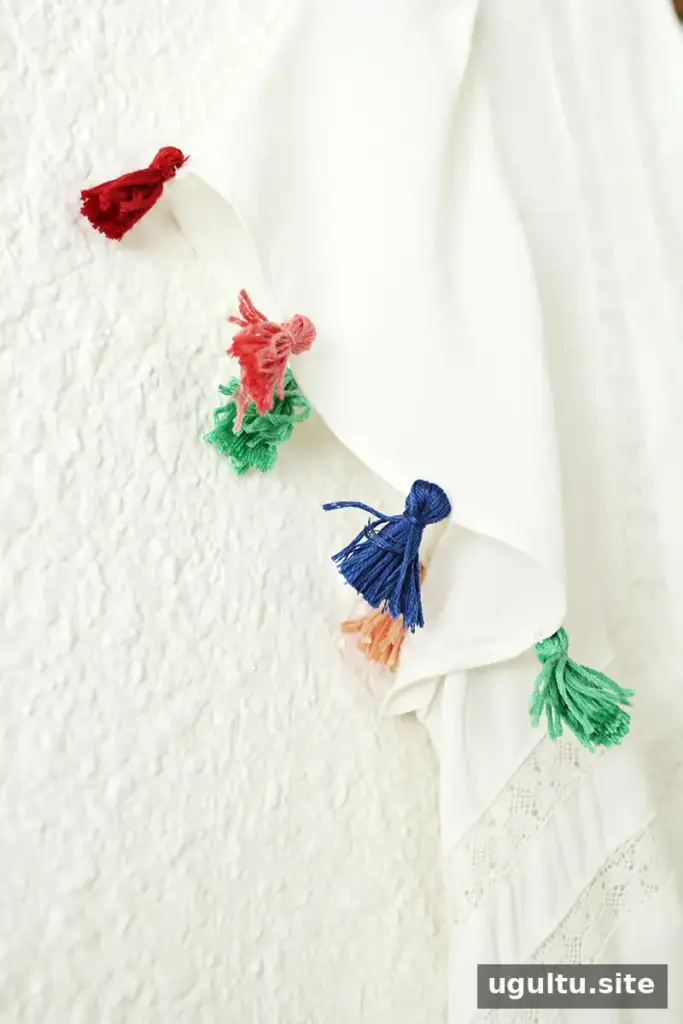
Arrange the tassels along the hem and sleeve edges before sewing them on. Spacing them out first makes it easier to keep the placement balanced. If you want a repeating color sequence, lay out the tassels in order and check the arrangement from a short distance.
Sew each tassel securely to the dress with a needle and thread. Use small stitches through the tied top of the tassel, taking care not to pull the fabric tightly enough to gather or distort it. Check that each tassel is firmly attached before wearing the dress. For a delicate garment, test your needle and stitching on an inconspicuous area first.


Finishing Touches and Care
Once the trim is attached, look over the dress for loose threads and uneven tassel ends. A final light trim can make the edges look neater. Follow the garment’s care instructions, and consider removing or protecting the dress from rough handling if the tassels could snag. When cleaning, check how the added floss and stitching respond to the recommended care method.

Colorful tassels give a plain dress a playful update without changing the garment’s original color. With careful placement and secure stitching, this DIY tassel dress project can be adapted to different color combinations and dress styles.
By Katie


