
 admin

DIY marker mugs are a simple way to personalize a pair of porcelain cups for a gift, celebration, or everyday use. The basic idea is to draw directly on the mug and bake it, but the finish may not be equally durable on every surface. Testing the design and planning to hand-wash the mugs can help you get the best results.
What You Need for DIY Marker Mugs
This project uses a permanent marker and a porcelain dish or mug. Inexpensive mugs can work for a low-cost craft, but check that the item is suitable for oven use before heating it. Different glazes and marker formulas may respond differently, so consider testing your design on a spare piece first.
- A clean, dry porcelain mug or dish
- A permanent marker in your chosen color
- An oven and a heat-safe place to cool the mug
For a neat result, sketch the design lightly on paper before drawing on the mug. Keep the decoration on the outside, away from the rim and any area that may touch food or drink.
How to Make DIY Marker Mugs
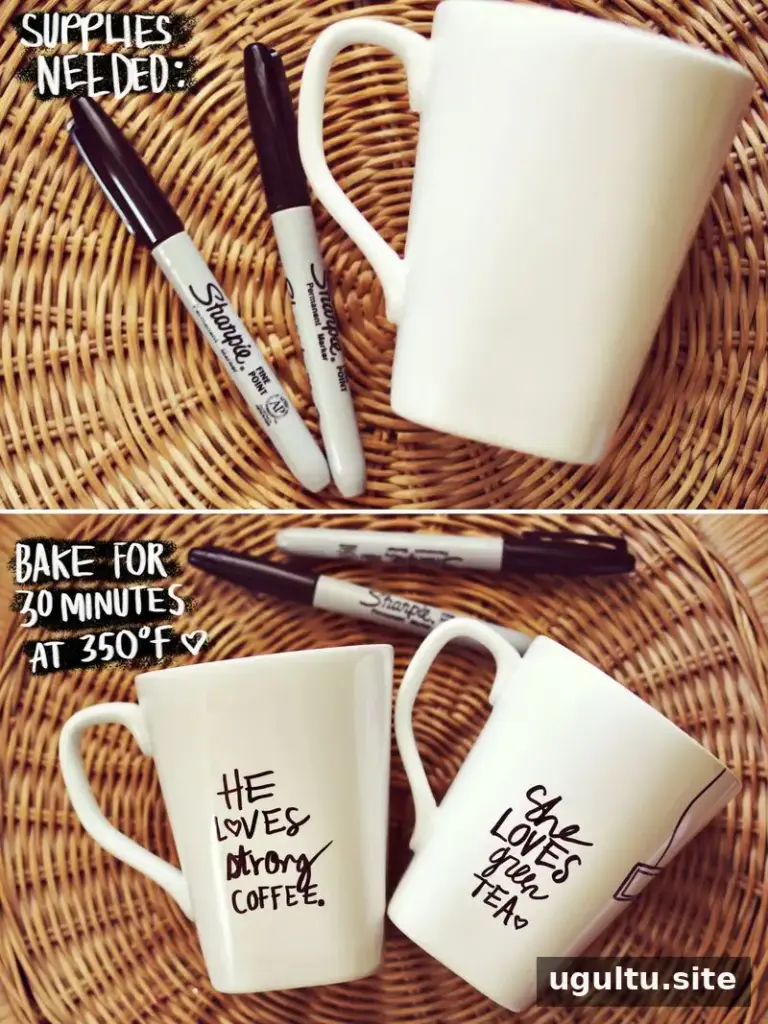
Draw your design on the mug’s surface, then bake it for 30 minutes at 350 degrees. Follow the marker and mug manufacturers’ safety instructions if they provide specific guidance. Avoid placing a cold mug into a hot oven or exposing hot ceramic to a cold surface, as sudden temperature changes can cause damage.
- Make sure the mug is clean and completely dry.
- Draw the design and allow the ink to dry before baking.
- Bake for 30 minutes at 350 degrees.
- Let the mug cool completely before washing or using it.
Allowing the mug to cool gradually is a useful precaution. Do not handle it while hot, and use an oven mitt when removing it from the oven.
Washing and Durability

In the reported test, the decoration remained intact after scrubbing by hand with soap and a kitchen sponge. The dishwasher test had a different result: about half of the design came off. For that reason, hand-washing is the better choice for mugs decorated with this method. Use a soft sponge and avoid abrasive cleaners to reduce wear.
Results can vary: some crafters have found that the marker washes away, even when the same general steps are followed. The method is inexpensive, but it cannot guarantee a permanent finish on every mug. If the design begins to fade, do not assume that baking it again will restore it; check the marker’s instructions before attempting any repair.
Is This Mug Decorating Method Right for You?
DIY marker mugs are best treated as decorative or hand-wash-only items rather than dishwasher-safe everyday dishes. They can make a thoughtful handmade present, but durability depends on the marker, the mug’s surface, and how the item is cleaned. If a long-lasting result is essential, use a product specifically intended for decorating ceramics and follow its directions carefully.
With a suitable mug, a simple design, and gentle hand-washing, DIY marker mugs can be a fun, low-cost craft to try. Let each mug cool fully before use, and remember that the finish may vary. Project notes: Elsie.


