
 admin


A waterfall twist creates a cascading effect by leaving sections of hair loose as you twist along the head. It offers a simpler alternative to a waterfall braid for anyone who finds braiding awkward, especially when working on the back of their own hair. Follow the steps below to make a single waterfall twist, or continue with the original cascading sections to create a double waterfall twist.
How to Create a Waterfall Twist
Start with brushed, manageable hair. Choose a parting and a starting point near the front of the head. Working with sections of similar size helps the twist look consistent; larger sections create a softer, looser effect.
Steps 1–3: Begin the twist and add the first waterfall section
- Divide the starting section. Take a section of hair and separate it into two pieces. Cross the bottom piece over the top piece to make the first twist.
- Add a section from above. Pick up a new section of hair from the top of the head and lay it over the piece held in your top hand.
- Let the new section fall. Keep the added section draped between the twist pieces rather than twisting it in. Cross the original bottom piece over both the draped section and the top piece.
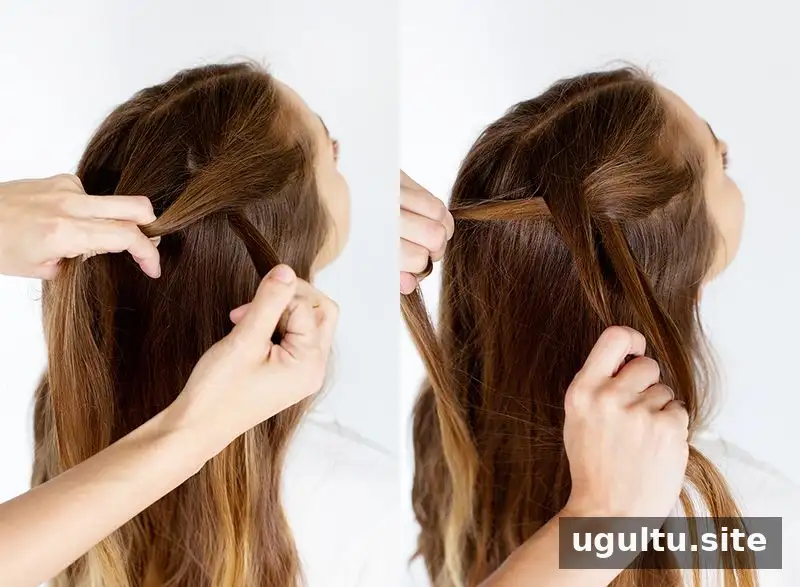
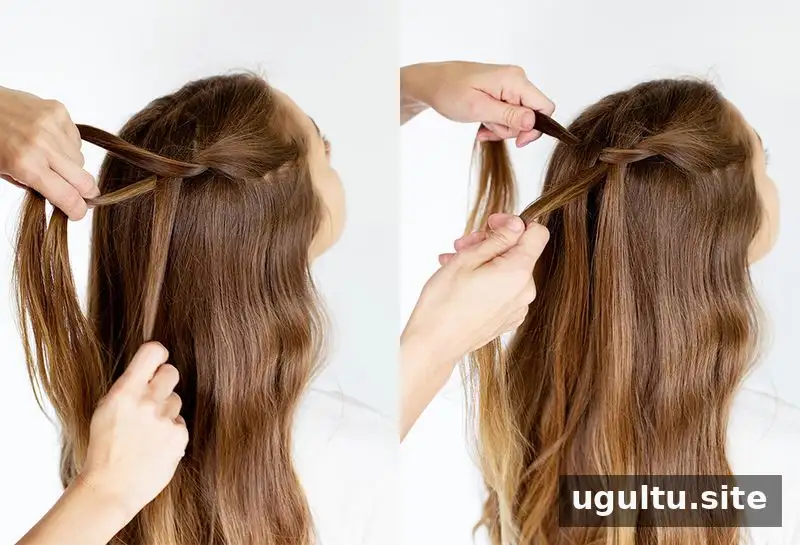
Steps 4–6: Continue and secure the first twist
Pick up another section from above and drape it between the two twist pieces. Cross the bottom piece over the draped section and the top piece to complete the next twist. Repeat this motion as you work toward the other side of the head, adding a fresh section from above each time you twist.

When you reach your preferred stopping point, secure the hair with a clip, or finish the section with a simple braid or twist. Use a mirror to check that the cascading pieces fall evenly, and adjust the tension if the twist feels too tight.
How to Make a Double Waterfall Twist
To create the double version, make a second twist beneath the first one and feed the original waterfall sections through it. This uses the loose pieces from the first pass, rather than picking up a new section from the top for each addition.
Steps 7–8: Start the second twist
Take a new starting section and divide it into two pieces, just as you did at the beginning. Make the first twist. Then take the first loose waterfall section from the original twist and lay it between the new twist pieces. Cross the bottom piece over it to continue.
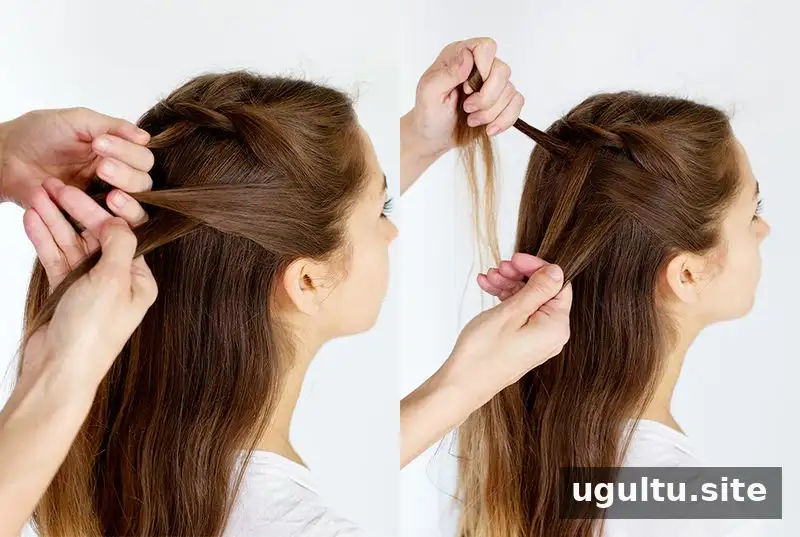
Steps 9–10: Work through the cascading sections
Continue along the head, using the original waterfall sections one at a time as the additions to the second twist. Once you reach the other side, braid or twist together the ends from both passes and secure them in place.

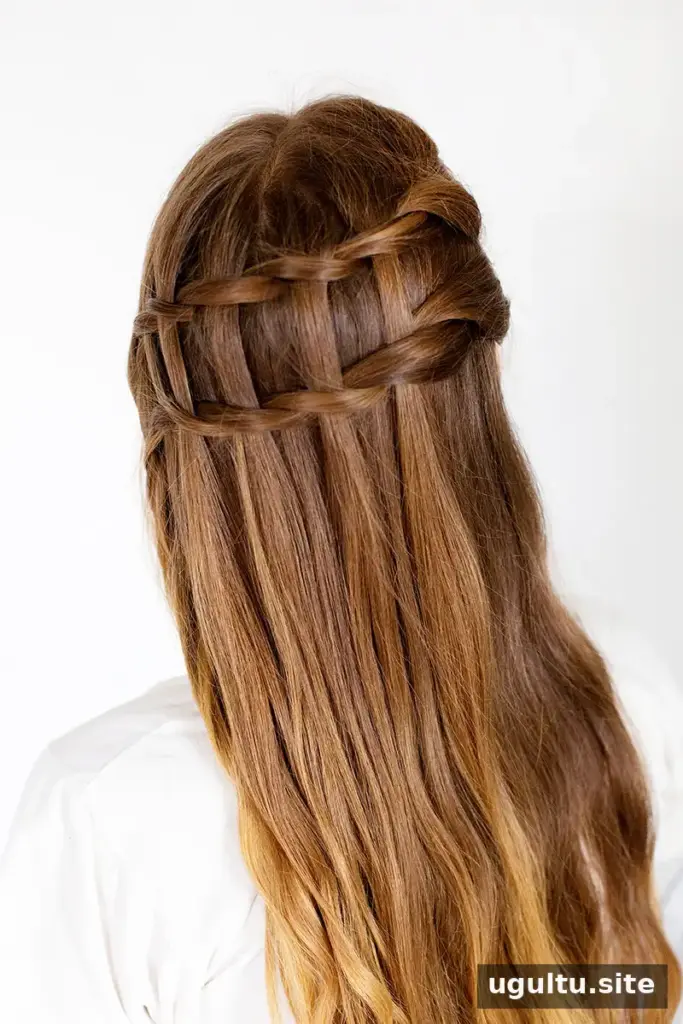
The finished look can be adjusted to suit the occasion. Larger sections and a relaxed grip give the style a softer appearance, while smaller sections held more firmly create a neater, more defined finish. Keep the twist comfortable and avoid pulling tightly at the hairline.


Tutorial by Katie. The waterfall twist is a practical style to try when you want a cascading look without forming a traditional waterfall braid. Start with the single version to get familiar with the motion, then use its loose sections to build the double waterfall twist.


