
 admin

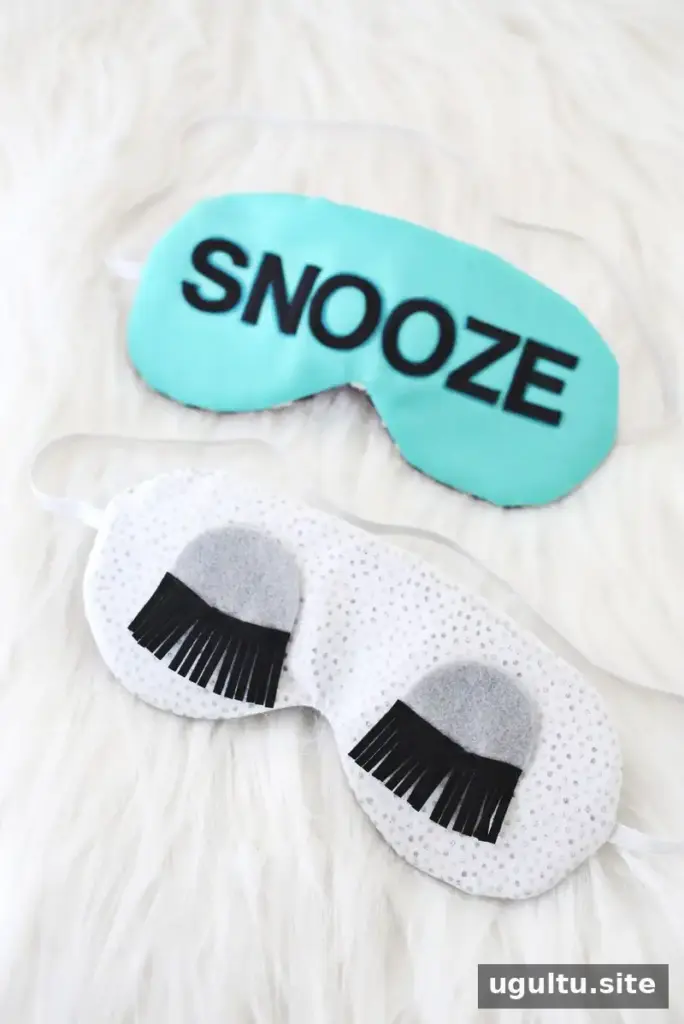
A DIY eye mask is a simple sewing project that can help make a sleep space feel darker and more comfortable. This version uses cotton fabric, quilt batting, and elastic, with optional felt and fringe for a playful design. You can personalize the decoration to suit the recipient or keep the mask plain for a more understated look.
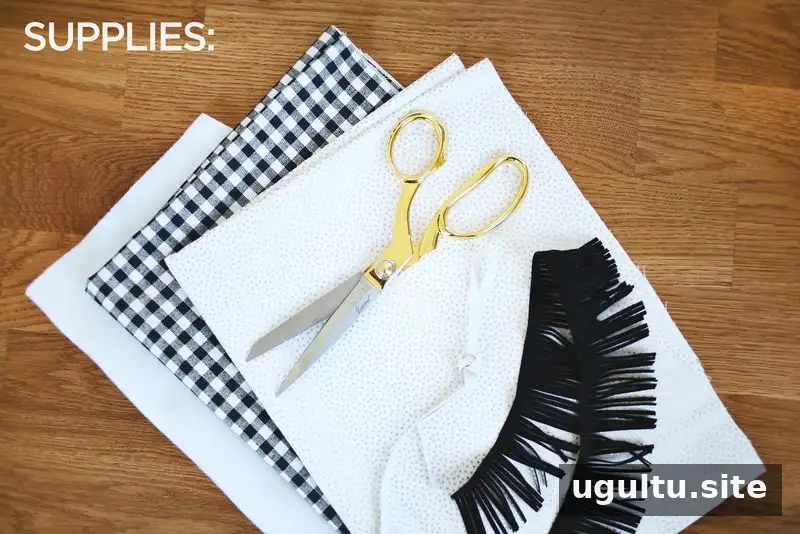
Supplies for a DIY Eye Mask
Gather the following materials before you start. Having everything ready makes it easier to assemble the layers and finish the mask without interrupting the sewing process.
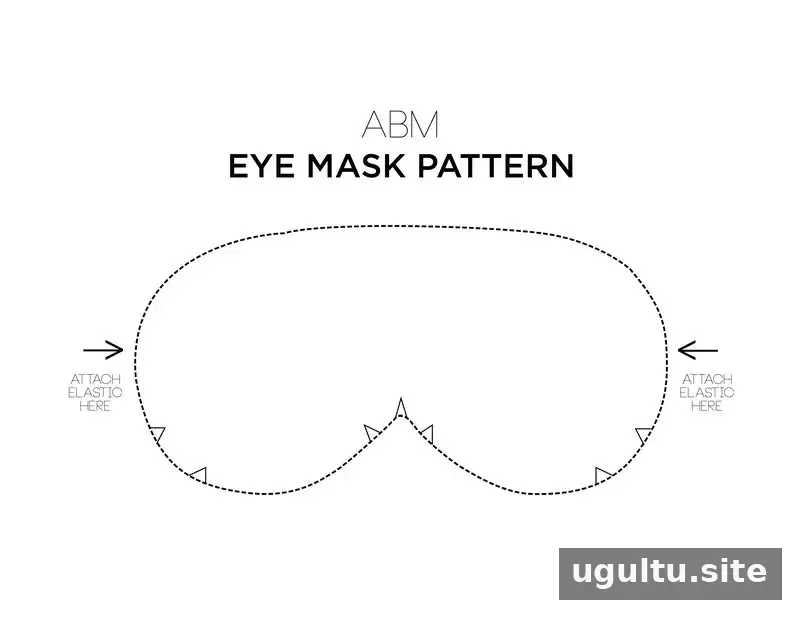
- A printed eye mask pattern
- Two pieces of cotton fabric
- Quilt batting to add thickness
- Elastic
- Fabric glue
- Felt
- Suede fringe
- Fabric scissors
Check that the pattern prints at its intended size, and choose soft fabric for the side that will rest against the face. Before cutting, make sure the cotton pieces are large enough to cover the entire pattern.
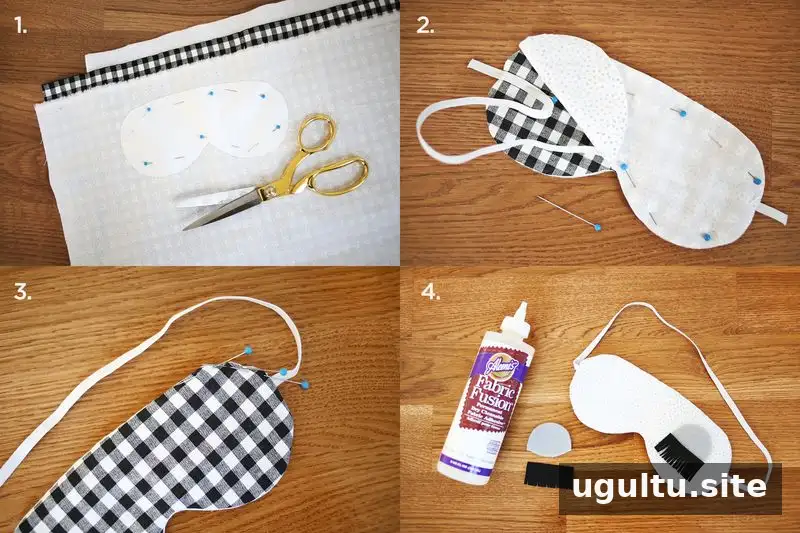
How to Make the Mask
- Cut the fabric layers. Place the two cotton fabrics with their right sides facing each other, then lay both layers on top of the quilt batting. Print and cut out the eye mask pattern, pin it to the fabric, and cut around the shape. Keep the layers aligned while cutting.
- Measure and position the elastic. Measure around the head to estimate the required band length. Cut the elastic with an extra inch on each side. Following the positions marked on the pattern, pin the elastic ends between the two cotton layers. The ends should extend out through the sides, while the rest of the band is held between the fabric layers.
- Sew and turn the mask. Sew around the edge with a 1/2-inch seam allowance, leaving an opening at least 1 inch wide. Use this opening to turn the mask right side out, then close it with a hidden stitch. Check that the elastic is secure and that the seams are closed.
- Add the decoration. Cut felt into half circles to create eyelids, then trim a piece of suede fringe to make lashes. Attach the pieces with fabric glue and pin them in place until the glue has dried. Keep decorative materials on the outside of the mask so they do not rub against the face.

Finishing Tips and Gift Ideas
Before using the mask, check that the elastic feels comfortable and does not pull too tightly. If the fit needs adjusting, shorten or lengthen the band before securing the final stitching. Allow the fabric glue to dry fully according to its instructions before wearing or wrapping the finished mask.
A handmade eye mask can also be personalized with felt shapes or iron-on letters, as shown on the second mask. This makes the project suitable as a thoughtful gift, particularly for someone who travels and likes to bring familiar sleep accessories along. Choose decorations that are secure and comfortable, and keep the finished mask clean by following the care guidance for its fabrics and embellishments.

This DIY eye mask combines a straightforward sewing project with plenty of room for personal touches. With a printed pattern, a few basic materials, and careful fitting, you can make a comfortable mask for yourself or create a customized gift. — Laura


