
 admin

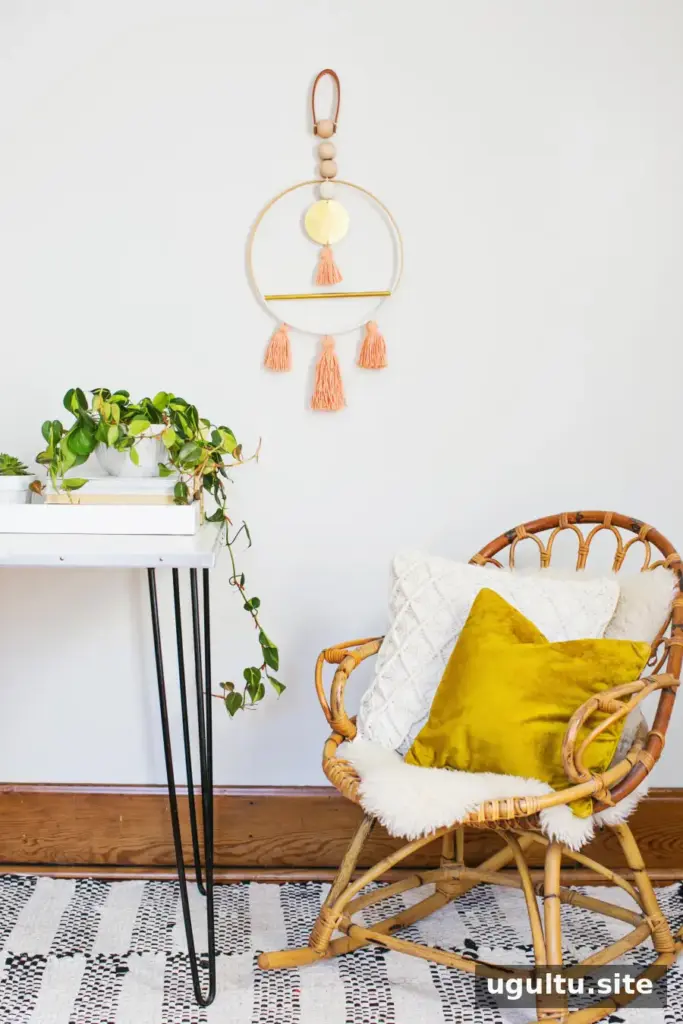
This Scandinavian wall art DIY pairs a simple wooden hoop with warm brass, natural leather, wooden beads, and soft cotton yarn. The finished hanging brings a calm, handmade touch to a living room or studio, and can also suit a nursery when placed safely out of reach. The project uses accessible craft materials and is a practical way to use leftover supplies.
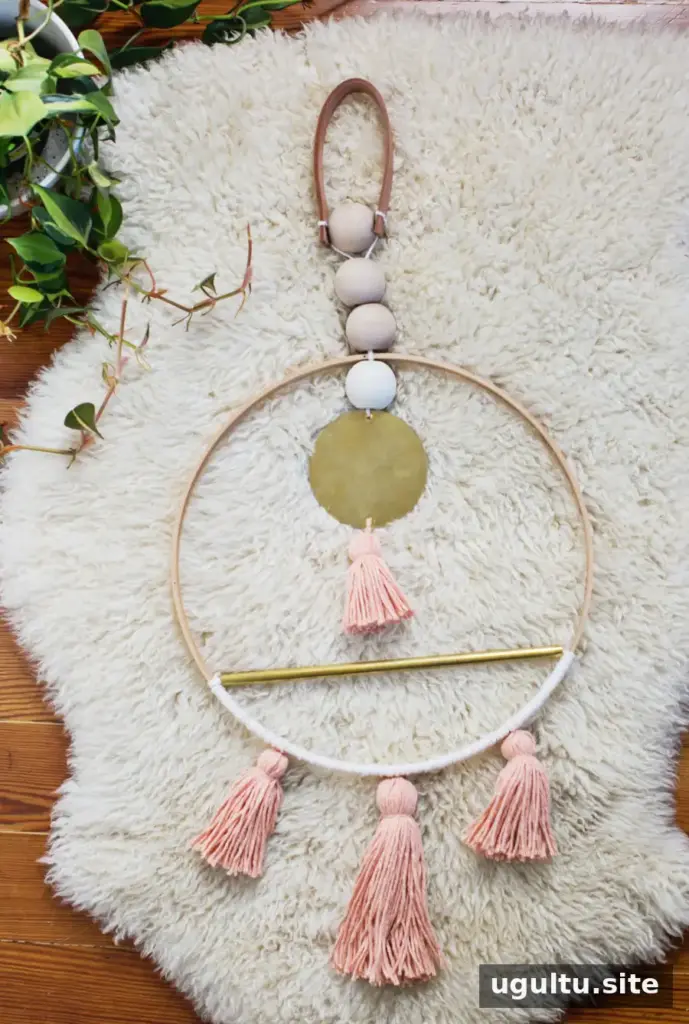
Before you begin, lay out the pieces and decide how you want them arranged. Checking the proportions first makes it easier to balance the hanging elements and choose where to attach the beads, brass circle, and tassels.
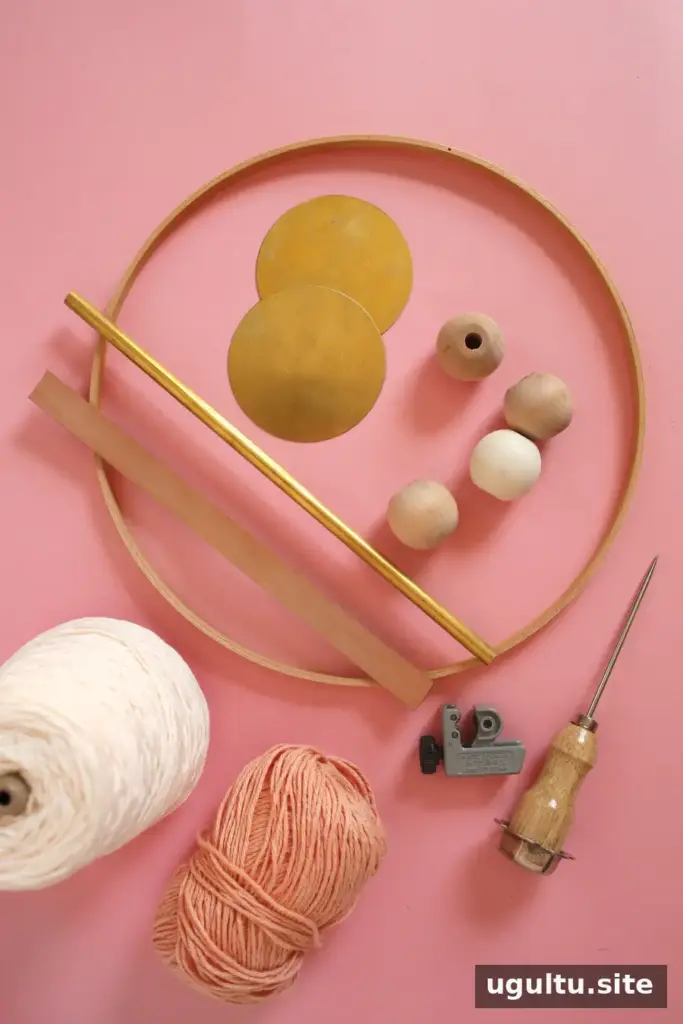
Materials for Scandinavian wall art DIY
- One 12-inch wood embroidery hoop; use only the inner ring
- One 1/2-inch by 12-inch brass tube
- One 16-gauge (0.051-inch) flat brass circle
- One 1-inch by 8-inch strip of cowhide
- Four 1.5-inch wooden beads
- One small skein of ecru cotton yarn
- One small skein of peach cotton yarn
- A small pipe cutter, 3-inch embroidery needle, hammer, nail, scissors, and an optional awl
Protect your work surface before hammering the brass. A self-healing mat or scrap wood can help prevent damage to the surface below. Use care when cutting the tube, and keep small components away from young children.
Prepare the brass, leather, and hoop
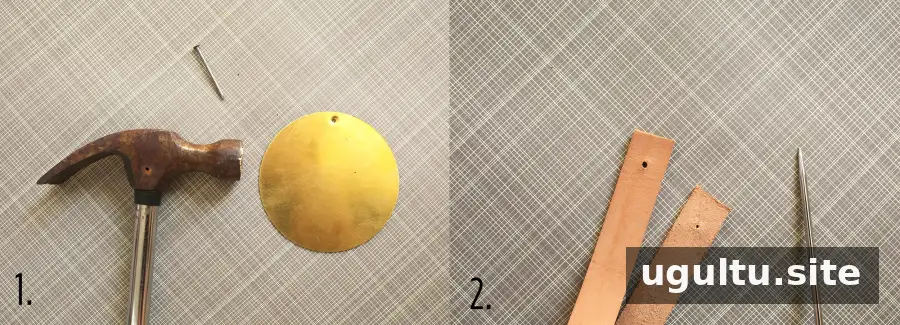
Make holes in the brass circle and leather
Step 1: Place the brass circle on a protected surface. Use a hammer and nail to make a hole near one edge, leaving enough space so the hole does not break through the rim. Make a second hole on the opposite side.
Step 2: Use an awl to make a hole near each end of the leather strip, about 1/2 inch from the edge. If you do not have an awl, carefully make the holes with a hammer and nail.
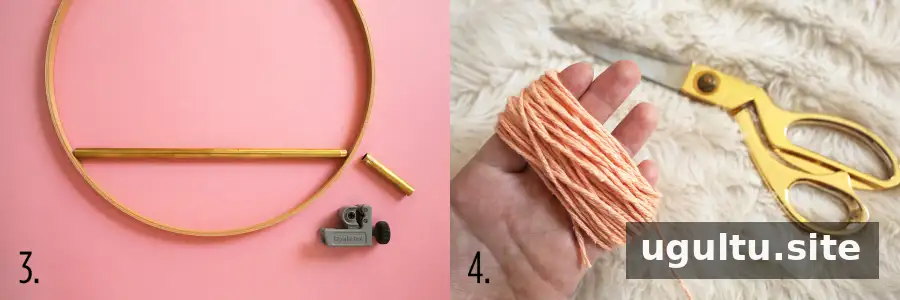
Step 3: Use the pipe cutter to remove two inches from the 12-inch brass tube. Position the remaining piece across the lower third of the wooden hoop. Save the offcut for another craft project if you like.
Make the tassel and arrange the pieces
Step 4: Wrap peach yarn around your hand about 30 times. Slide the loops off carefully, keeping them together.
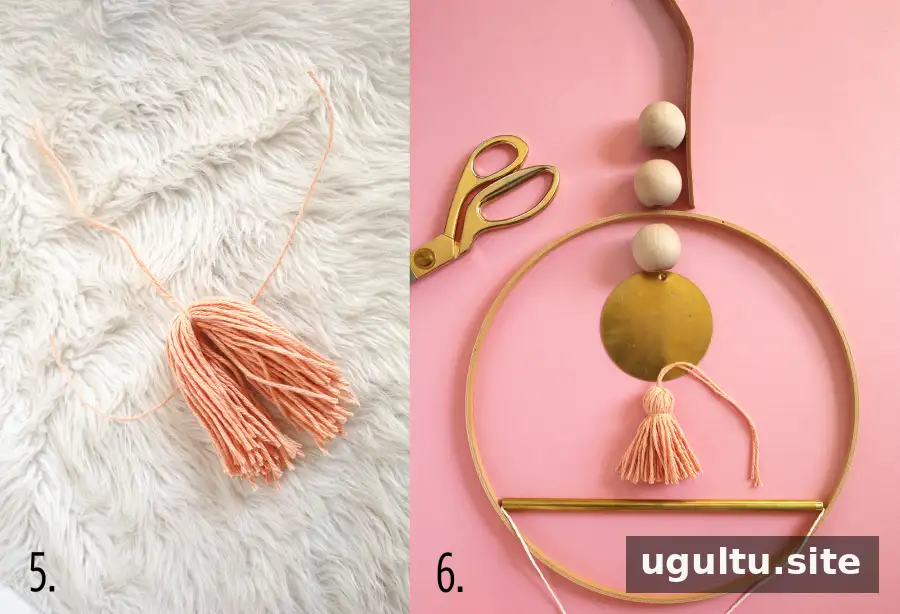
Step 5: Cut through the loops at one end. Tie a separate piece of yarn around the folded end, then wrap and knot another length around the bundle to form the tassel head. Leave the ends untrimmed until the final assembly.
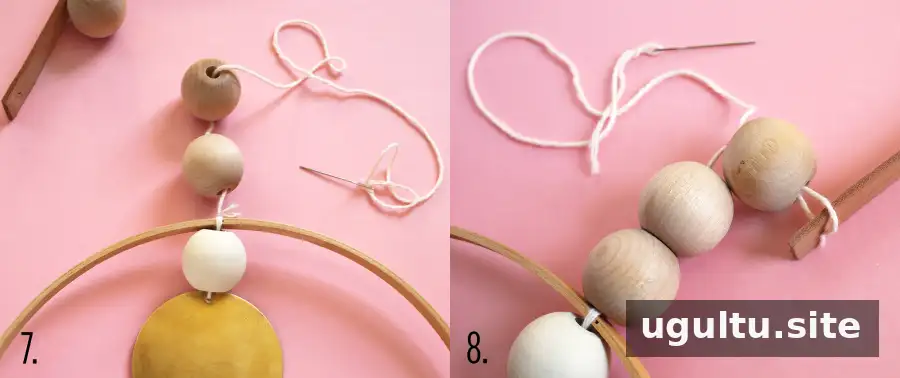
Step 6: Arrange the brass circle, beads, leather strip, hoop, and tassel in the order you plan to assemble them. This dry layout helps you check spacing and balance before tying anything in place.
Assemble the beaded hanger
Step 7: Thread a length of ecru yarn through one hole in the brass circle and tie a knot, leaving a 6-inch tail. Pass both yarn ends through the first wooden bead, then tie them securely around the hoop so the bead sits close to the wood. Thread the longer end through the remaining three beads.
Step 8: Pass the yarn through one hole in the leather strip from the inside. Wrap it around one side of the leather and pass it through the same hole again. Repeat around the other side, then thread the yarn back through the top wooden bead.
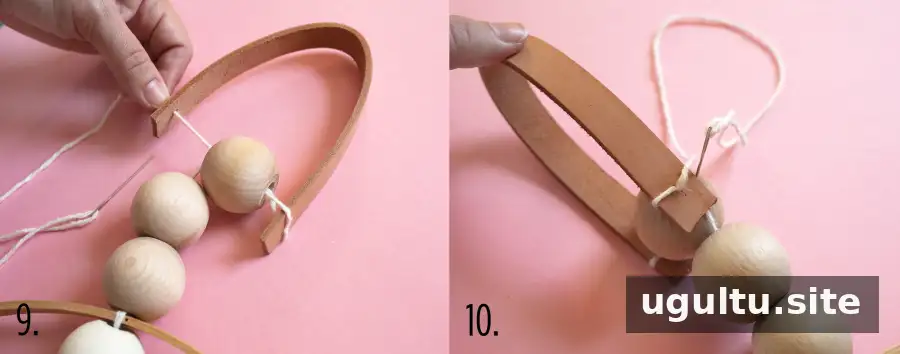
Step 9: Pass the yarn through the leather strip’s other hole from the inside.
Step 10: Wrap the yarn around both sides of the leather at this hole, passing through the same opening as before. Thread it through the wooden bead again. These wraps help hold the leather in place.
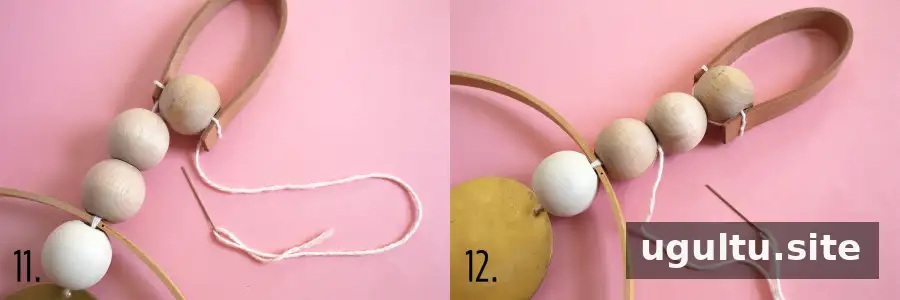
Step 11: Check that the leather strip is secured around the top bead before continuing. If it shifts, adjust the yarn tension and reinforce the wraps.
Step 12: Thread the yarn down through the next two beads. Tie it around the wooden hoop, then tuck the loose end back through a bead to conceal it.
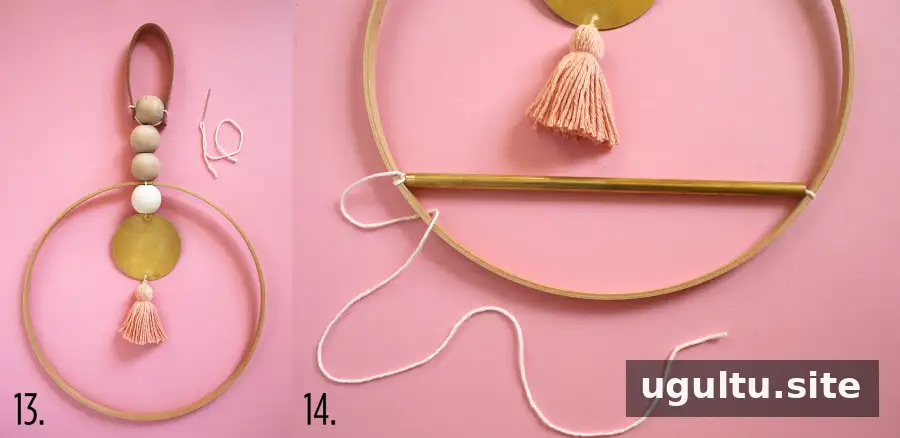
Step 13: Tie the peach tassel to the bottom hole of the brass circle. Trim it later, once the other hanging elements are complete.
Wrap the hoop and finish the wall hanging
Step 14: Cut a 4-foot length of ecru yarn and thread it through the brass tube. Tie one end around the hoop and tuck the short tail inside the tube. Tie the other end around the opposite side of the hoop, leaving the long end attached.
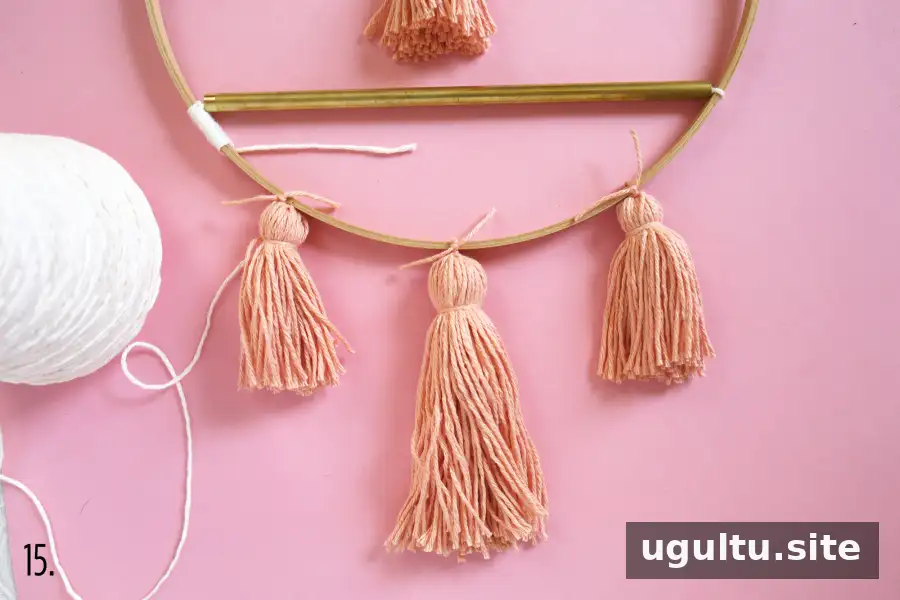
Step 15: Wrap the remaining ecru yarn around the wooden hoop, leaving a 3-inch tail. Make three more tassels: two of similar length and one twice as long. Tie them along the bottom of the hoop and trim their ends to about 1/2 inch.
Cut another 4-foot length of ecru yarn and tie it to the first yarn tail. Trim the joined ends to about 1/2 inch, wrap over them to hide them, and continue wrapping until about 3 inches remain. Repeat as needed to reach the other end of the brass tube, covering the peach yarn ends as you go. Tuck the final tail into the tube, then trim the tassels so they look even and balanced.
Display and customize your Scandinavian wall art DIY
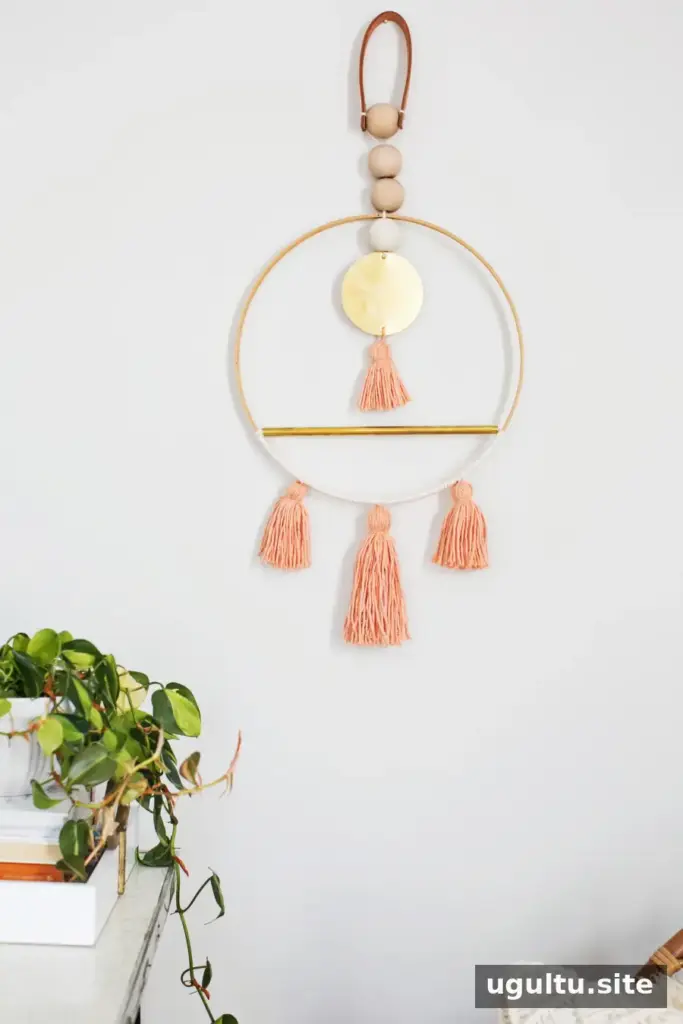
Varying the size of the beads or brass elements can change the look of the finished piece while keeping the same simple materials and assembly approach. Before hanging it, check that the knots and wraps are secure and choose suitable wall hardware for the surface. Keep the artwork beyond a child’s reach if it is displayed in a nursery.
There are many ways to arrange these materials, so you can adjust the spacing and tassel lengths to suit your room. —Rachel


