
 admin
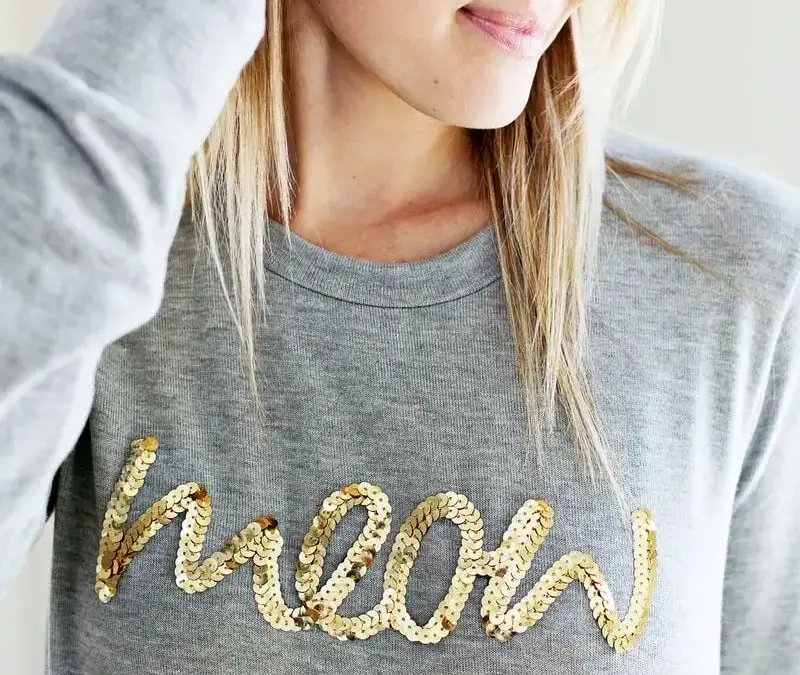

A Sequin Phrase Sweatshirt DIY project adds a bright, personalized detail to a comfortable everyday top. With sequin trim, fabric glue, and a few basic tools, you can outline a short phrase in cursive lettering. Gluing the trim in place before sewing makes it easier to adjust the design and helps secure it to the fabric.
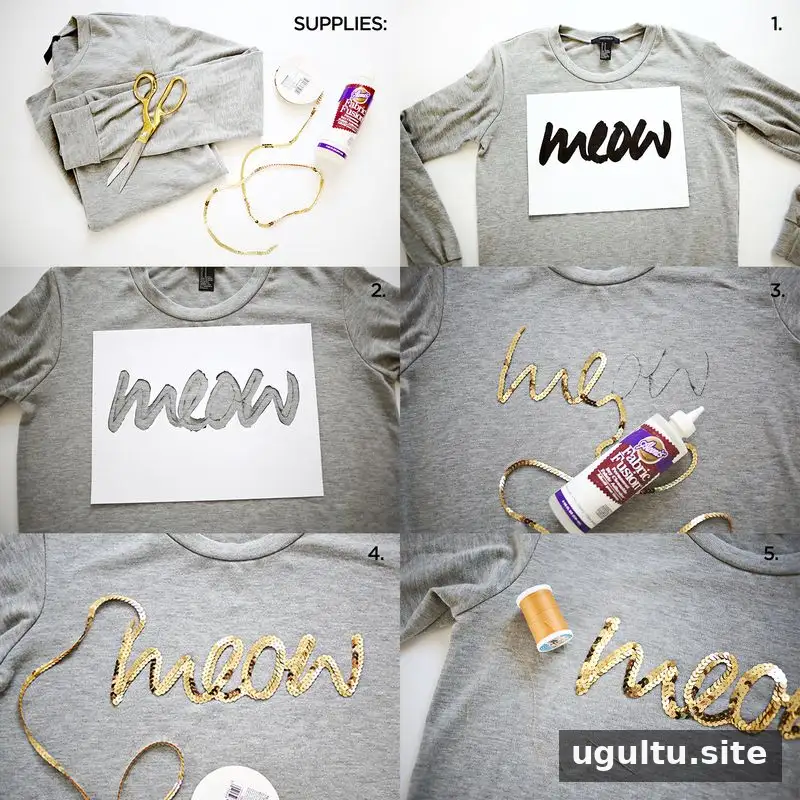
Supplies for a Sequin Phrase Sweatshirt DIY
- A sweatshirt
- Sequin trim
- Needle and thread
- Fabric glue suitable for the materials
- A marker
- Printed lettering, plus scissors or an X-Acto knife for making a template
Before starting, check that the glue is appropriate for the sweatshirt fabric and sequin trim. Protect the work surface, and test the marker and glue in an inconspicuous area if you are unsure how they will affect the garment.
How to Make a Sequin Phrase Sweatshirt
1. Print the phrase
Choose a cursive, handwritten-style font and print your phrase at the size you want it to appear on the sweatshirt. Keep the lettering simple enough to follow with the trim, especially if this is your first time making a design.
2. Create and position the template
Cut out the letters with scissors or an X-Acto knife to make a guide. Position the template on the sweatshirt, then use a marker to trace the center line of the phrase. Check the placement while the garment is flat so the design sits where you want it.
3. Glue the first row of sequins
Apply fabric glue along the left side of the marked line and place the sequin trim on top. Follow the phrase so the trim outlines the lettering. Work in manageable sections to keep the trim aligned and avoid applying more glue than you can cover neatly.
4. Add the second row
Apply another line of glue along the right side of the marker line. At the end of the phrase, turn the trim around and follow the lettering back toward the beginning. Let the rows overlap slightly. When you reach the starting point, trim the excess. Fold each loose end under the second-to-last sequin and glue it down.
Some letters may require retracing part of the same path to reach the next section. If that happens, place the trim over the existing row rather than extending the design beyond two rows in that spot.

5. Stitch the trim to the sweatshirt
Allow the glue to dry according to its product instructions. Then use a needle and thread to sew through every third or fourth sequin, attaching the phrase to the sweatshirt. This added stitching helps hold the trim in place during wear and washing. Avoid pulling the thread so tightly that the fabric puckers.


Finishing and care tips
Let the glue fully set before wearing or washing the sweatshirt. Since the glue takes time to dry, you can make small placement adjustments before it sets, but follow the adhesive instructions for its working and drying times. When laundering, check the sweatshirt and glue care guidance first; turning the garment inside out and using a gentle cycle may help reduce friction if those instructions allow it.
This design can also be adapted for coordinated sweatshirts for a team or bridal party. Choose a short phrase and keep the lettering style and placement consistent across the garments. A carefully planned Sequin Phrase Sweatshirt DIY creates a personalized piece, and the combination of glue and stitching helps keep the trim more securely attached.
— Laura


