
 admin
A static lines woven rug is a rewarding project for anyone who enjoys hands-on crafts and has time for a steady, repetitive rhythm. This design uses a simple wooden frame loom, cotton warp, and five colors of jersey yarn to create bold columns with a subtle zigzag pattern. The finished rug is described as 4.5″ x 6″, and the project takes about 15 hours, so prepare a comfortable workspace and expect to work on it over several sessions.
Materials for a static lines woven rug
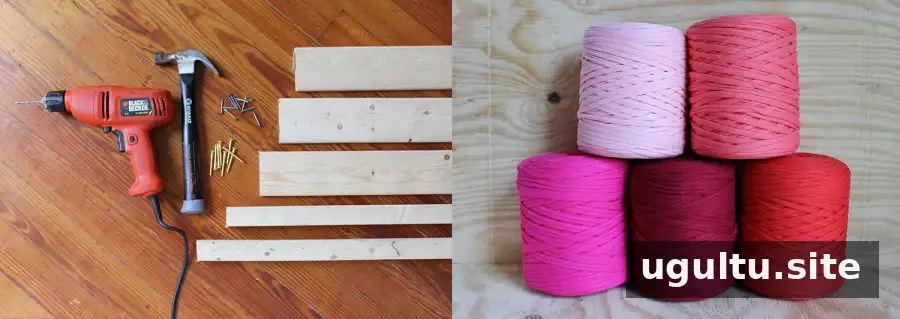
Gather the following supplies before building the loom. Having the yarn and tools ready makes it easier to keep the warp evenly tensioned while you weave.
- Two 2″ x 2″ x 8′ pine boards
- Two 1/2″ x 4″ x 8′ pine boards
- Twelve 1.5″ wood screws
- One box of 2″ nails with small heads
- Power drill and a bit that matches the screw size
- Hammer
- 100 yards of cotton twine
- Five spools of jersey yarn, 150 yards each
- Tapestry needle for finishing
Build the frame loom
1. Assemble the frame
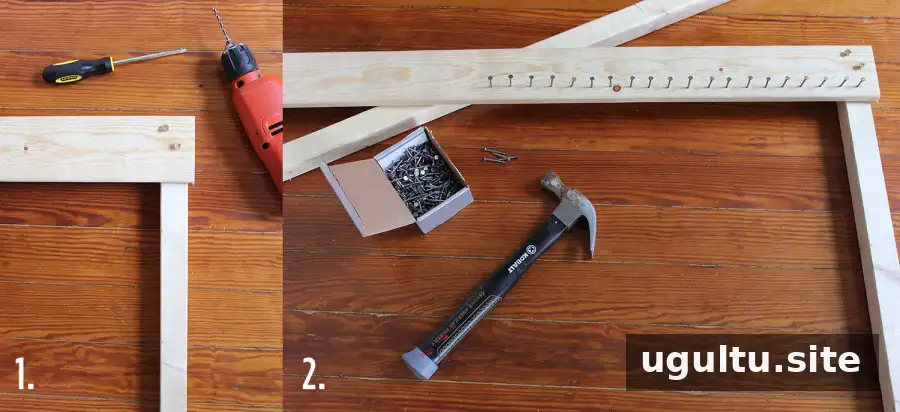
Cut both 2″ x 2″ boards to 6′ long. Cut the two 1/2″ x 4″ boards in half, creating four 4′ pieces, and set one piece aside. Arrange the remaining pieces into a rectangle with a third 4′ board across the center. Rest the wider boards on top of the 2″ x 2″ rails. Pre-drill two holes at each overlapping corner and two holes at each end of the center board, then secure the joints with screws.
If you do not have a saw, a lumber store may be able to cut the boards to size. Pre-drilling helps reduce the chance of splitting the wood.
2. Add the nails
Place a 2″ x 2″ offcut beneath one of the wide boards for support. Hammer nails across the board, spacing them about 3/4″ apart and keeping them at least 3/4″ from the edge. Repeat on the opposite board, using the same number of nails on both sides. Even spacing is important because the nails hold the warp threads in place.
Warp the loom and weave the rug
3. Set up the warp
Beginning at one corner, tie a loop-knot in the cotton twine and wind it up and down across the frame, wrapping around each nail in turn. Continue across the loom, then tie another loop-knot around the final nail. Keep the tension consistent; overly tight warp threads can pull the rug inward.
4. Mark the color sections
Divide the warp into five evenly sized sections. Mark the center of each section with a short strip of the jersey yarn assigned to it. These temporary guides help keep the color columns straight as the woven area grows.
5. Weave the first section
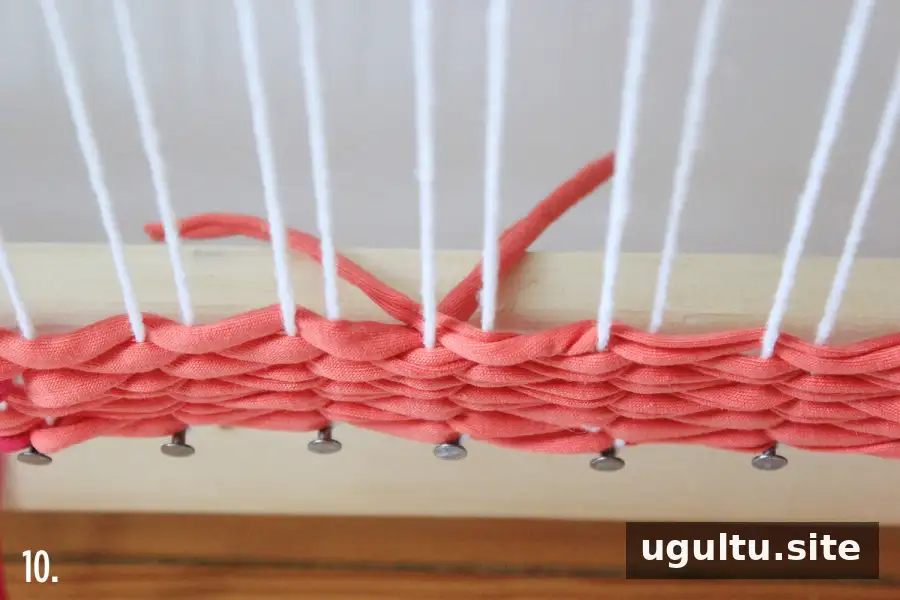
Use your fingers to weave a 5′ length of jersey yarn through the center section. Leave a 4″ tail at the back, then weave through about 20 warp rows, or 10 nails. On the return pass, go beyond the starting row by one or two rows. Push the yarn down into gentle arches rather than pulling it tight, which helps preserve the rug’s width.
6. Build the pattern
Continue weaving back and forth, offsetting the ends so that successive weft rows do not line up evenly. This creates the design’s zigzag effect. Work the adjacent sections all the way to the edges of each section so there are no gaps between color columns.
Jersey yarn can vary in thickness. If one color is noticeably thinner than another, try weaving two rows of the thinner yarn for each row of the thicker yarn. Check the surface regularly and adjust the number of rows as needed to keep the sections balanced.
7. Add yarn and manage tension
When joining a new length or changing colors, overlap the two yarn tails behind the same warp row. This helps keep the join discreet on the front. Work across the colors from left to right as you move up the loom, rather than completing one entire color column before starting the next. Avoid pulling firmly as you weave, since uneven tension can make the rug narrower in the middle and wider at the ends.
Pause occasionally to inspect the edges and the overall shape. Small adjustments are easier to make before many more rows have been added.
Remove the rug and finish the edges
8. Take the rug off the loom
When the woven piece reaches your preferred height, carefully lift the warp loops over the nails along the bottom. Adjust the jersey yarn gently if the rows shift. Lay the loom flat on the floor before removing the warp from the top; this helps prevent the rug from stretching unevenly.
Tie each pair of warp threads into a knot close to the top woven rows. The project described had about 2′ of space between the rug and the top of the loom.
9. Secure and trim the ends
Use a tapestry needle to stitch each knotted pair of warp threads down the back of the rug for about 4″. Continue across the top, then trim the excess. Yarn tails can also be knotted on the back. If the ends are too thick to stitch down neatly, they may be left in place, but handle the rug carefully during cleaning.
Care, cost, and project time
The stated supply cost is about $85, not including a drill already on hand, and the weaving takes approximately 15 hours. Because jersey yarn and handwoven fabric may respond differently to washing, spot-treat the rug or hand-wash it gently, then let it dry flat or over an even surface.
A static lines woven rug is a distinctive handmade accent, but its size and care needs are worth considering before you begin. The original project lists the finished dimensions as 4.5″ x 6″; confirm that these are the intended units before cutting materials. –Rachel


