
 admin
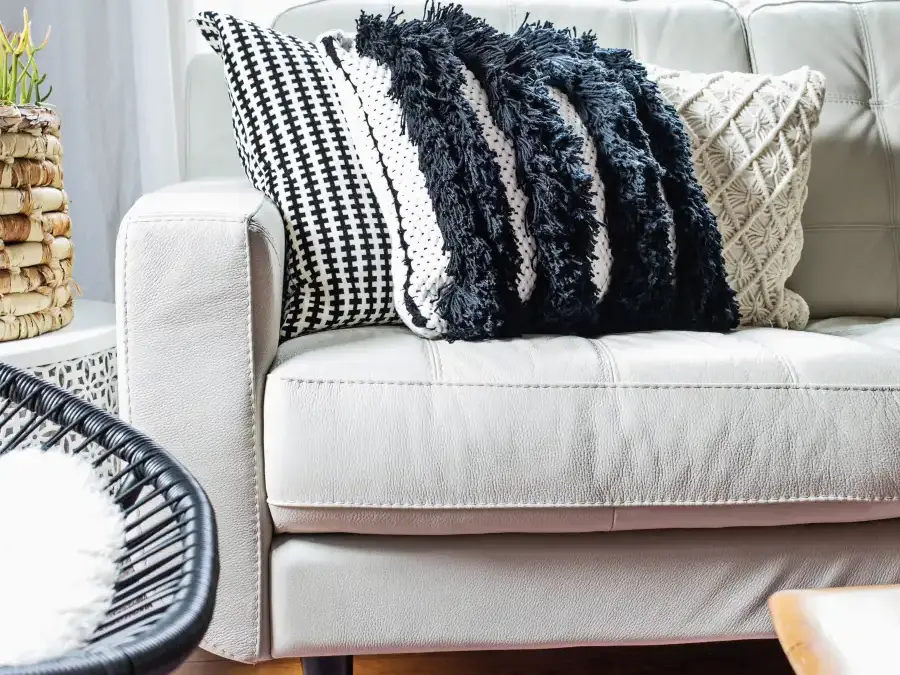
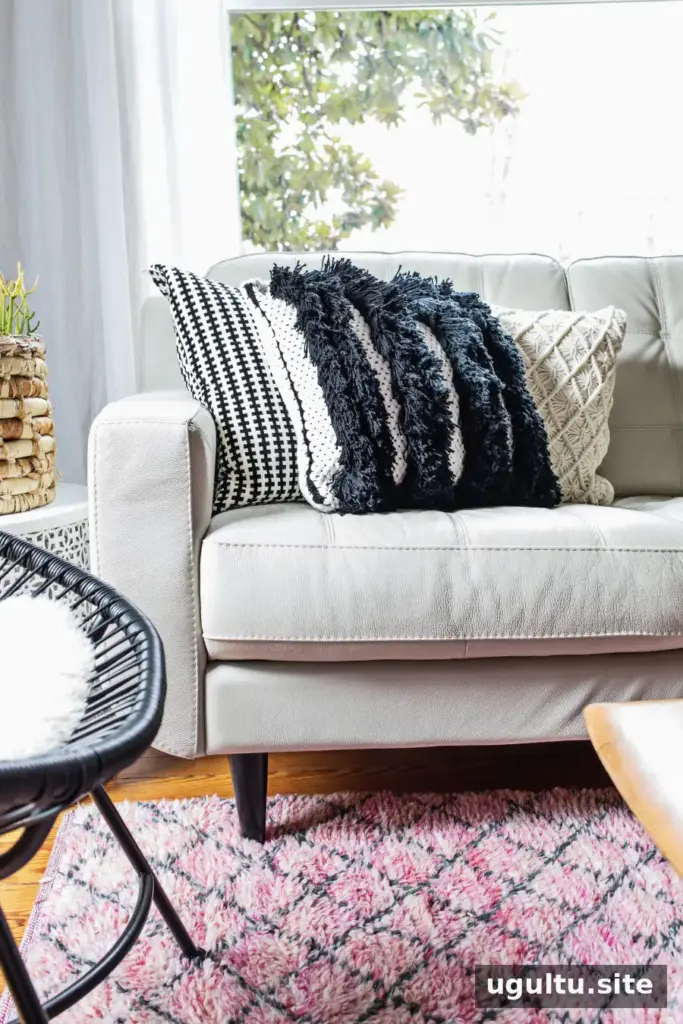
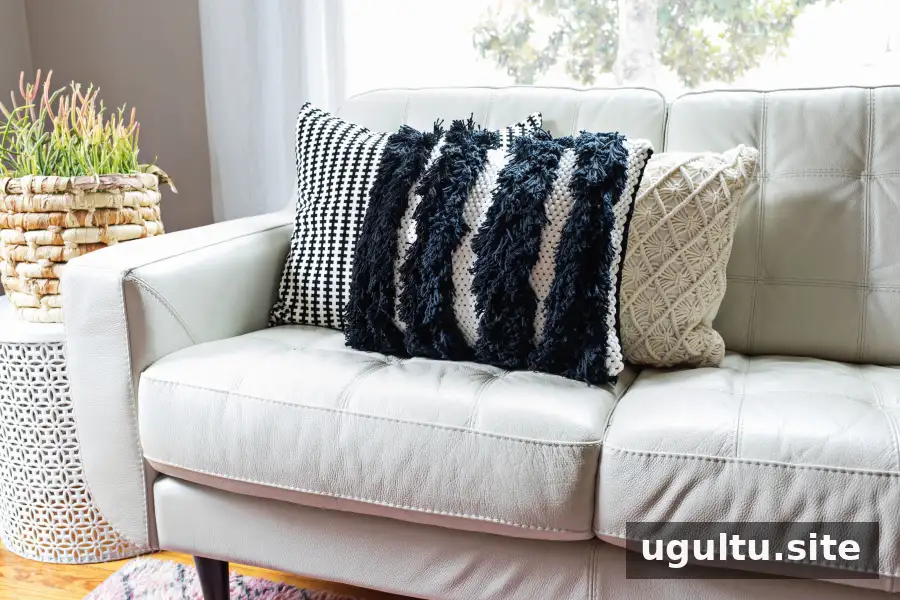
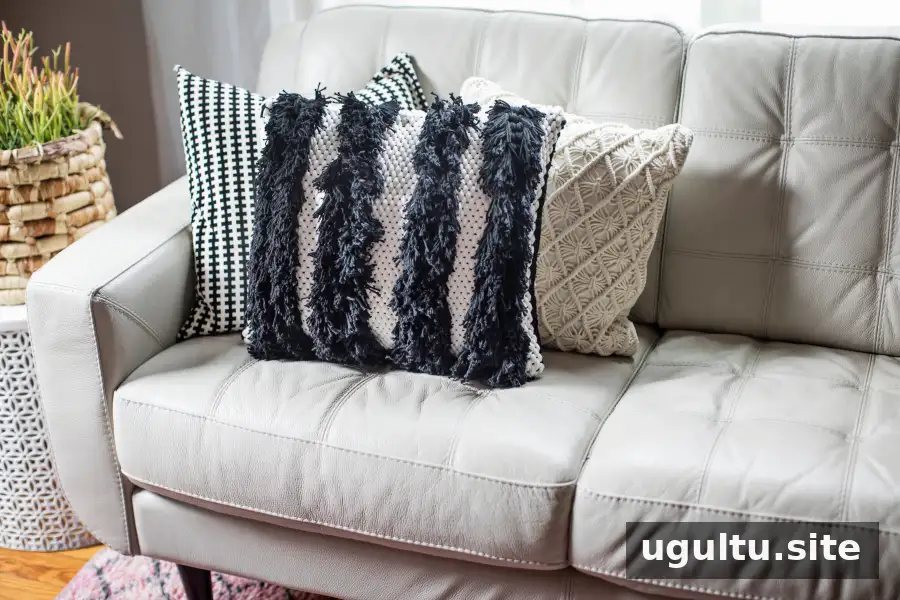
A woven pillow DIY project is a practical way to bring texture and handmade character into a room. This design combines warm-white fabric yarn with black cotton yarn and layered rya-knot fringe. If you already know basic frame-loom weaving, you can apply those skills to home accessories; beginners can also follow the steps below to make a pair of panels and stitch them around a pillow form.
The suggested palette is black and warm white, but the colors can be adapted to suit your space. Choose contrasting yarns for a bold pattern or similar tones for a softer, more subtle finish. Keep the yarn weights and measurements consistent with the instructions so the woven panels fit together neatly.
Woven Pillow DIY supplies and setup
Gather the materials before warping the loom. The listed loom size and pillow form are intended to work together, so check that you have enough room to weave panels of matching dimensions.
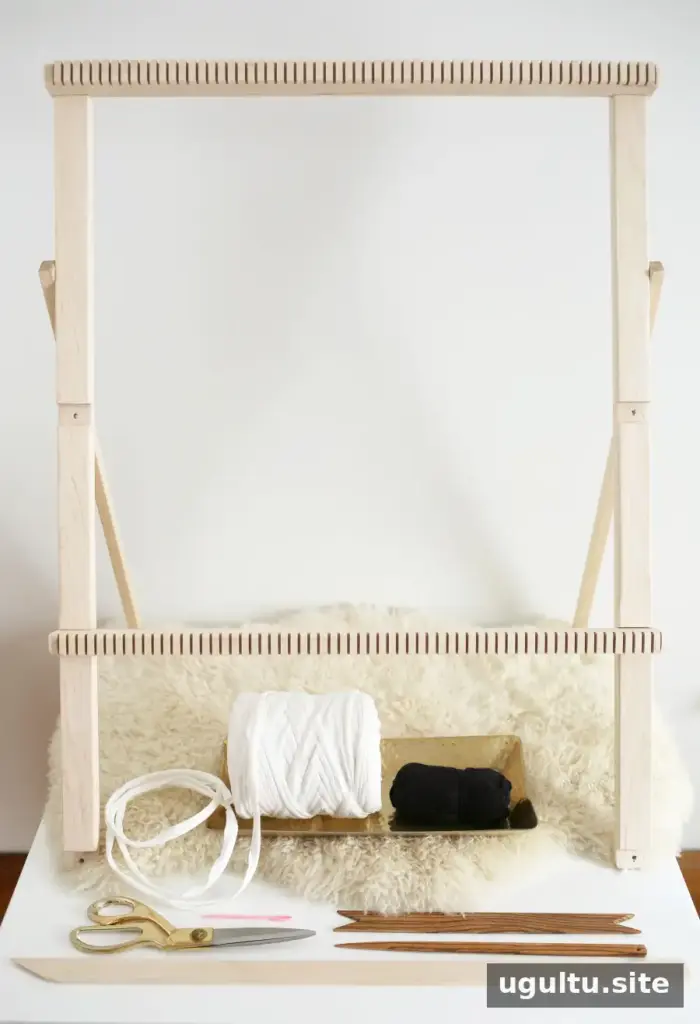
- 24″ x 32″ adjustable frame loom and weaving sword. As an alternative, make a simple loom by placing two rows of nails about 18″ apart on a piece of plywood, with nails spaced 1/8″ along each row.
- 100 yards of warm-white fabric yarn.
- 300 yards of black cotton yarn for the fringe.
- One 12″ stick shuttle.
- One 12″ weaving needle, or a smaller needle if that is what is available.
- One 3″ plastic or metal tapestry needle.
- Scissors.
- One 18″ x 18″ pillow form; down-alternative or real down are options.
Weave the front panel
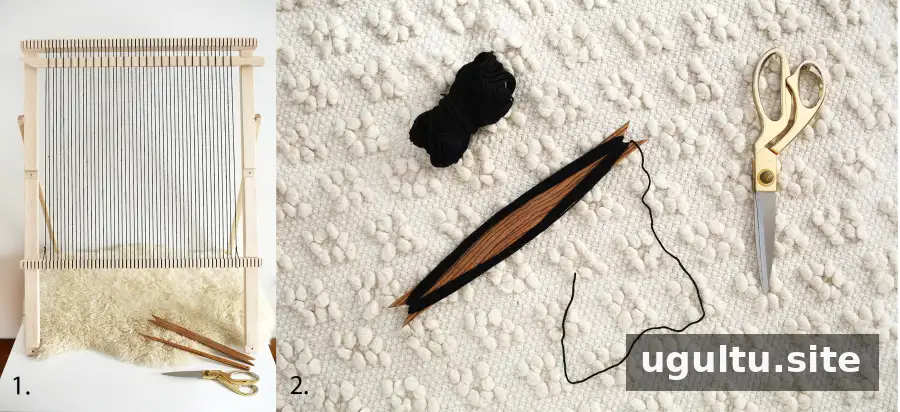
1. Warp the loom. Use black cotton yarn to warp the loom to about 21″ wide and at least 21″ tall. The weaving does not need to reach the very top of the loom. Cotton in a contrasting color helps define the pattern; using a color close to the fabric yarn creates less contrast.
2. Prepare the shuttle. Wind about 8 yards of black cotton yarn onto the stick shuttle in a figure-eight pattern. This lets you weave longer sections before adding more yarn and reduces the number of loose ends to tuck in.
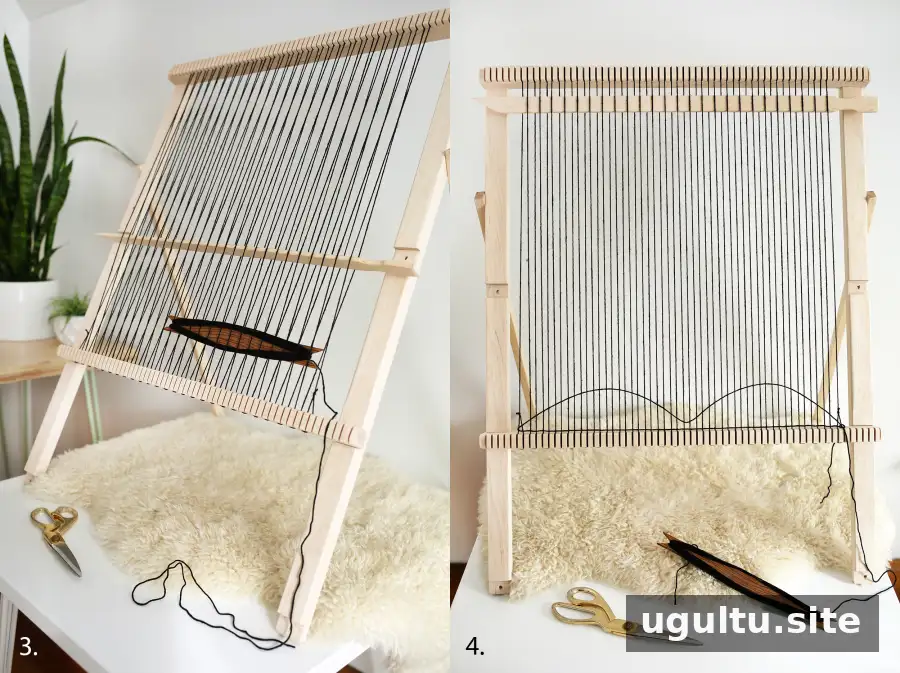
3. Weave the first rows. Pass the weaving sword over and under the warp threads, then tilt it to separate every other thread. This opens a passage for the stick shuttle. If you do not have a weaving sword, a yardstick can serve as a substitute. Pull the shuttle through and leave a 4″ tail at the starting side.
On the opposite side, draw the yarn through with a small arch rather than pulling it tight. Press the arch down at its center with your fingers, a fork, or a comb, then work across the remaining arches until the yarn sits evenly at the bottom of the loom. This helps prevent overly tight rows and inward-pulling edges.
4. Continue in the opposite direction. Use the shuttle to weave the next row over and under the warp in the reverse pattern. Form a small arch as you go, then gently press it down. The weaving sword can also be used to beat each row into place.
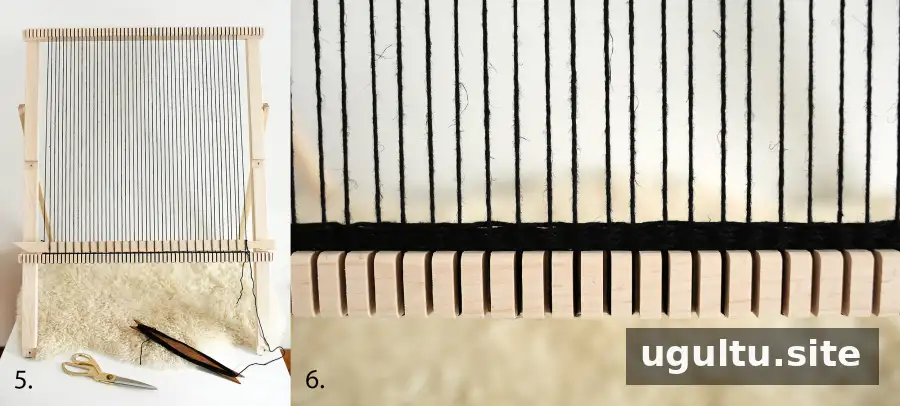
5. Add the first black section. Weave eight to ten rows of black cotton yarn. Finish at a side, leave a 5″ tail, and bring the yarn around as if beginning the next row. Tuck the end to the back of the warp.
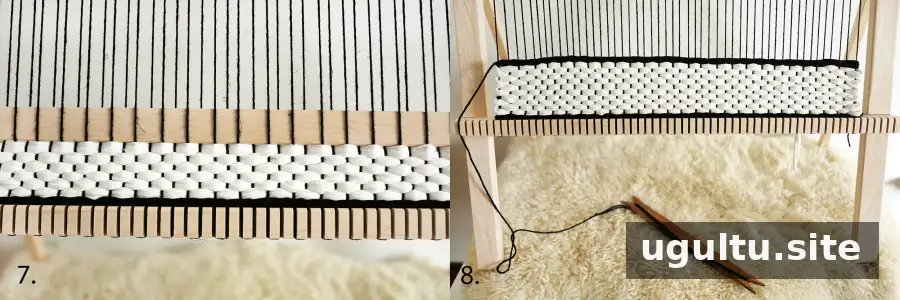
6. Weave the white section. Cut about 5 yards of white jersey yarn. Weave eight to ten rows using your fingers or a tapestry needle with a large eye. Jersey yarn stretches, so use a light hand and avoid pulling it taut, which can make the panel narrow in the middle. Leave a 5″ tail at the side, wrap it around as though starting another row, and tuck it behind the loom.
7. Add another black section. Weave eight to ten rows of black cotton yarn. The white fabric-yarn sections will be framed by black rows on both sides.
Make the layered rya-knot fringe
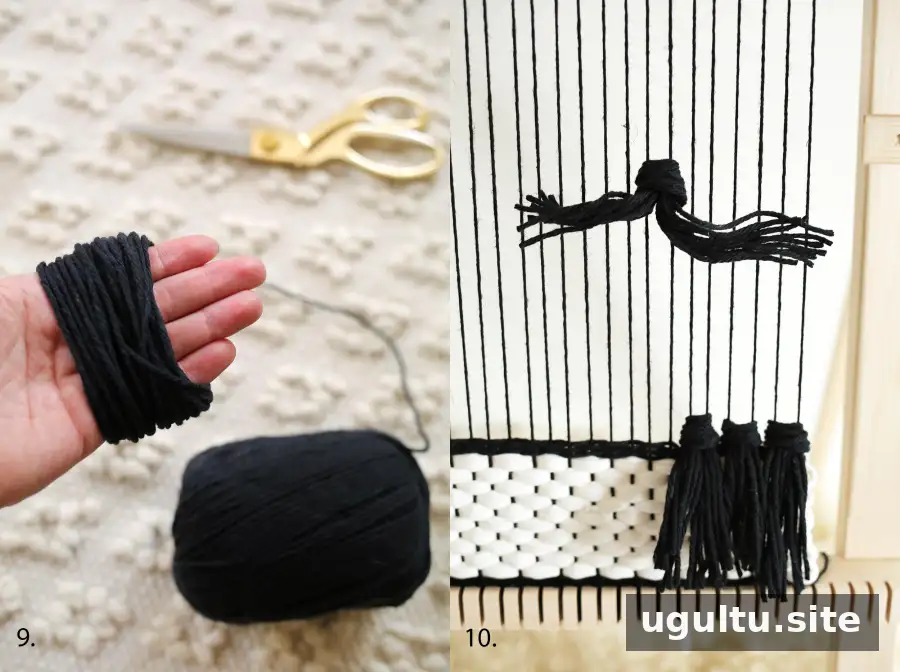
8. Prepare the fringe strands. Wrap black cotton yarn around four fingers 30–40 times, then cut the bundle once to create 30–40 strands. You will make multiple bundles, so there is no need to count each wrap exactly. Avoid wrapping more than this at a time, as a larger bundle can become uncomfortable on your hand.
9. Tie the first row of rya knots. Each knot uses ten strands. Center a bundle over the two outer warp threads, beginning at either side. Wrap the left half around the left warp thread and the right half around the right warp thread. Adjust the strands so both sides meet evenly in the middle, then ease the knot down until it rests on the weft row beneath it. Do not pull so hard that the warp threads move together. Repeat across the loom; the fringe can be trimmed evenly later.
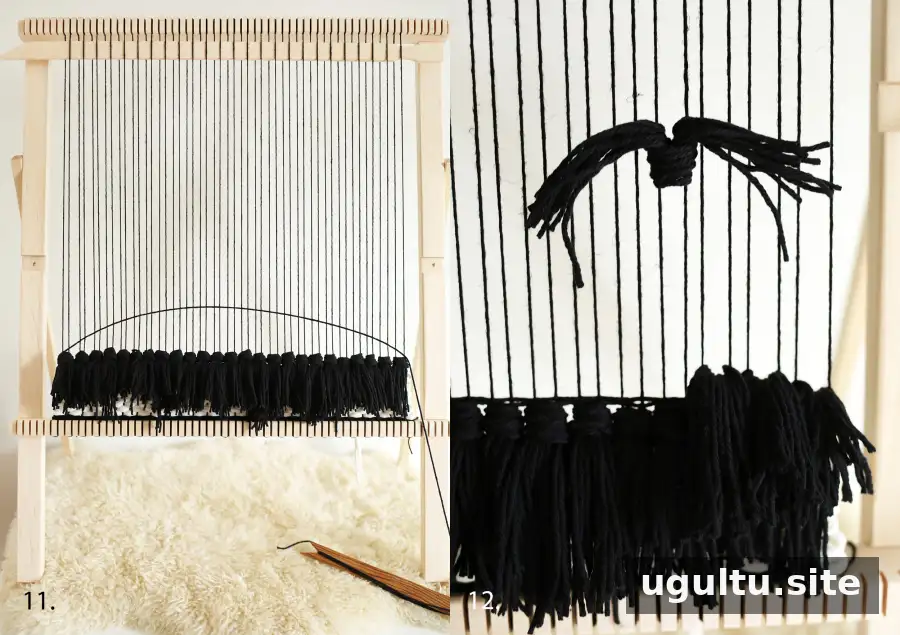
10. Secure the first fringe layer. Weave four rows of black cotton yarn. These rows help stabilize the woven structure between the rya-knot layers.
11. Add a mirrored fringe layer. Make another row of rya knots, starting at an outer edge and wrapping the strands so their ends turn up and over. This creates an upside-down version of the first knot row. If the direction is difficult to follow, turn the loom upside down. Mirroring the knots adds fullness to the fringe.
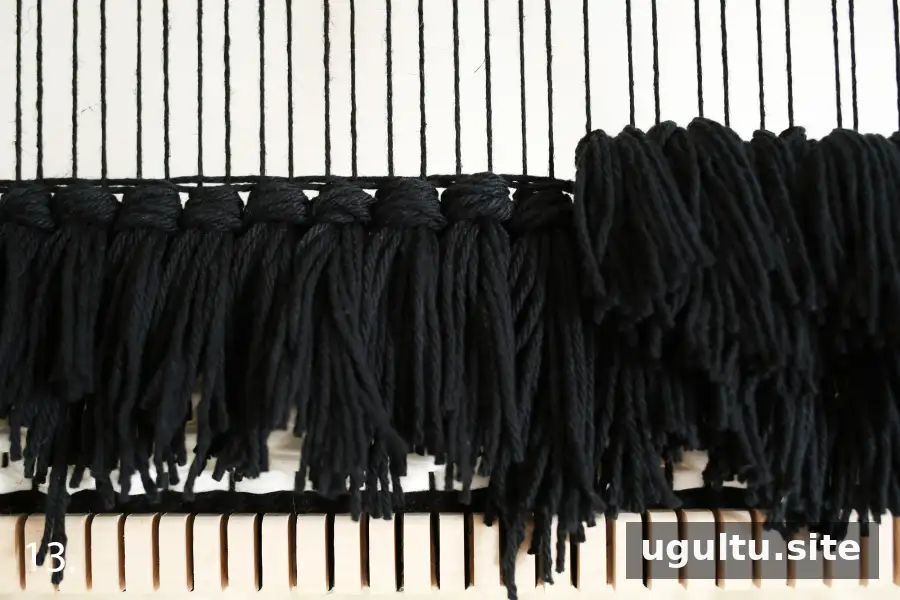
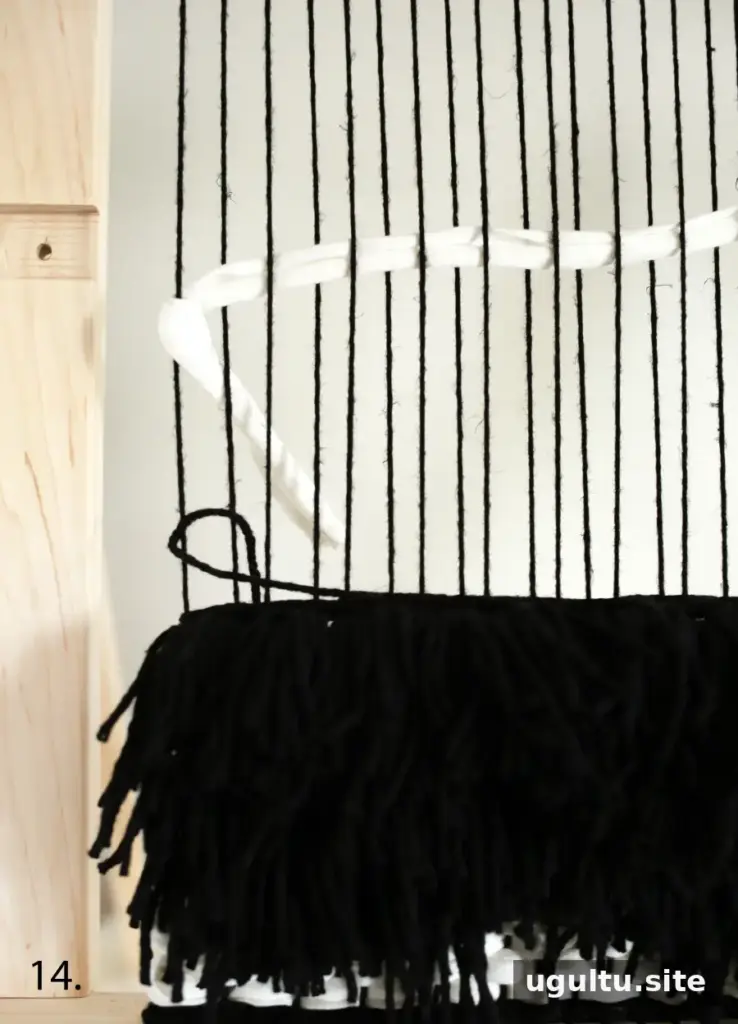
12. Continue the pattern. Weave another eight to ten rows of black cotton, then begin the next white fabric-yarn section. Tuck loose ends into the weaving for a tidier edge. Continue repeating the woven sections and layered fringe until the panel reaches about 21″ high; this should create approximately four rows of layered rya knots.
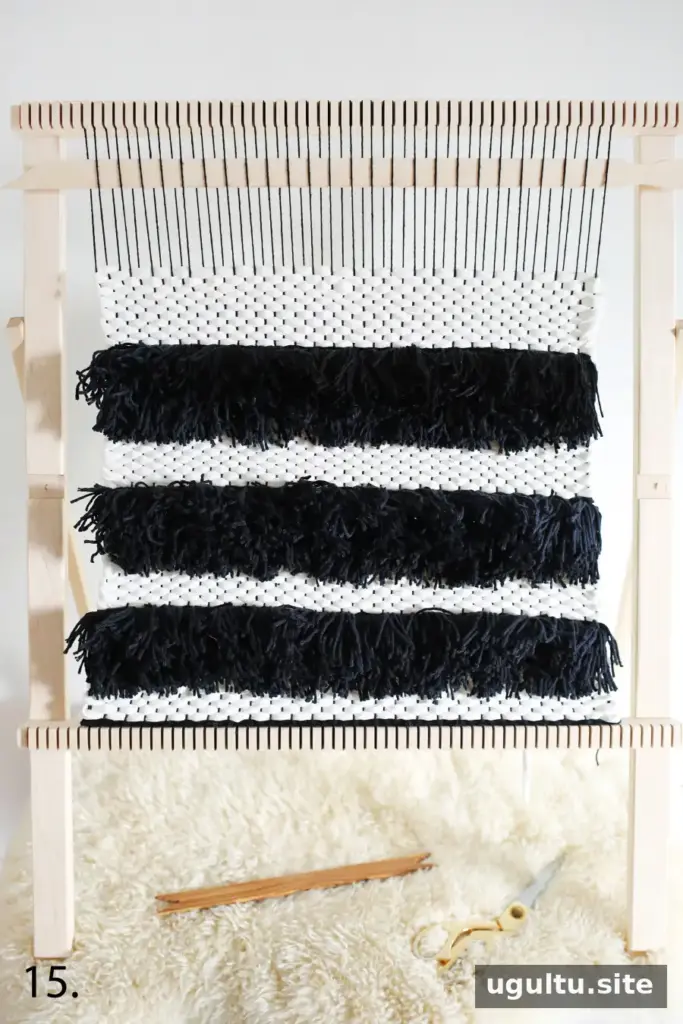
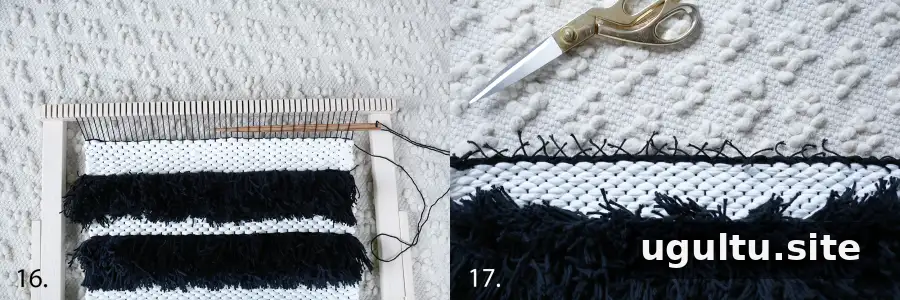
13. Finish the first panel. End with eight to ten rows of black cotton yarn. Use the 12″ weaving needle or the tapestry needle if the gap is too tight for the stick shuttle.
14. Secure the warp. Carefully lift a set of warp threads from the notches at the top of the loom, cut them at the top, and tie the two ends together with a double knot to secure the weft. Repeat across the top, then do the same at the bottom.
Make the back panel and join the pillow
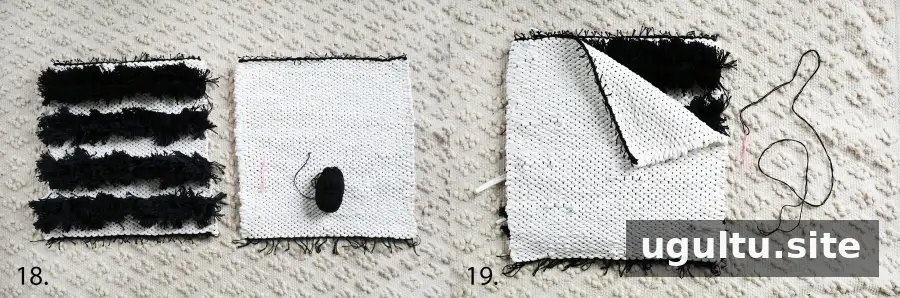
15. Weave the back panel. Make a second panel that matches the first in width and height. Begin and end with eight to ten rows of black cotton yarn, and weave the center with the white fabric yarn. Matching the panel dimensions makes the seams easier to align.
16. Position the panels. Place the back panel over the fringed front panel with their right sides facing each other.
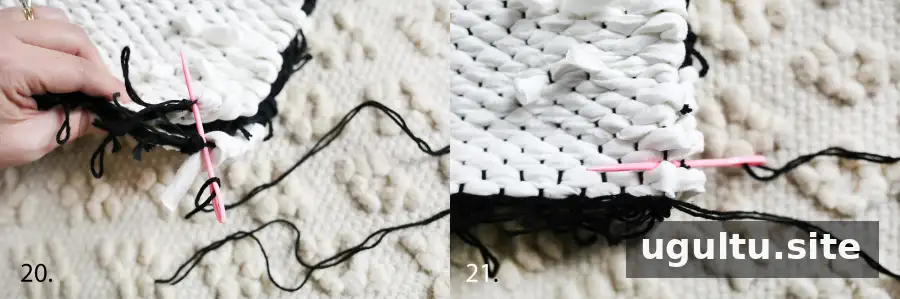
17. Stitch the first side. Cut a 5′ length of black cotton yarn and thread it doubled through the tapestry needle. Starting at a bottom corner, stitch between the knot and the beginning of the black weft rows on both panels. Secure the yarn with a double knot.
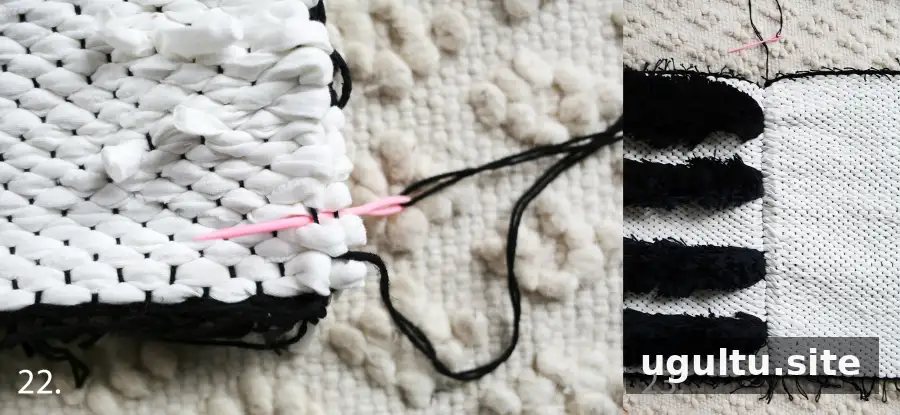
Continue by stitching between the second and third white-cotton weft rows, passing between the first and second black-cotton warp threads. Pull the yarn through until snug. From the back, wrap the needle around and stitch between the fourth and fifth weft rows, again between the first and second warp threads. Continue in the same direction between each pair of weft rows along the edge until you reach the top. Tie a double knot between the black cotton yarn and the knot securing the warp.
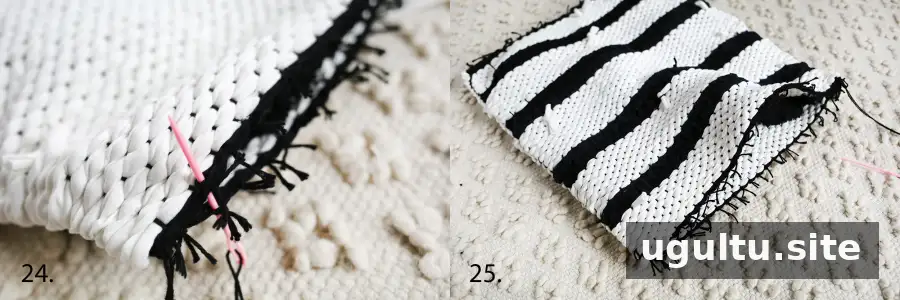
18. Stitch the second and third sides. Open the panels briefly to check that the seam is snug and does not leave large gaps. Put the right sides together again and cut another 5′ length of black cotton yarn. Tie a double knot at the corner, then stitch beneath the warp knots, passing through corresponding knots on both panels. Keep the tension even and secure the far end with a double knot. Stitch the third side in the same way, leaving the fourth side open.
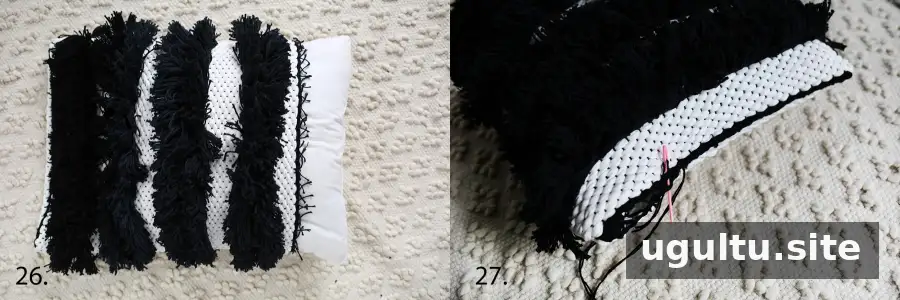
19. Insert the pillow form. Turn the cover right side out and gently push the corners into shape with your fingers. Insert the 18″ x 18″ pillow form.
20. Close the opening. Thread another 5′ length of black cotton yarn. Tie a double knot around the warp knots as before, keeping the tail inside the pillow. Fold the knotted ends inward as you stitch beneath them. Use either a blanket stitch or a ladder stitch; the black yarn blends with the black weft. At the end, tie a double knot, pass the needle into the pillow form and bring it out about 4″ away. Pull the yarn snug, trim it, and let the end slip back inside the form to conceal it.
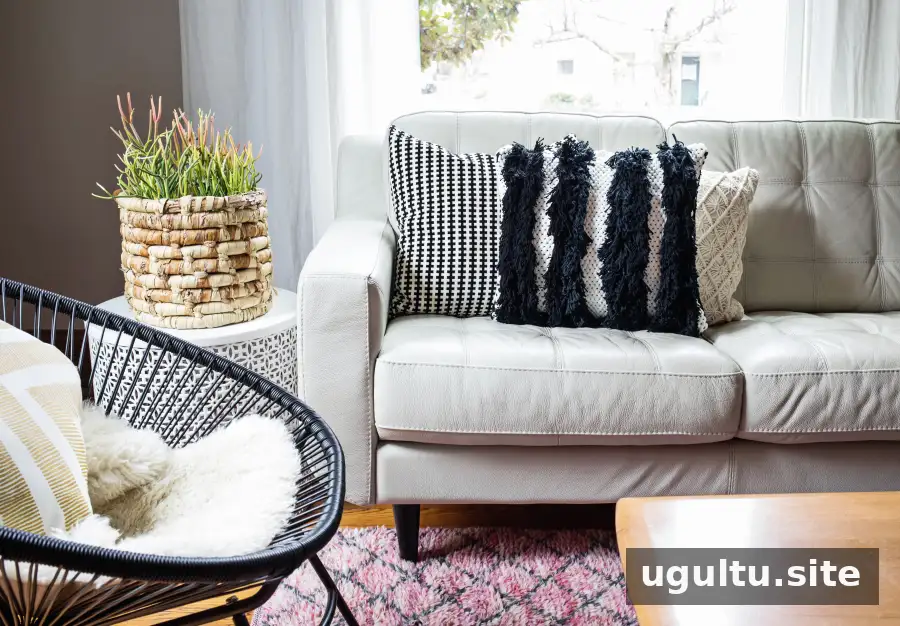
Once the cover is assembled, carefully trim the black cotton fringe so its ends look more even. Make small cuts and check the shape often; trimming gradually helps avoid removing too much.
Finishing and customization tips

Jersey yarn is a quick-to-weave, durable choice for the pillow’s base, while the cotton fringe is also durable and is described as not shedding onto clothing. To make a removable cover, add a zipper to one side before sewing the remaining sides. Wash the cover inside out in cold water.
You can change the project’s scale if your loom allows it: a larger design can become a floor pillow, while a smaller version can work as a decorative accent. The same woven design can also be lined with canvas and fitted with straps to make an oversized tote. When changing the size, make sure both panels are the same dimensions and choose a pillow form that fits the finished cover.
This woven pillow DIY brings loom weaving into everyday home décor, with a customizable color palette and a textured fringe finish. Rachel


