
 admin


A wraparound side braid keeps hair gathered away from your face and neck while creating a polished look from the front and back. It can also be a useful option for layered or uneven-length hair, since the braid follows the nape of the neck and can help secure shorter pieces that might slip out of a simple side braid.
The style takes a little more attention at the beginning than a basic braid, but the technique is straightforward: start near one ear, braid along the nape, and add hair from only one side as you go. For a neater result, brush through your hair first and work with small, even sections.
How to Make a Wraparound Side Braid
Choose the side where you want the finished braid to rest. For example, sweep your hair to the right and begin on the left. Keep a few bobby pins nearby if you have shorter layers around your face.
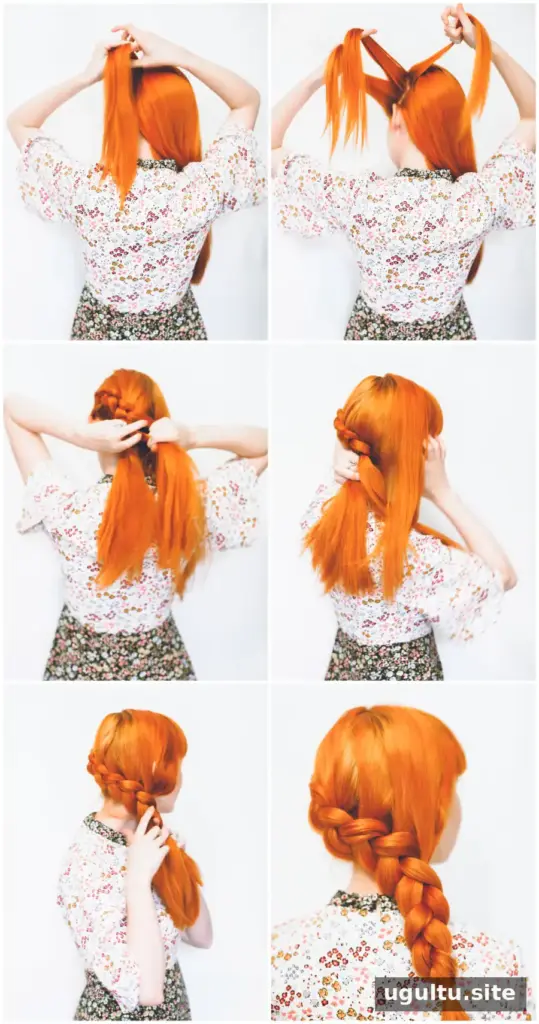
Step 1: Start with clean, brushed hair swept to one side. Position the bulk of your hair where you want the finished braid to fall.
Step 2: Take a small section just above one ear and divide it into three strands. Starting with a small section makes it easier to control the braid as it curves around your head.
Step 3: Choose a Dutch or French braid. For a Dutch braid, cross the outer strands under the middle strand; for a French braid, cross them over. The example uses the Dutch technique: cross the far-right strand under the middle, then cross the far-left strand under the new middle strand.
Step 4: Add a small section of hair to the far-right strand and cross it under the middle. Then cross the far-left strand under the new middle strand. Continue adding hair from just one side rather than adding hair to both outer strands.
Step 5: Keep braiding along the nape of your neck, adding hair to the same side each time. Keep the braid low and snug, but avoid pulling so tightly that it feels uncomfortable.
Step 6: Add the final section of hair when the braid reaches just below your opposite ear. This placement helps the finished braid fall over your shoulder.
Step 7: Continue with a regular three-strand braid through the ends, then secure it with a hair tie.
Tips for a Neat, Comfortable Braid
- Use sections of a similar size so the braid looks even as it travels around the nape.
- If shorter layers loosen, tuck them into the braid as you work or secure them discreetly with bobby pins.
- For a softer look, gently loosen the braid after tying it off. Do this gradually so it stays secure.
- This style can also be worn with a hat that sits a little higher on the head; check that the hat does not press uncomfortably on the braid.
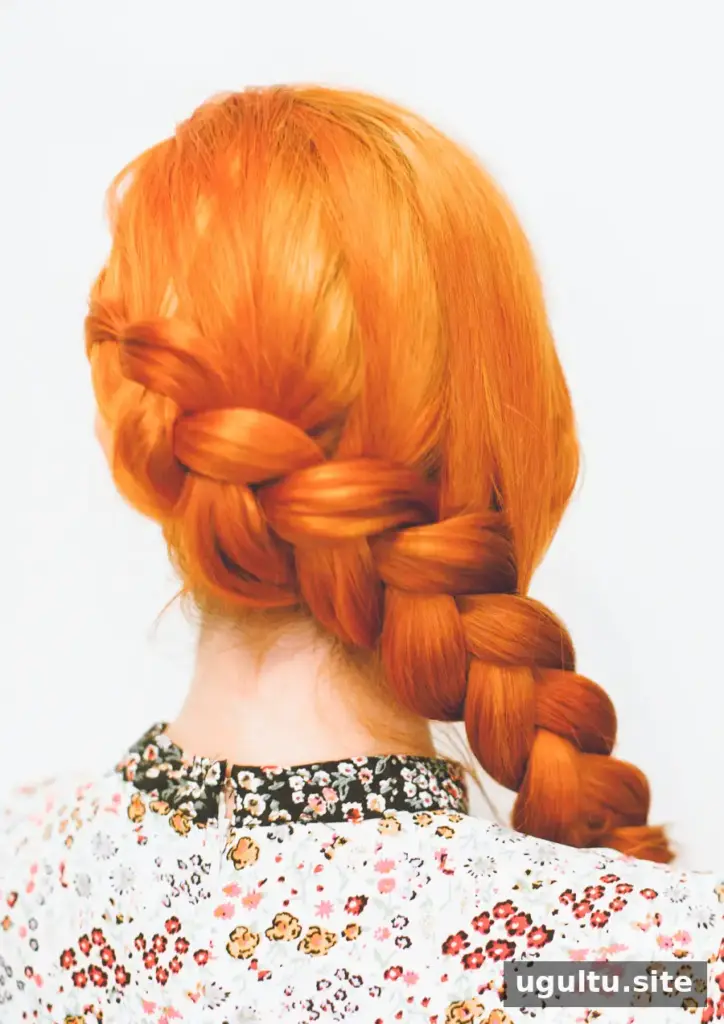
From the front, a wraparound side braid can resemble a simple side braid, while the woven section at the back adds detail and helps keep hair gathered. If you do not have bangs, or your bangs are long enough to braid, you can begin closer to the front hairline and continue around the back. Adjust the starting point to suit your hair length and the way you want the braid to sit.
Conclusion
A wraparound side braid is a practical hairstyle for keeping hair in place, especially when layers make a standard side braid difficult to manage. Start with brushed hair, add sections from one side as you braid along the nape, and secure the ends. The result works on its own or with a suitable hat. — Rebecca


