
 admin
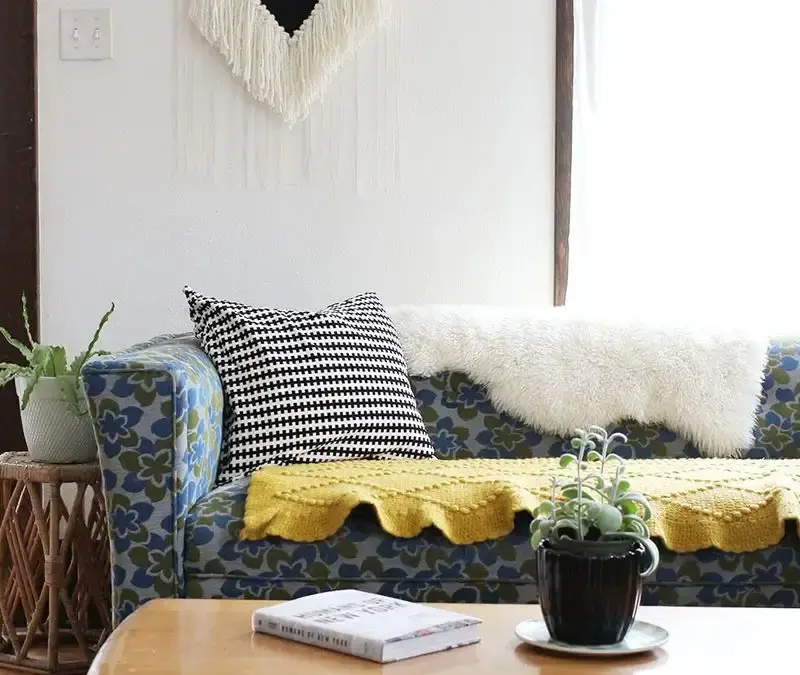
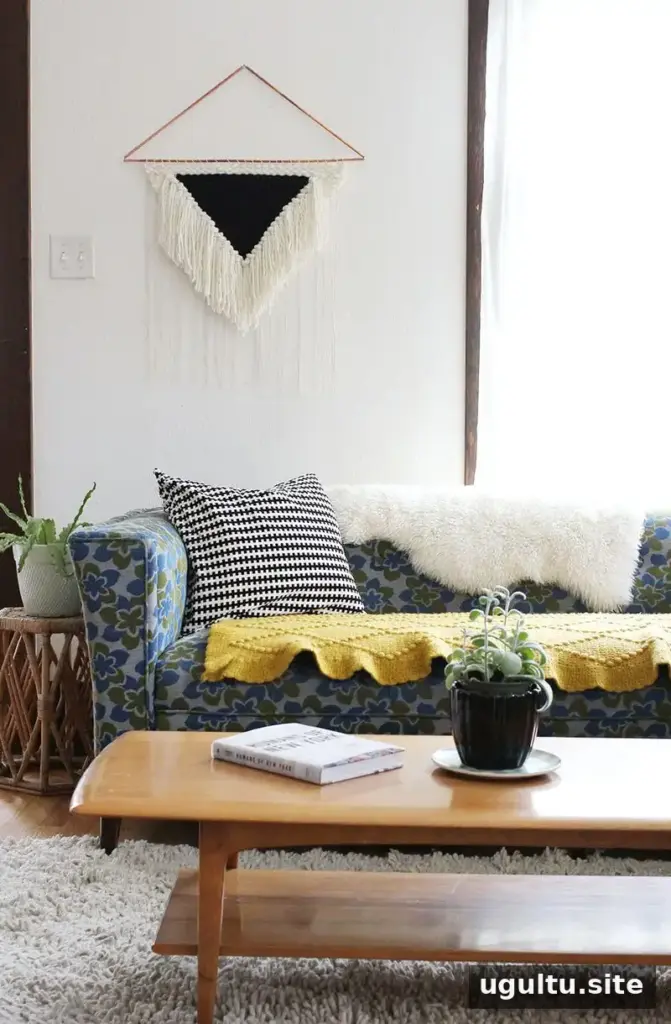
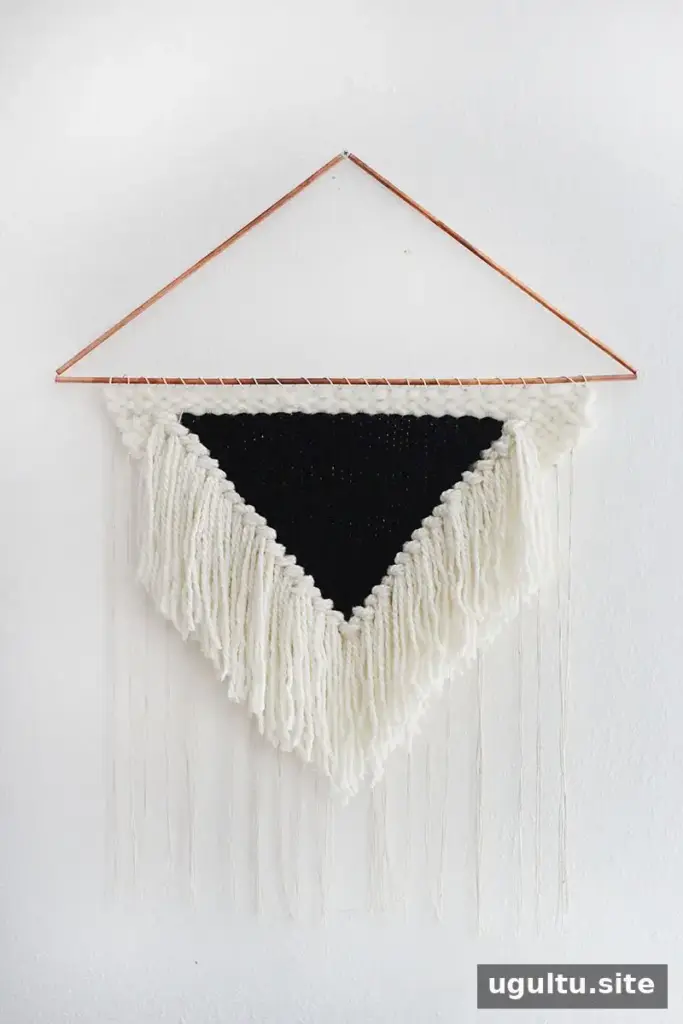
A large statement wall hanging can bring color, texture, and scale to an open wall. This weaving project uses a handmade cardboard loom, a mix of yarn weights, and three copper pipes that become part of the finished design. Adjust the yarn colors and fringe to suit your space, and check that your box is large enough for the dimensions you have in mind before starting.
The copper frame is made from one full-length pipe and two shorter pieces arranged as a triangle. Handle the pipes gently: thin copper can bend if squeezed too firmly, especially while cutting.
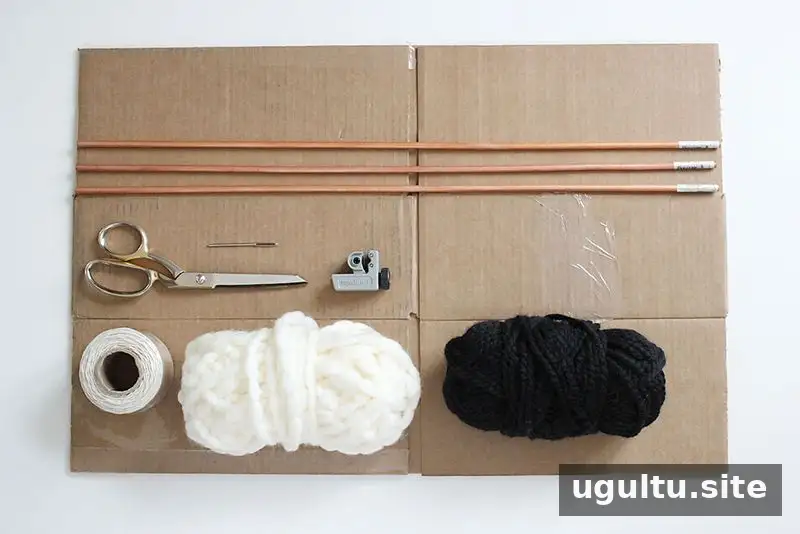
Supplies for a large statement wall hanging
Gather the materials before building the loom. A shuttle helps move yarn through the warp, but a paint stirrer or yardstick can work as a simple substitute.
- A corrugated cardboard box to use as a loom.
- Cotton yarn for the warp—the vertical foundation threads wrapped around the loom.
- Weft yarn in the colors and thicknesses you prefer.
- Three copper pipe lengths, each about 1/4 inch by 2 feet.
- A blunt tapestry needle with an eye large enough for your yarn.
- A copper pipe cutter.
- A shuttle, paint stirrer, or yardstick.
- Scissors.
Make a cardboard loom and set up the warp
A custom-sized wall hanging may need a loom that is not available in a standard size. A wooden frame can provide a sturdier surface, but a cardboard box is a practical option for this project. Choose a box that suits the height you want, then wrap the warp yarn across it to create the width.
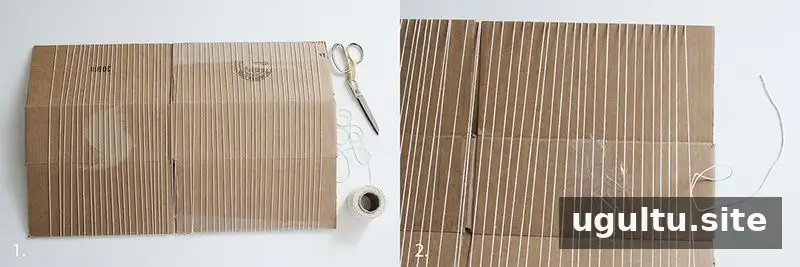
Step 1: Wrap the box
Tape one end of the cotton warp yarn to the back of the box on the left side. Wrap the yarn across the front and around the box repeatedly, moving from left to right. Keep the vertical warp strands evenly spaced, about 1/3 to 1/2 inch apart.
Step 2: Secure the other end
Tie the yarn at the back or secure it with tape. Check the warp from both sides and make sure the strands are evenly taut across the loom. A box with fewer folds is preferable because creases can bend under tension; if you are using a folded box, avoid pulling the warp so tightly that the cardboard bows.
Weave the design and shape the fringe
This design begins upside down so the angled fringe can be shaped at the bottom. When weaving, keep the weft loose enough to avoid drawing the sides inward. Lifting the yarn at an angle before pressing it gently into place helps maintain the width of the work.
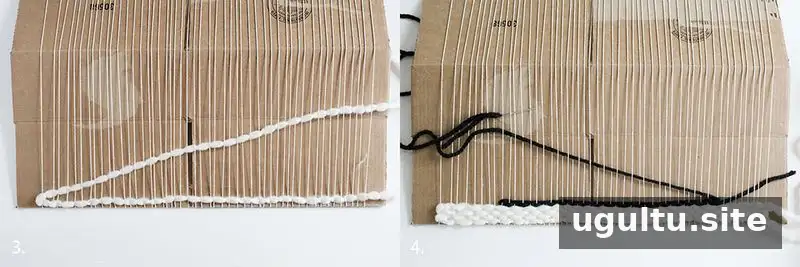
Steps 3 and 4: Begin weaving and make the triangle base
Weave the thick yarn over and under the warp, then return in the opposite direction. After four rows of white yarn, start the large triangle at its base. Count about nine warp rows in from each side and weave between those points, then continue back across.
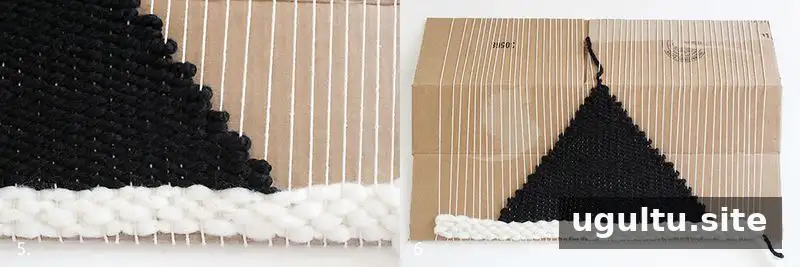
Steps 5 and 6: Build the triangle
Work from the triangle’s base toward its point. Weave two rows, then reduce by one warp row on each side. Form the triangle first, then fill in its sides. Keep checking the edges as you go so the shape remains balanced.
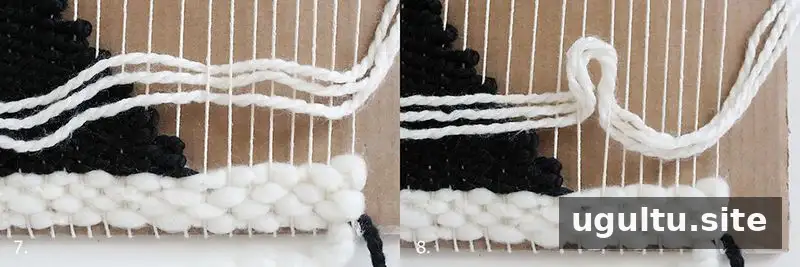
Steps 7 through 10: Add rya knots
Cut three lengths of yarn, each about 15 inches long. Place them beneath two warp threads where you want the first rya knot. Pull the yarn up from below to create a small bridge, wrap the long ends up and under that bridge, and gently tighten the knot. Slide it down until it rests against the woven section.
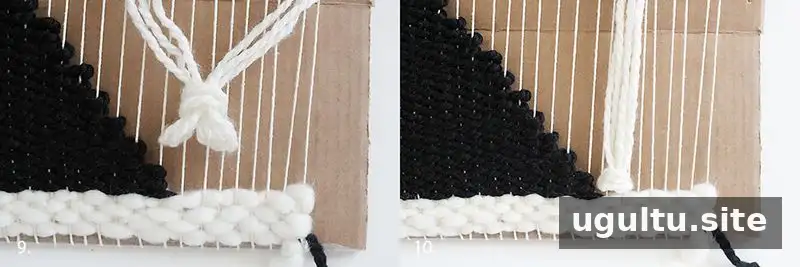
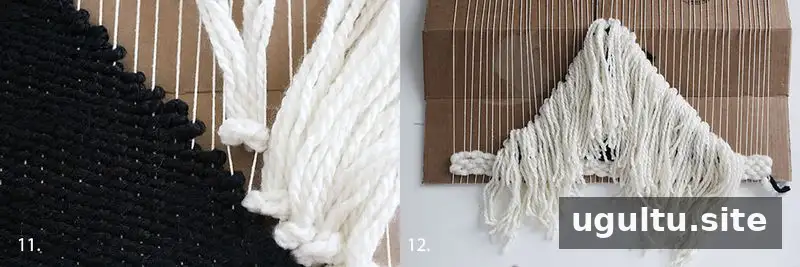
Steps 11 and 12: Continue the fringe
Add rya knots along one side of the triangle and then the other. The knots can overlap, with the next knot using the same warp row as the previous one. Turning each completed knot toward you can make it easier to see the next row. Three strands of thick yarn create a full fringe; for a lighter result, use two strands or choose thinner yarn.
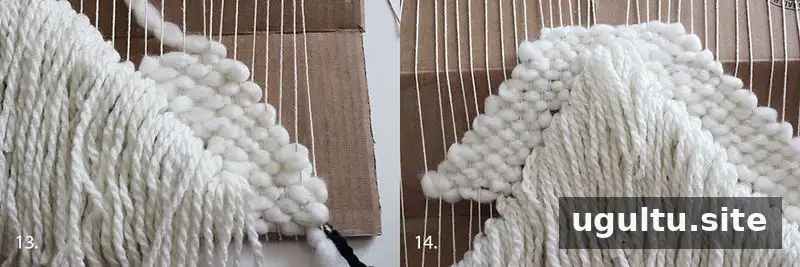
Steps 13 and 14: Fill out the shape
Continue filling the shape with the thick, roving-style yarn. Decrease one row at the outer edge while increasing one row as you move up the triangle. Because the roving yarn is about as thick as two strands of the black yarn, the shaping does not need to follow the same row spacing. Work to the top, then continue down the opposite side rather than forming a pointed tip. This can also help secure the shape.
Finish the weaving and assemble the copper hanger
Steps 15 and 16: Secure the warp ends
When the weaving is complete, cut the warp in small groups of six strands, leaving about 4 inches of warp at the wide base. Tie neighboring pairs together to prevent the weaving from coming undone. Continue across both the top and bottom. If three strands remain at one end, tie them together in a single knot.
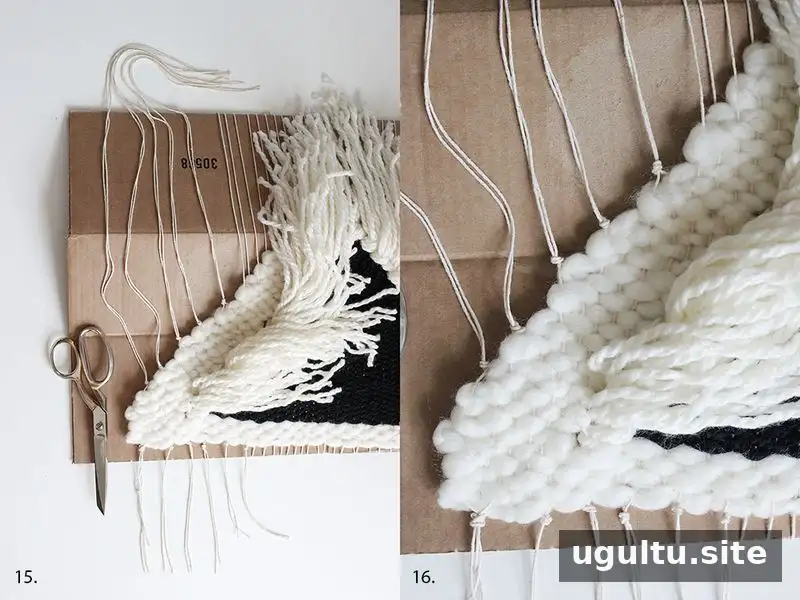
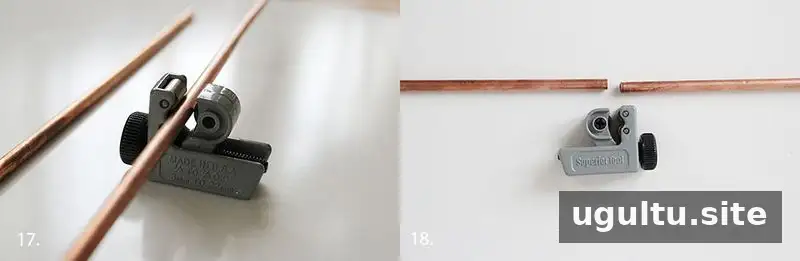
Steps 17 and 18: Cut the copper pipes
Use one full-length pipe as the top hanging bar. Cut the other two pipes shorter to make the sides of the triangle. Measure about 5 inches in from the end of each of those pipes and position the pipe cutter at the mark.
Tighten the cutter gently and rotate the pipe twice to make a small groove. Tighten slightly more and rotate twice again. Repeat until the cutter goes through the thin pipe. Do not overtighten, as pressure can bend the copper. Keep the cut-off pieces for another craft project.
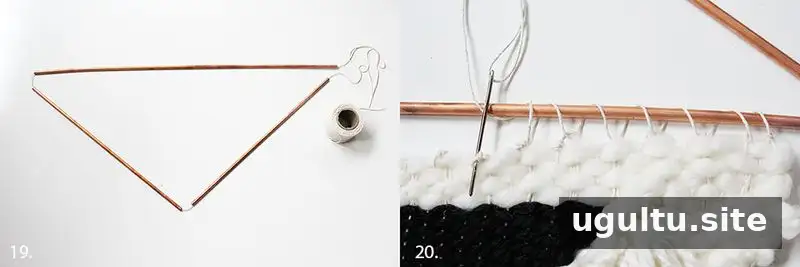
Steps 19 and 20: Connect the frame and attach the weaving
Thread the three copper pieces together with cotton yarn or twine to form a triangle, then tie a knot. Trim the yarn ends and tuck the knot into one of the pipe ends so it is hidden. This copper triangle forms the structural base for the weaving.
Tuck the top ends of the weaving behind the work, then stitch the weaving to the wide base of the copper triangle. Make sure the piece is securely attached before hanging it.
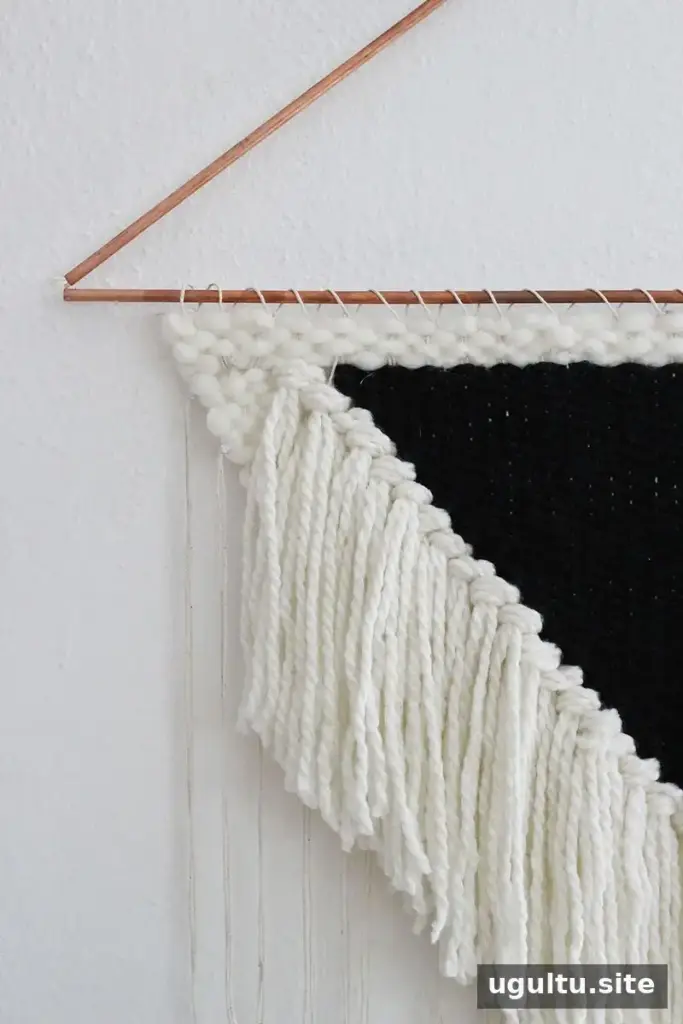
Hang and trim your large statement wall hanging
Once the weaving is attached, hang it and trim the rya knots into a clean angle that follows the black triangle. The thin warp rows can also be cut straight across at the bottom to create another layer of texture. Trim gradually and check the overall shape before removing more yarn.
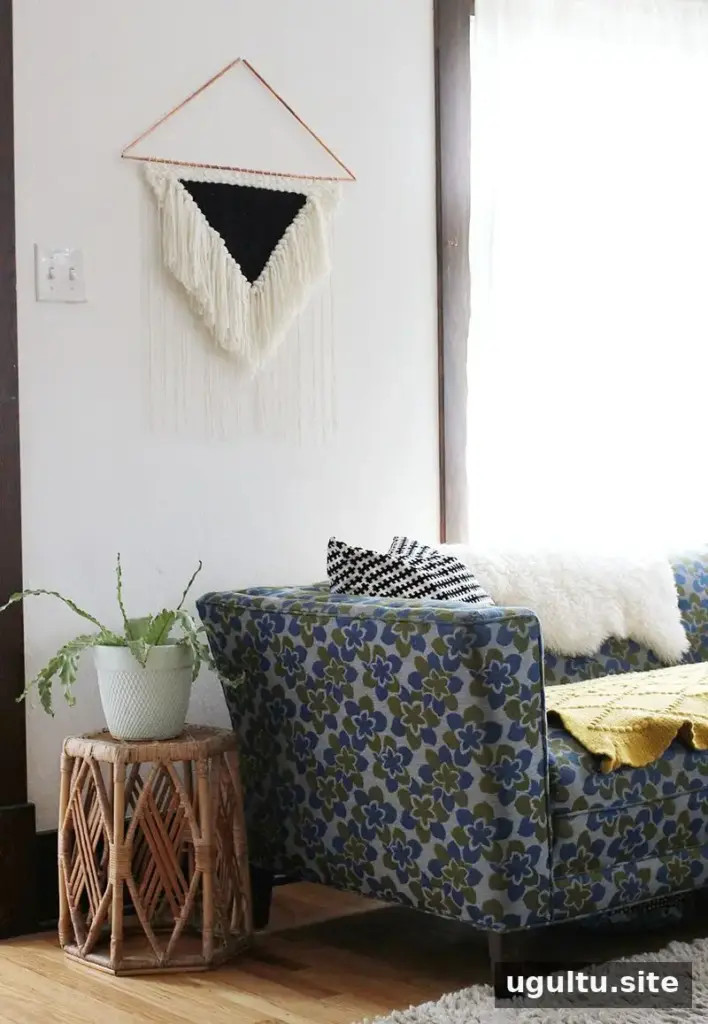
The copper triangle replaces a simple dowel with a frame that contributes to the design, while the varied yarn and fringe add dimension. With careful warp spacing, relaxed weaving tension, and secure knots, this large statement wall hanging can be customized to fit a larger wall. — Rachel


