
 admin
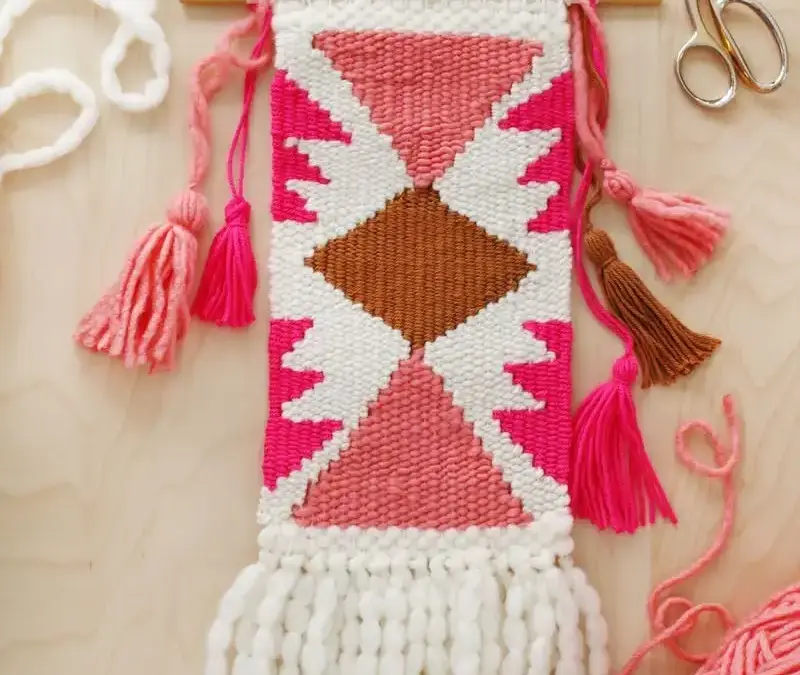
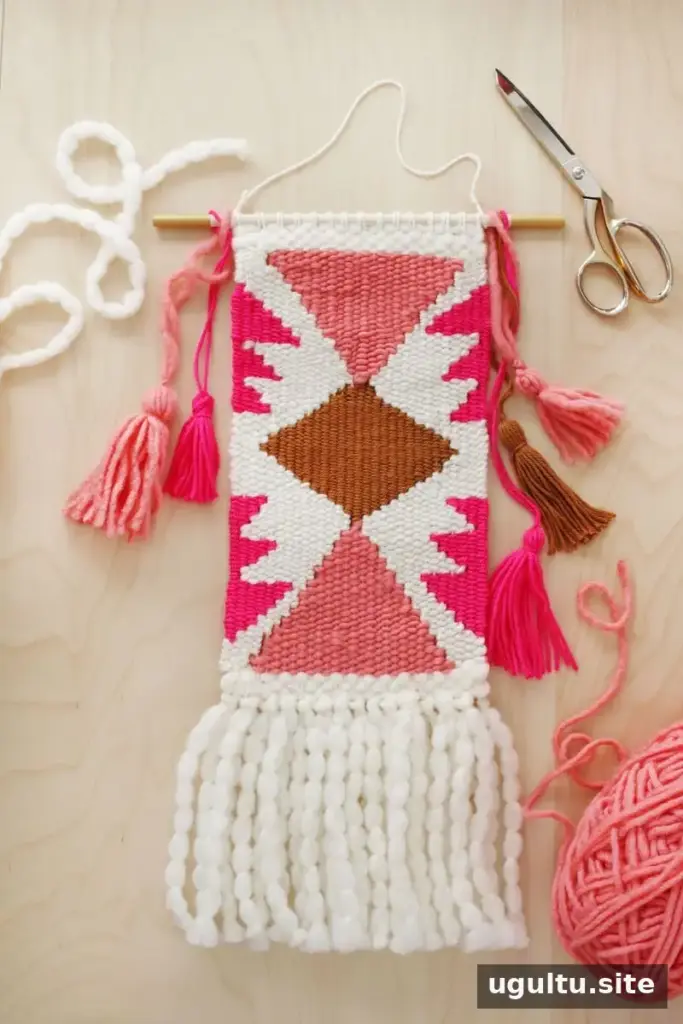
Learn how to make a woven wall hanging with simple geometric shapes, colorful yarn, fringe, and handmade tassels. This project builds on basic loom-weaving skills and shows how counting warp strands can help you create triangles, diamonds, and other graphic designs.
If you are new to weaving, review the basic tools and setup before you begin. Practicing the shapes on a small sample can make it easier to find a comfortable rhythm and plan your design.
Plan a woven wall hanging design
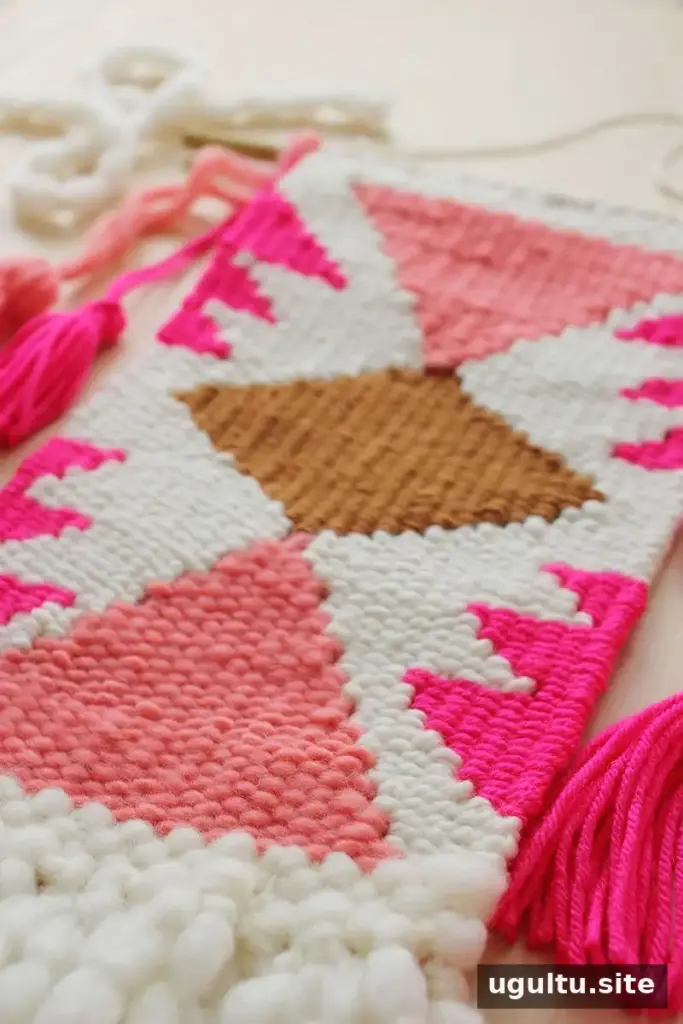
A design can start with simple rows in different thicknesses, textured knots, basketweave, or shapes formed by leaving negative space. Over time, you may find that you prefer particular colors, patterns, or combinations of textures. Try a few arrangements before settling on a design; a small sketch can help you see how the shapes will fit together.
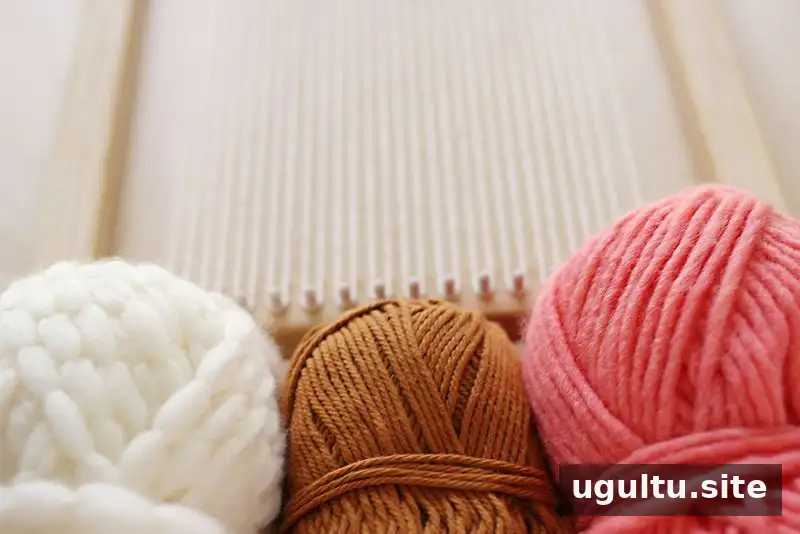
Choose yarns in a range of colors and thicknesses. Local yarn shops often carry natural fibers, wool roving, and specialty colors. If you do not have access to a nearby shop, standard craft yarns can also work. You can make a simple loom yourself if you do not already have one.
Materials and setup
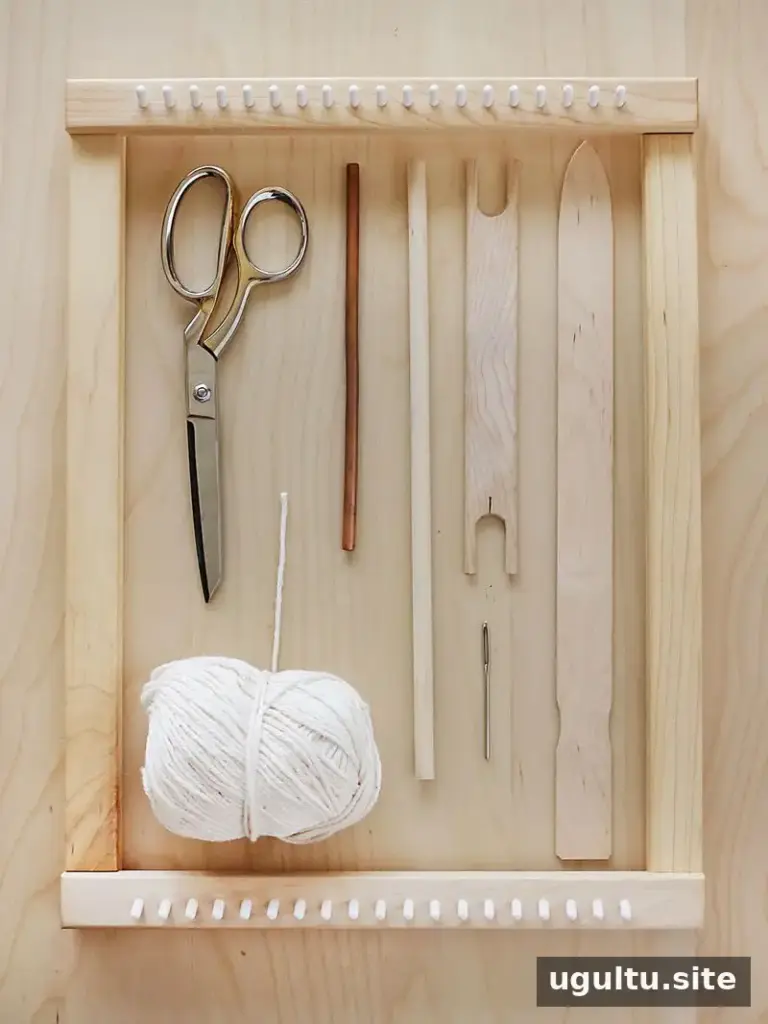
- A loom, such as a Lap Loom Model A.
- Cotton yarn for the warp, which runs vertically across the loom and forms the foundation.
- Weft yarn in your preferred colors and thicknesses.
- A wooden dowel, copper pipe, or sturdy stick that is 1–2 inches wider than the weaving.
- A tapestry needle, about 3 inches long, with a large eye and blunt tip.
- A shuttle, if desired, for carrying yarn through the opening in the warp. A tapestry needle can also be used.
- A shed stick to help open the warp for weaving. On this type of loom, one shed stick may be enough.
- Scissors.
Warp the loom and add fringe
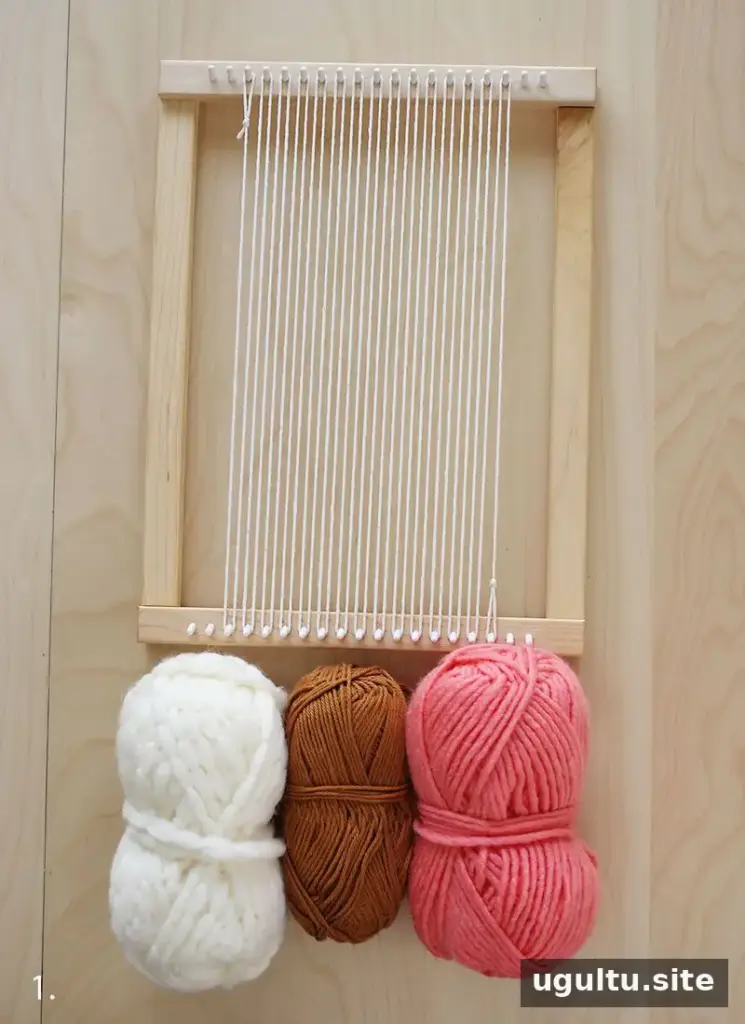
Step 1: Make a loop knot at the end of the warp yarn and secure it to the top-left peg. Bring the yarn down to the bottom-left peg, then back up. Continue across the loom to your desired width and finish with another loop knot. Keep the warp neither too loose nor too tight. As the weaving grows, the warp may become more taut; gently press down to even out irregular sections.
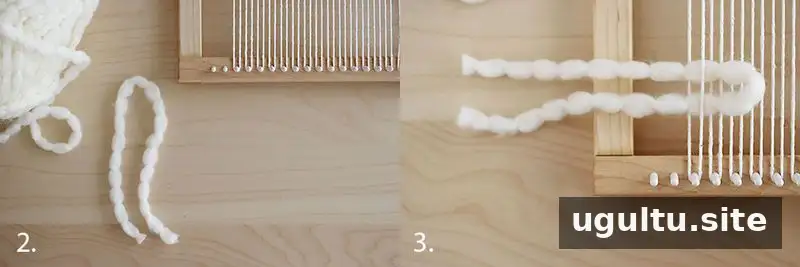
Step 2: Cut a length of yarn for the bottom fringe and fold it in half. Extra-thick yarn may need less length; for standard yarn, cut a longer piece before folding.
Step 3: Make one fringe knot for each bottom peg. Place the folded center over the first warp strand, pass it under the second, and bring it back up.
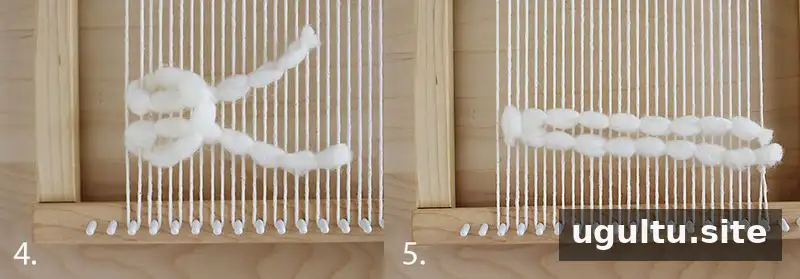
Step 4: Pass the loose ends through the folded center, as shown.
Step 5: Pull gently until the knot is secure.
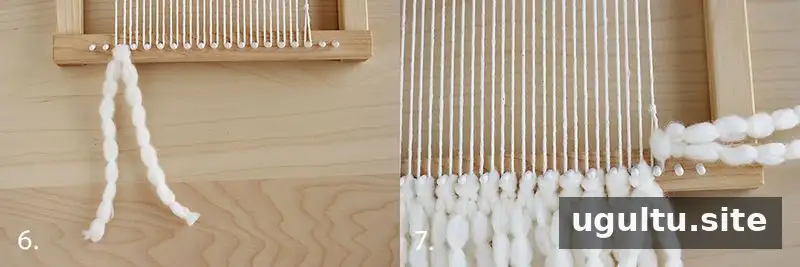
Step 6: Slide the fringe down so it rests beneath the peg. Repeat across the loom, then trim the fringe into a straight or angled edge.
Step 7: Attach fringe to the final peg by passing it through the loop knot. Trim the ends to match the rest.
Weave the base and shape the design
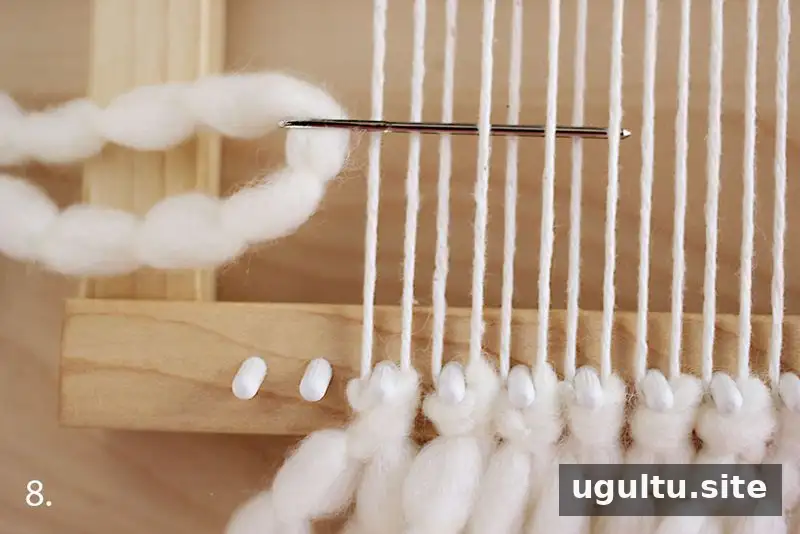
Step 8: Thread the tapestry needle with about 4 feet of yarn for the first color. Begin three or four warp strands in from the edge so the yarn tails can be tucked away. Weave under the fifth strand, over the sixth, under the seventh, and continue across.
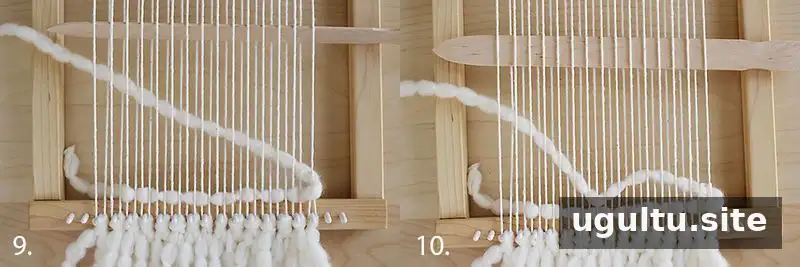
Step 9: When weaving back in the opposite direction, angle the yarn toward the opposite corner rather than pulling it straight across.
Step 10: Press the yarn down at the center first, then work toward both edges. Adjust with a gentle tug if needed. This helps prevent overly tight weaving and an hourglass-shaped middle. For thin yarn, use a fork or wide-tooth comb to push the rows into place.
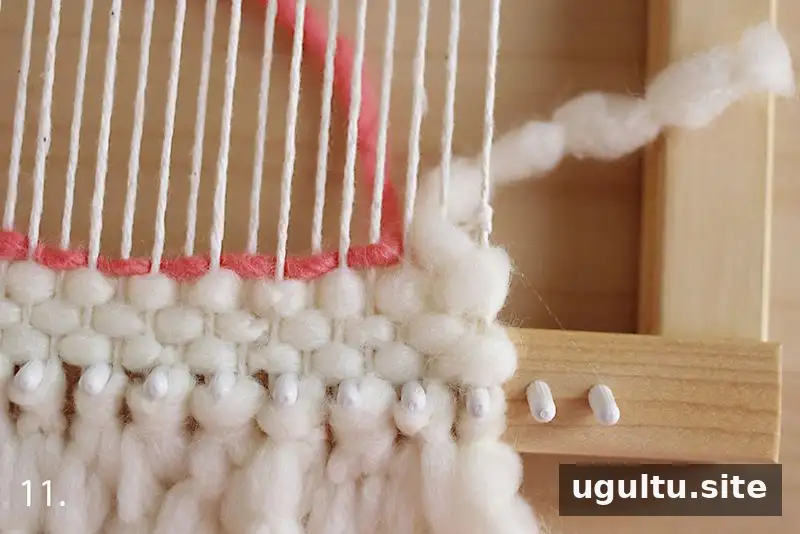
Step 11: Begin a triangle by starting the fourth row with a base color, then tuck its end in. Start the triangle color where the base color would have returned. If the triangle begins on the fourth warp strand from one side, end it on the fourth strand from the other side to keep the shape symmetrical.
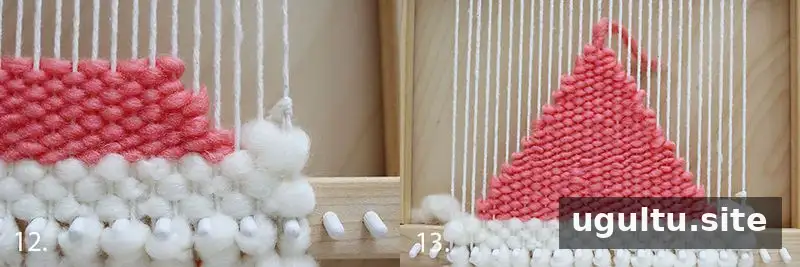
Step 12: Shape the triangle by changing the width of each row rather than weaving full-width rows. For a taller triangle, weave two rows at each width before reducing by one warp strand on each side.
Step 13: In this example, the rows are two rows of 23, two of 21, two of 19, and so on, down to two rows of one. Reducing by one warp strand on each side after every row creates a shorter, wider triangle. The open areas around the shape can be filled with additional shapes and a background color.
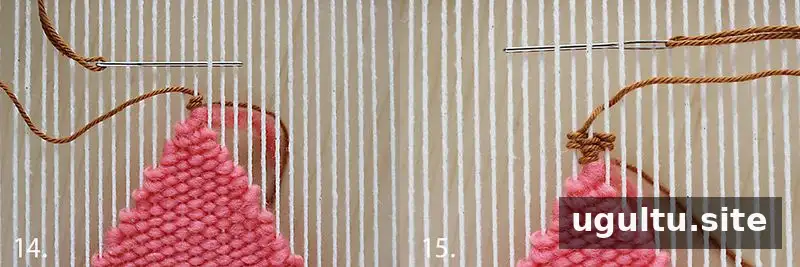
Step 14: Add a diamond above the triangle, with its point facing the opposite direction. Wrap the yarn twice around the center row, then begin the next row at a width of three warp strands.
Step 15: Weave two rows at each width, increasing from three to five, seven, and nine warp strands.
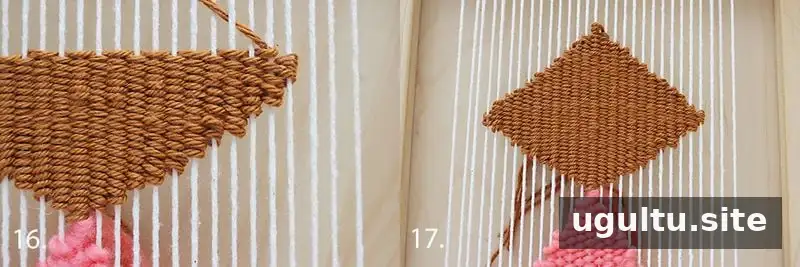
Step 16: Continue increasing until you reach the fourth warp strand from the edge. Then reduce the width in the same way to form the top half of the diamond.
Step 17: The completed diamond is made from two joined triangular sections.
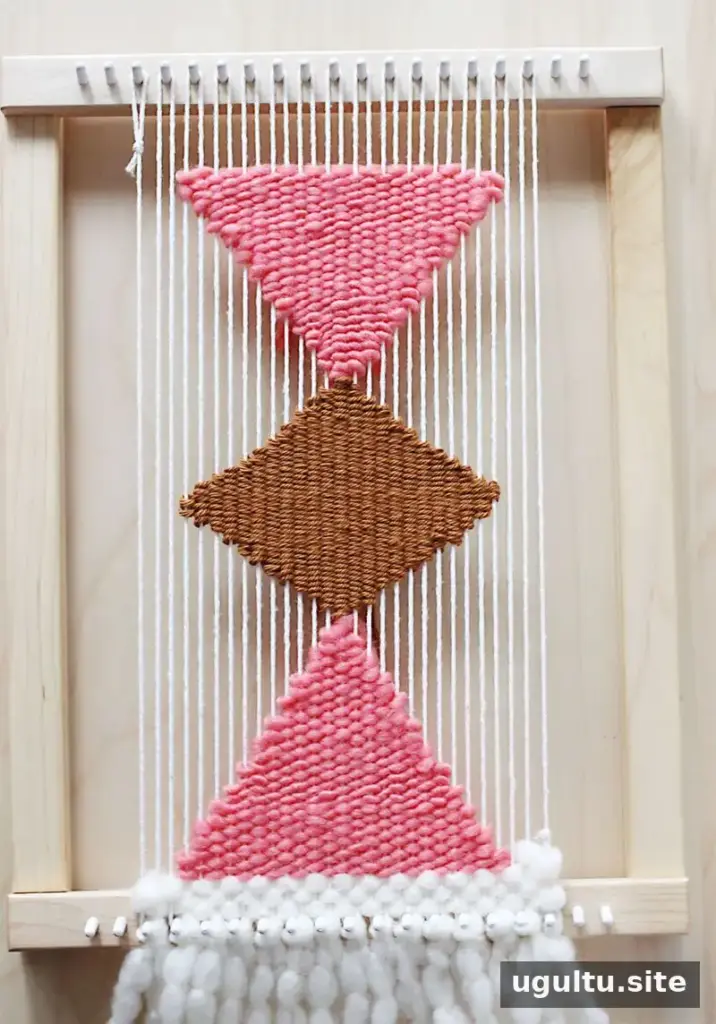
Add another triangle above the diamond, widening the rows gradually. Counting warp strands makes it easier to create a range of geometric shapes. Increase or decrease evenly for symmetry, or shift the pattern to one side for a diagonal design. For more detailed motifs, sketch the pattern on graph paper and treat each square like a pixel.
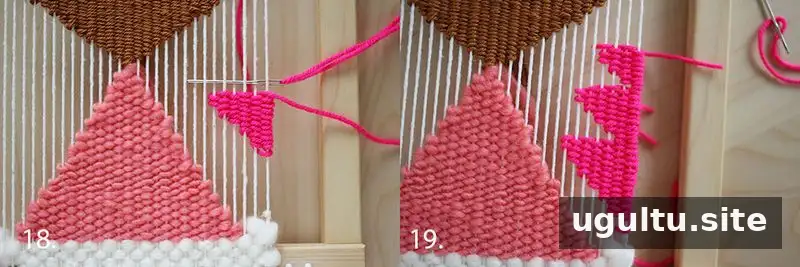
Step 18: To use the remaining negative space, add stacked half-triangles. Begin at the bottom of the space and weave two rows for each warp strand added. Using one row per strand will create shorter shapes.
Step 19: In this example, the first half-triangle extends seven rows in from the edge, the next extends six, and the third extends four. The remaining shapes use a seven-, five-, and four-row arrangement. Small variations are fine if the design is intended to be asymmetrical.
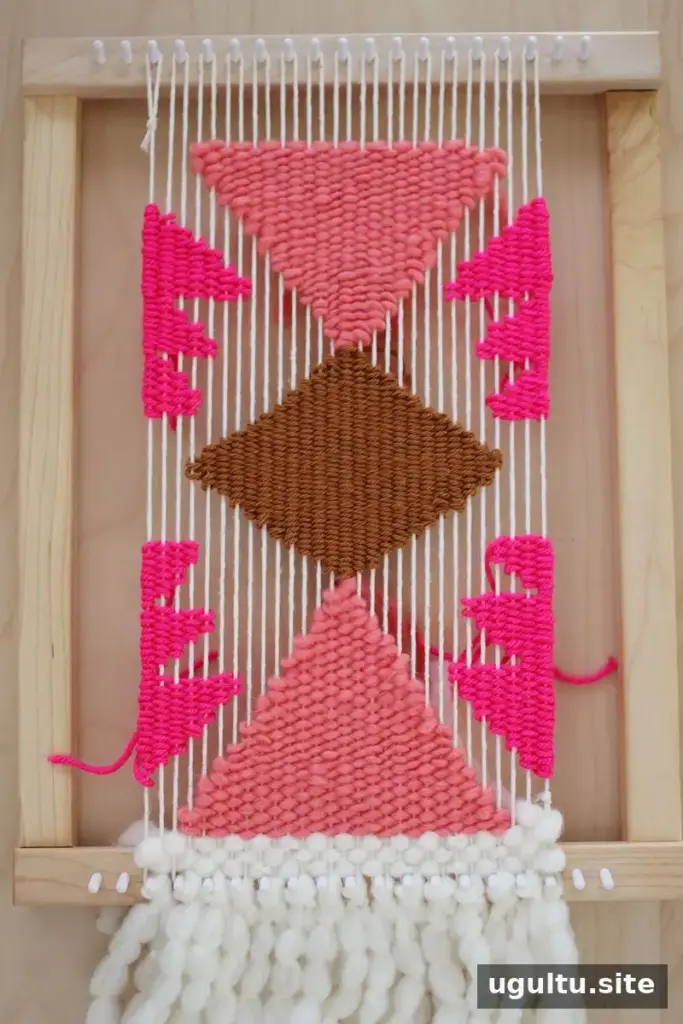
At this stage, the geometric shapes are in place, but the surrounding spaces are still unfilled.
Fill the background and finish the weaving
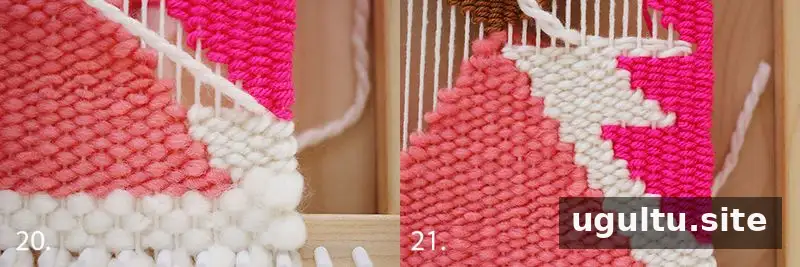
Step 20: Cut about 4 feet of white yarn, close in thickness to the peach yarn. When working with yarns of different thicknesses, fill the open spaces rather than trying to match every row exactly. Weave over and under as needed to fill the background. Avoid overlapping the peach, white, and hot pink sections; clean boundaries help keep the color shapes distinct.
Step 21: Use the peach rows as a guide for the white rows where their thicknesses match. Against the hot pink, some rows may align differently. In this example, two peach rows correspond to two white rows, while the half-triangles may need only one white row in places. Keep pressing the yarn down evenly so the negative spaces fill without distorting the shapes.
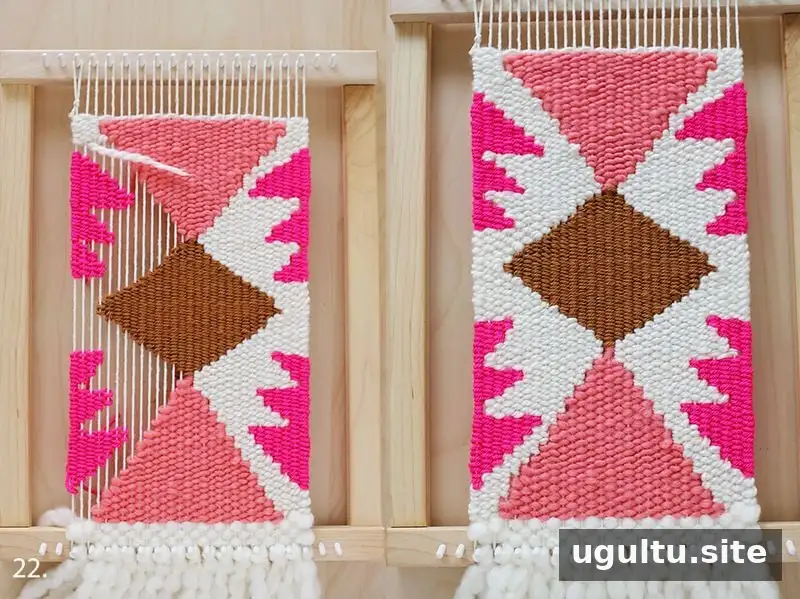
Step 22: When the 4-foot length runs out, attach or tuck in another length and continue filling. Work up one side, across to the other side, and back down to cover the remaining gaps. Add three rows of chunky white yarn at the top if needed. Leave enough space near the loom’s top edge to finish, or weave higher and wrap the warp ends around the dowel.
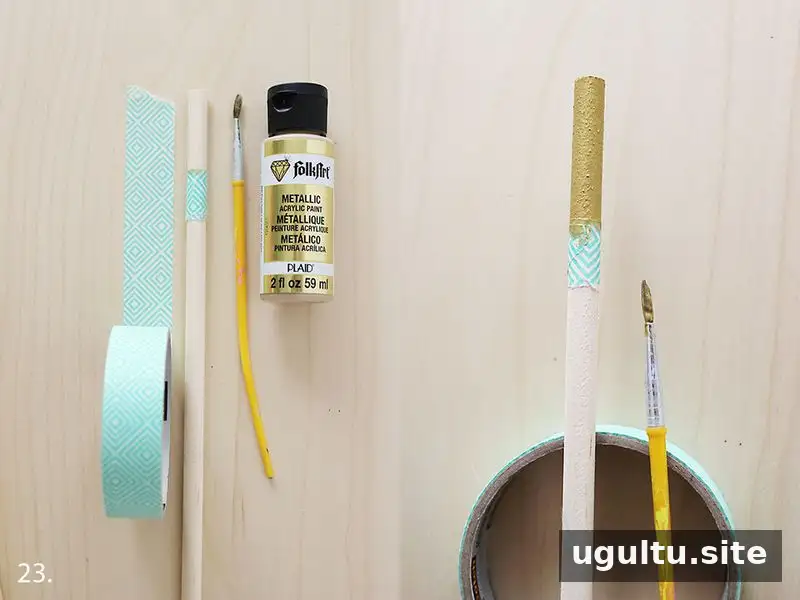
Step 23: Customize the dowel by painting or staining it. For a clean painted edge, wrap washi tape around about 2 inches at each end, apply metallic acrylic paint, and let it dry while securing the loose yarn ends on the back.
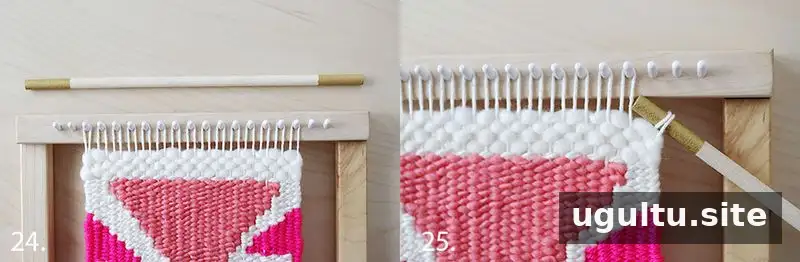
Step 24: Remove the tape once the paint is dry. Another option is to cover the dowel with patterned washi tape or a tightly wrapped strip of fabric. If the weaving ends about 1 1/2 inches below the top pegs, there may be enough length to wrap it around the dowel without cutting and tying the warp.
Step 25: Unhook one warp strand at a time and wrap it twice around the dowel. Repeat with each strand, gently moving them along as you go. Avoid pulling hard, since the warp is one continuous length of yarn and tension can shift the weaving.
Add tassels and hang the finished piece
The wall hanging can be left as it is or decorated with tassels. For a balanced but informal look, use different numbers of tassels on each side and choose colors already used in the weaving.
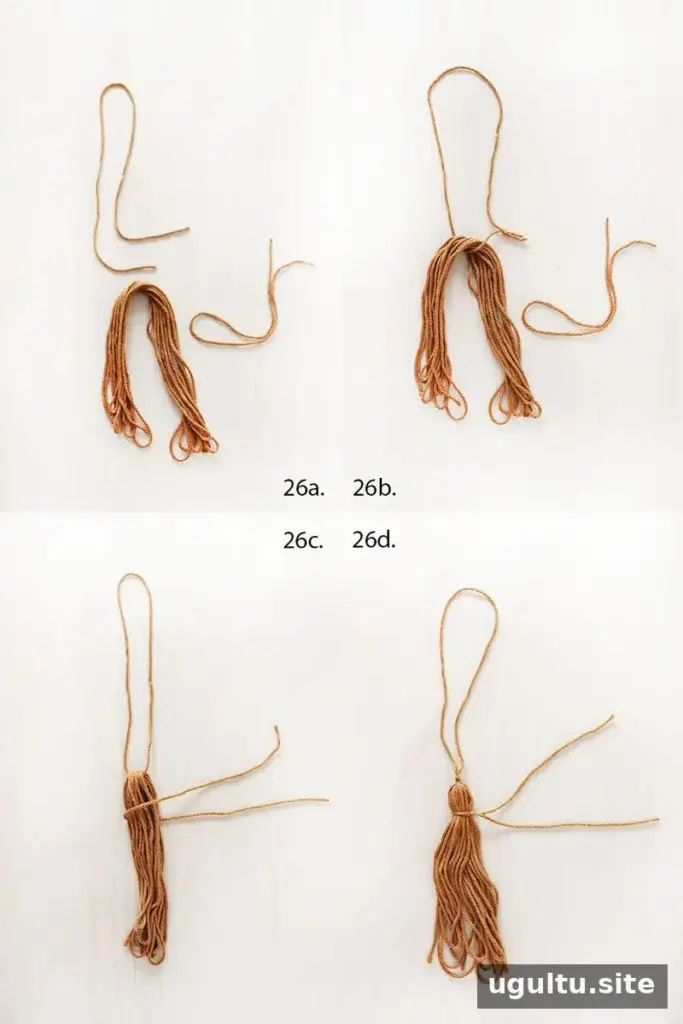
Step 26A: Wrap yarn back and forth until the bundle measures about 6–8 inches long. Fold it in half while keeping track of the center. Cut about 12 inches of yarn for the hanging loop and about 8 inches for the tie.
Step 26B: Place the loop yarn beneath the center of the folded bundle and tie a loop knot. The knot will be hidden in the next step.
Step 26C: Pull the knot beneath the folded yarn bundle. Wrap the shorter piece around the bundle.
Step 26D: Tie the shorter piece about 1/2 inch from the top of the bundle. Tie the hanging loop near the top as well to keep it in place.
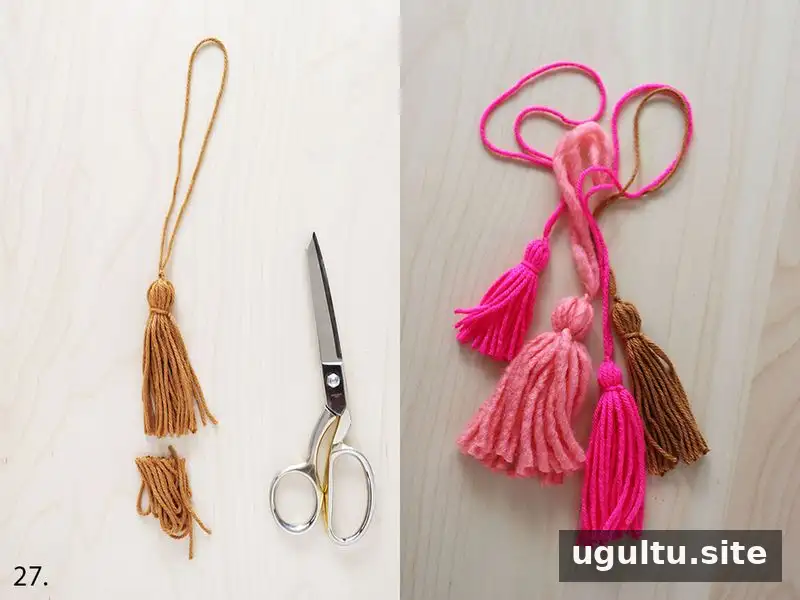
Step 27: Fold the short tie down alongside the bundle and trim the tassel ends evenly. Make additional tassels as needed.
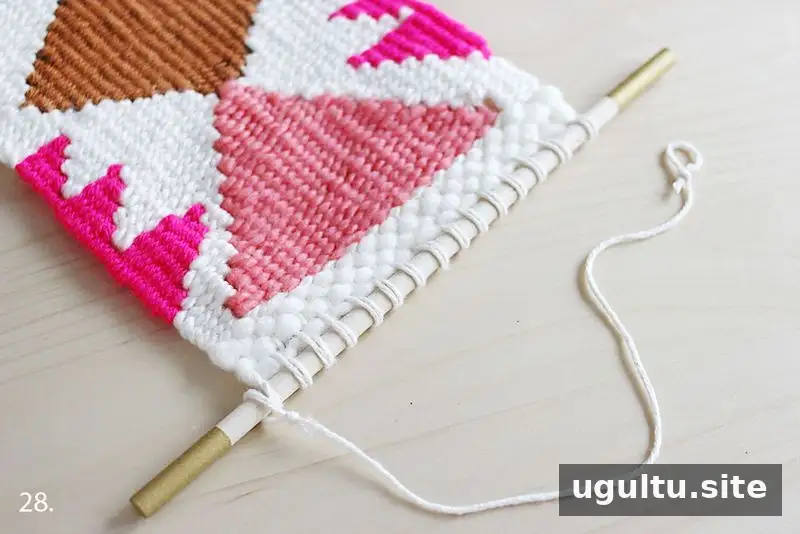
Step 28: Cut a length of warp yarn almost twice the width of the weaving. Make a loop knot at each end so the strand can fit over the dowel and serve as a hanging cord.
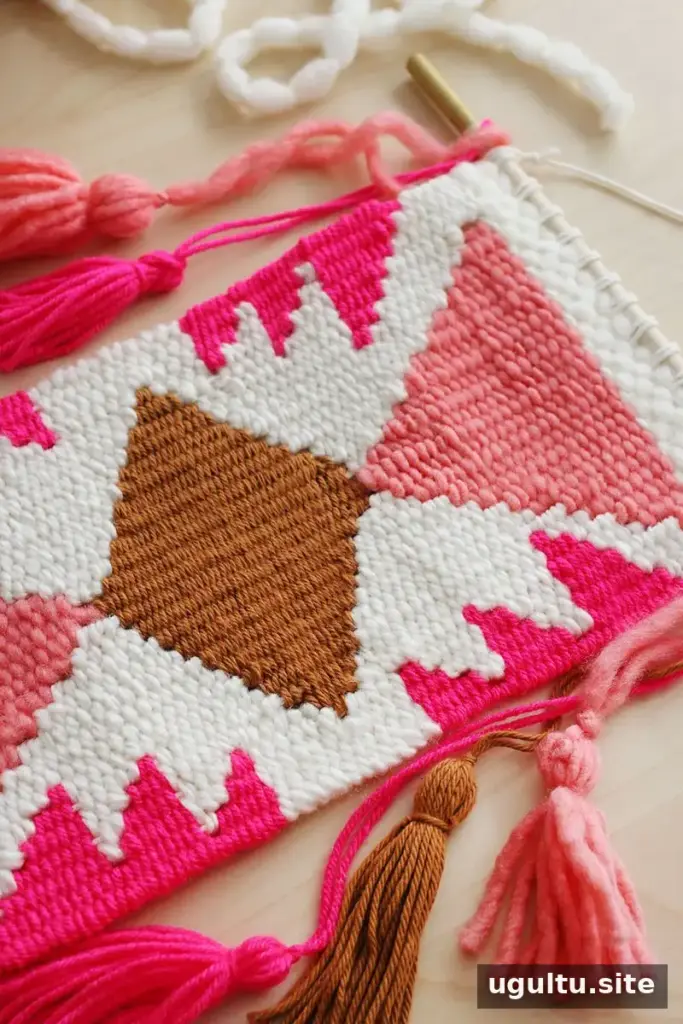
A small woven wall hanging can be completed in a few hours, depending on the design and the amount of detail. Testing a color or shape on a smaller sample first can help you work out the pattern before starting a larger piece.
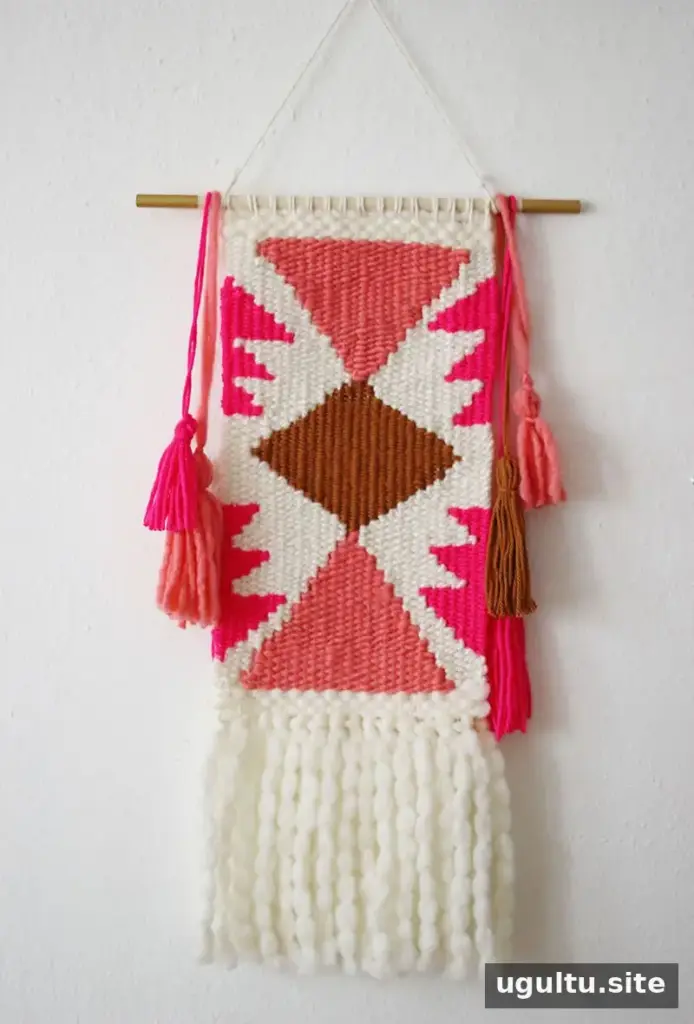
If shaping feels challenging, begin with a small weaving and practice changing row widths one strand at a time. With a little planning and careful counting, you can create triangles, diamonds, and other designs while keeping the surrounding weave neat.
—Rachel


