admin
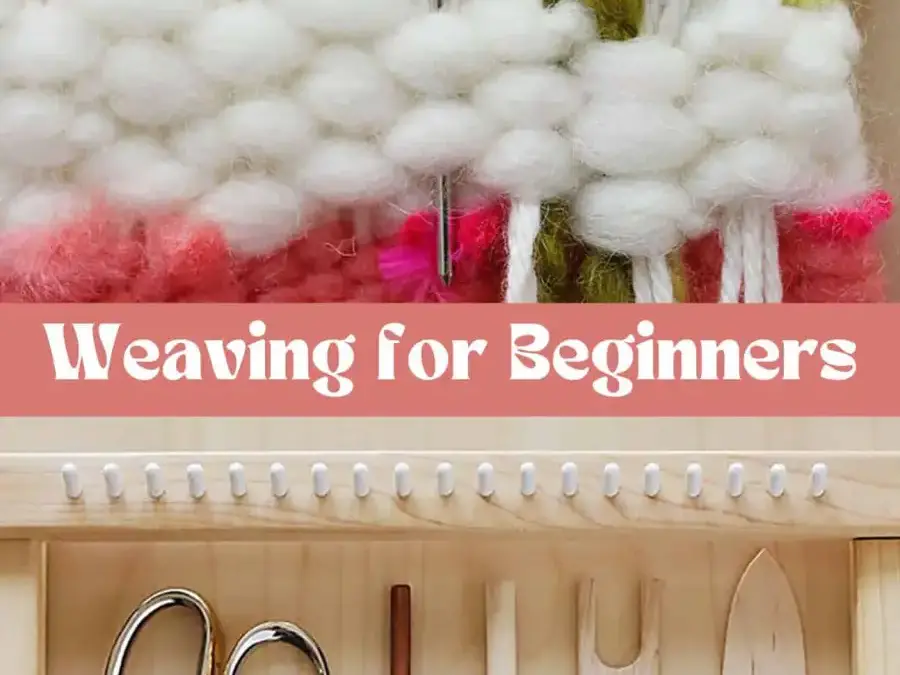
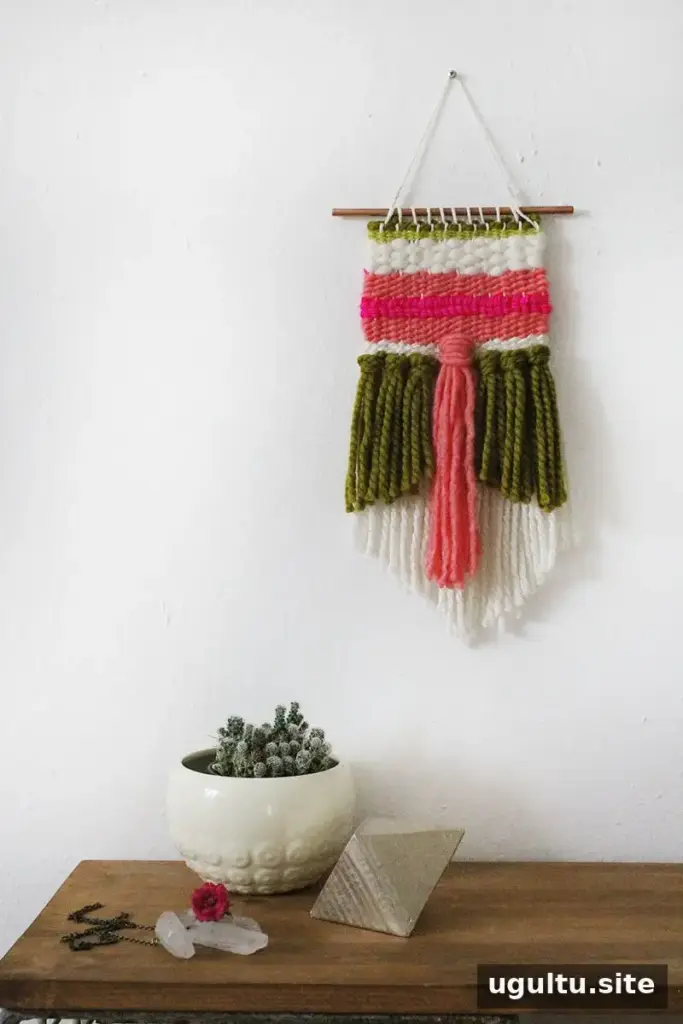
Weaving for beginners is easier to approach when you start with a small project, a simple frame loom, and a few basic stitches. This guide explains the essential terms and materials, then walks through making a textured wall hanging with fringe, plain weave, rya knots, and soumak. Take your time as you work: even tension and a little patience will help your finished piece look neat.
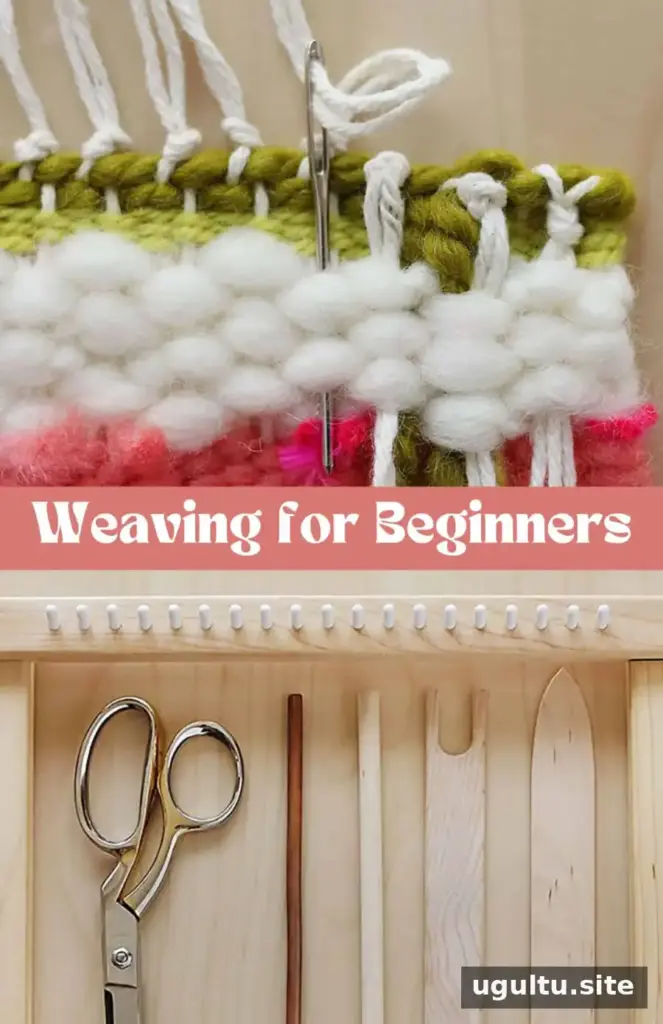
Weaving for Beginners: What You Need to Know
Weaving creates fabric or decorative designs by interlacing two sets of yarn. The warp threads are held in place on the loom, while the weft yarn passes across them. A small wall hanging is a useful first project because it lets you practise several techniques without needing a large loom.
Basic Weaving Terms
- Warp: The lengthwise threads stretched across the loom. They form the foundation of the weaving.
- Weft: The yarn passed over and under the warp to make the design.
- Loom: A frame or other structure that holds the warp under tension while you work. Options include frame, lap, table, floor, and circular looms.
- Shuttle: A tool that holds weft yarn and helps carry it through the warp.
- Shed stick: A flat stick woven through the warp to create an opening for passing yarn through more easily.
- Roving: Thick, loosely spun fiber that adds a soft, airy texture.
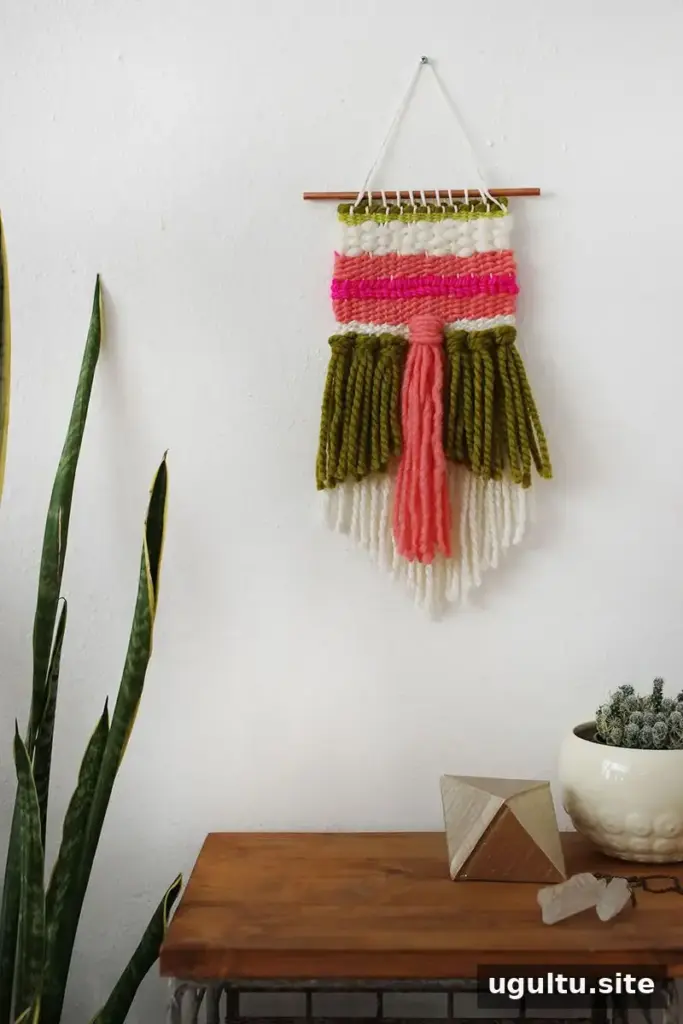
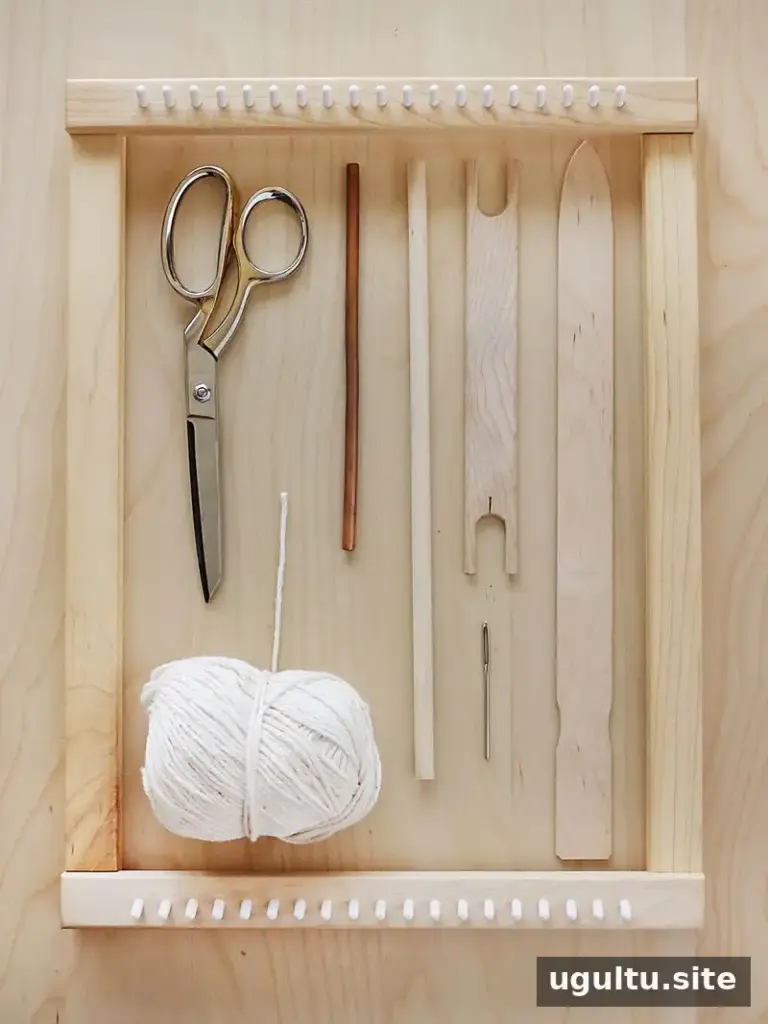
A beginner can use a lap loom, a sturdy frame with nails along the top and bottom, or a piece of strong cardboard. A homemade loom is a practical way to try weaving before choosing a more durable or larger frame. Check that the frame is stable and that its pegs or nails are firmly attached.
Supplies for a Beginner Weaving Project
- A loom or sturdy DIY frame
- Cotton yarn for the warp
- Weft yarn in the colors, thicknesses, and textures you prefer
- A wooden dowel, copper pipe, or sturdy stick, about 1–2 inches wider than the weaving
- A tapestry needle, about 3 inches long, with a large eye and blunt end
- A shuttle, if you want to carry yarn through the warp with one
- A shed stick, such as a flat wooden stick or paint stirrer
- Fabric scissors
Mixing yarn weights can add visual texture, while thicker yarn covers more space and can make a project work up faster. Before starting, lay out a few colors together to check that they suit the look you want.
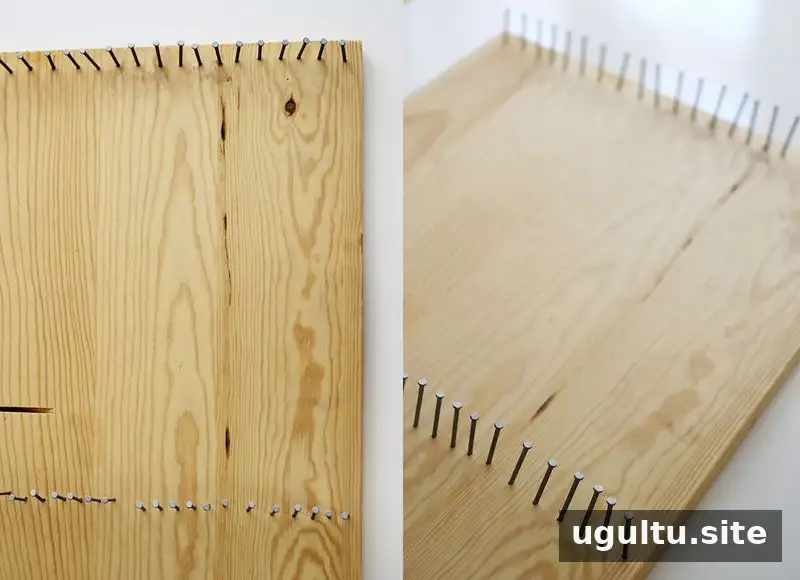
How to Make a Simple Loom
For a wooden frame, mark matching positions every 1/2 inch along the top and bottom, then add nails or pegs at those marks. For a first project, a frame about 8–10 inches tall is a manageable size. Keep the rows of pegs as straight and evenly spaced as possible.
To make a cardboard loom, cut a sturdy piece to your desired size. Tape the end of the warp yarn to the back near the top left corner, wrap the yarn around the front at roughly 1/3-inch intervals, and secure the other end on the back near the bottom right corner. Weave on the warp strands across the front.
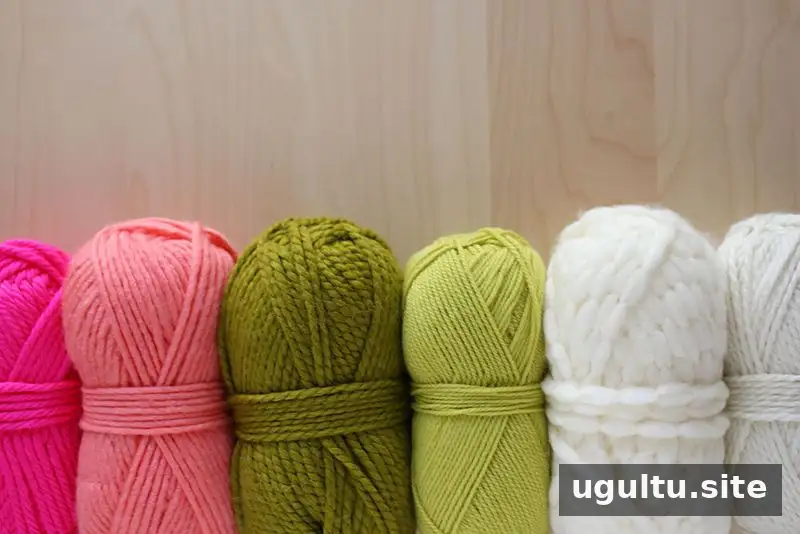
Choose yarn before warping the loom. Using a few different textures can make a wall hanging more dimensional. Remember that chunky yarn fills the warp quickly, so leave enough room for the design elements you plan to add.
How to Weave for Beginners
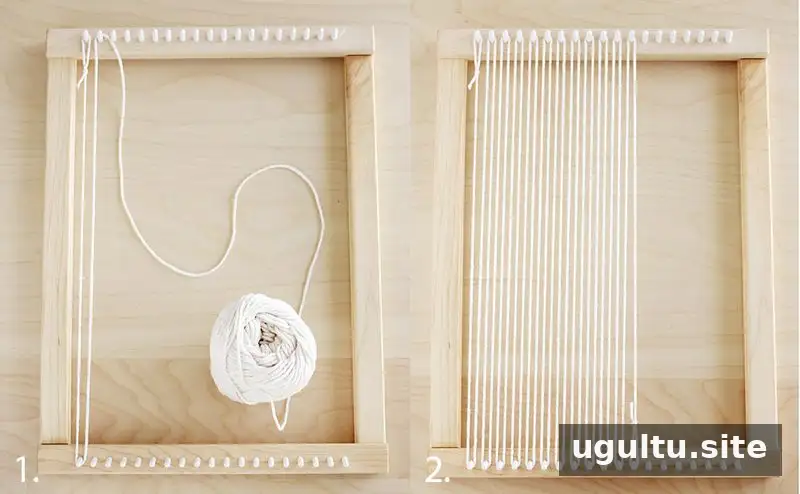
1. Set Up the Warp
Make a loop knot at the end of the warp yarn and fasten it to the top-left peg. Bring the yarn down to the bottom-left peg and back up, continuing across the loom until it reaches the width you want. Secure the end with another loop knot. Keep the warp evenly spaced and firm, but avoid pulling it extremely tight; the weaving will add tension as it grows.
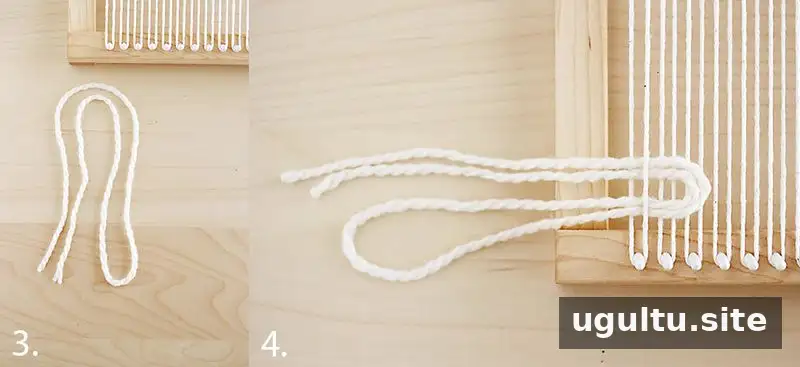
2. Add the Tassels
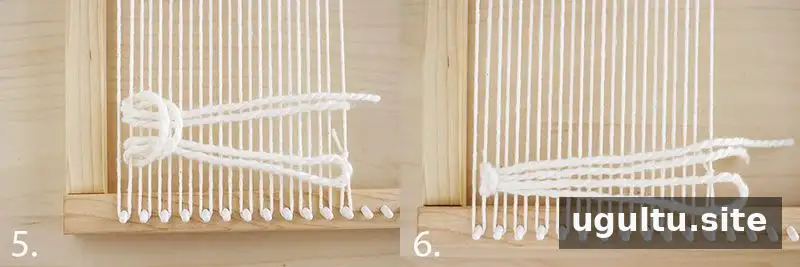
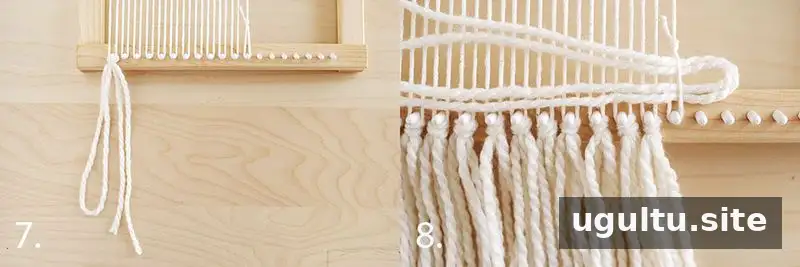
Cut fringe yarn into lengths of about 15–20 inches. Fold a piece in half, then fold it again if desired. Place the folded center over the first warp strand and under the second, then bring the ends through the loop and pull gently to tighten. Repeat across the bottom, using one tassel per peg, and trim the fringe evenly or at an angle when the row is complete. Finish the last peg by securing the fringe through its loop knot.
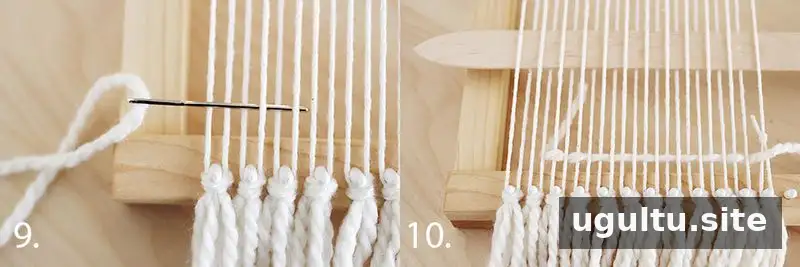
3. Weave a Plain Over-and-Under Pattern
Thread about 4 feet of yarn through a tapestry needle. To keep the yarn ends from sticking out at the edge, begin about three warp strands in. Pass the yarn under the fourth strand, over the fifth, under the sixth, and continue alternating across. Treat the loop knot at the edge as one warp strand for a consistent pattern.
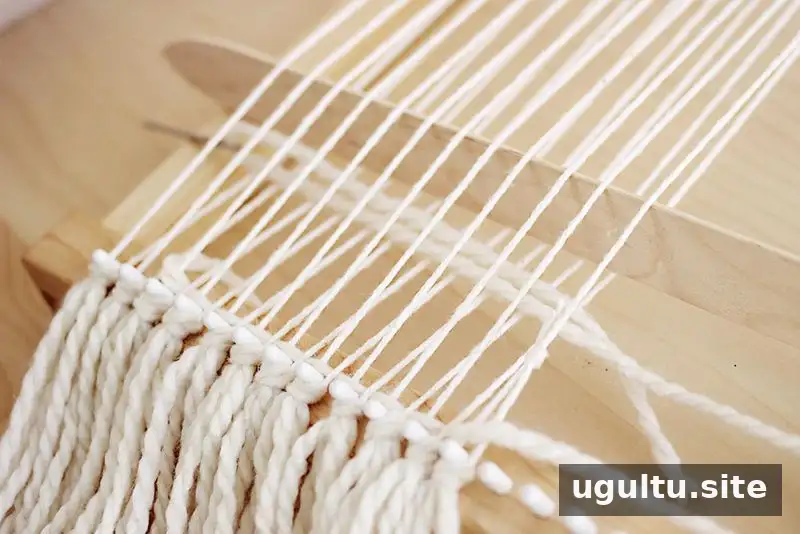
A shed stick can speed up the process. Weave it over and under the warp strands, then leave it in place. Raise it to open a gap when you need to pass the needle or shuttle through. As the weaving grows, move the stick upward so it stays about 4 inches above the latest row. There may be too little room to use it near the top.
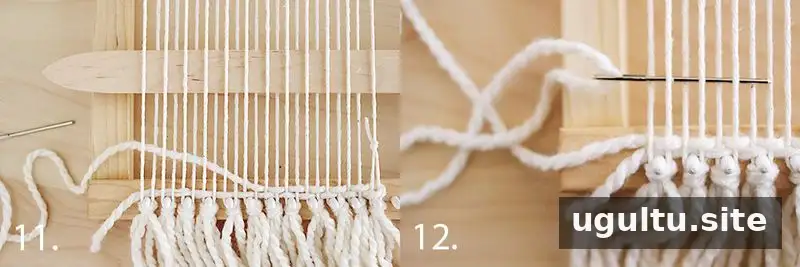
Pull each pass of yarn through and leave a gentle curve rather than pulling it tight. Press the row down toward the previous one, working from the center out toward both edges. This helps prevent the sides from drawing inward and creating an hourglass shape. A fork can help pack thinner yarn; fingers may be sufficient for thicker yarn.
For the next row, reverse the over-and-under sequence. If the yarn reaches the edge on an underpass, wrap it around the outer warp strand before returning. When changing colors or joining a new length, leave a 3–4 inch tail on the back so it can be woven in later.
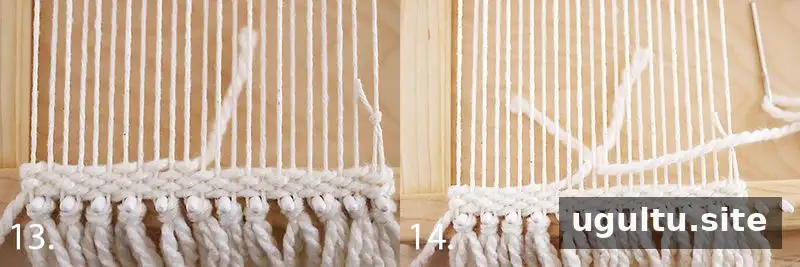
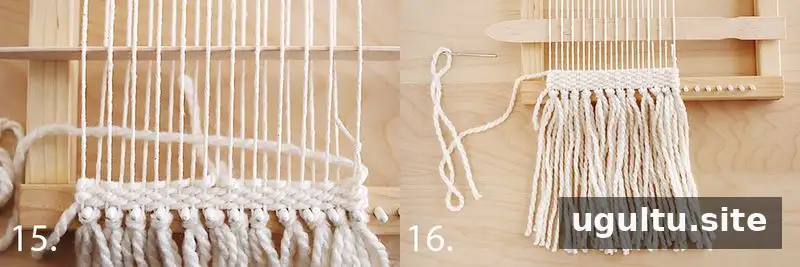
Continue with one or two more plain-weave rows, finishing at the edge before adding another texture. Keep checking the tension and the width as you work.
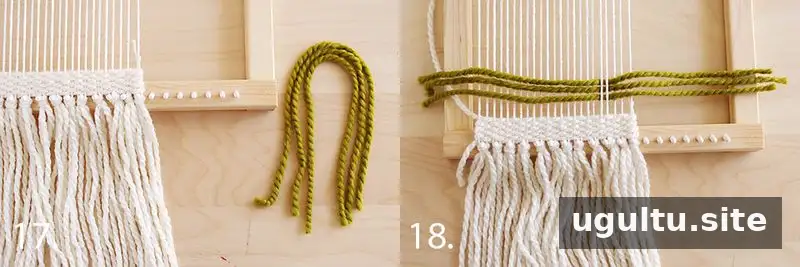
4. Add Rya Knots
Rya knots create a short fringe-like texture within the weaving. Cut three strands of contrasting yarn, each about 15 inches long. Place them across two adjacent warp strands near the area where you want the detail. Lift the yarn between the warp strands, bring the loose ends down through the raised loop, and pull gently to secure the knot.
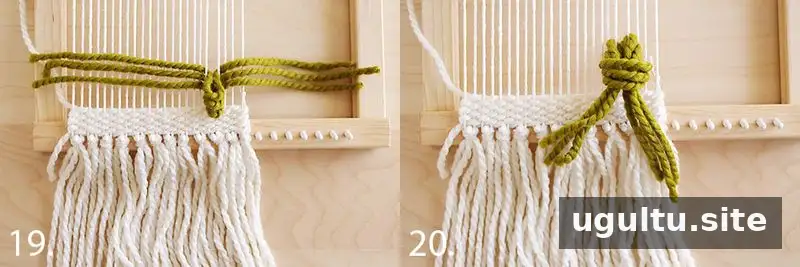
Adjust the knot so it sits neatly, then repeat where you want more fringe. You can trim the ends after the knots are in place. Resume plain weaving around and behind the knotted sections to fill the gaps; check the reverse side to make sure the yarn passes around the supporting warp strands.
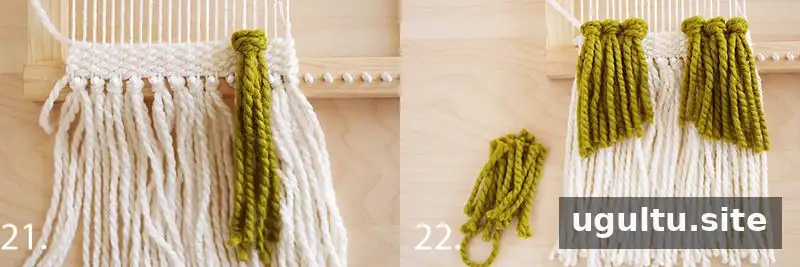
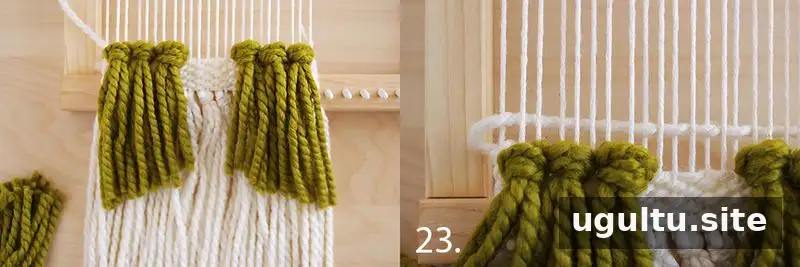
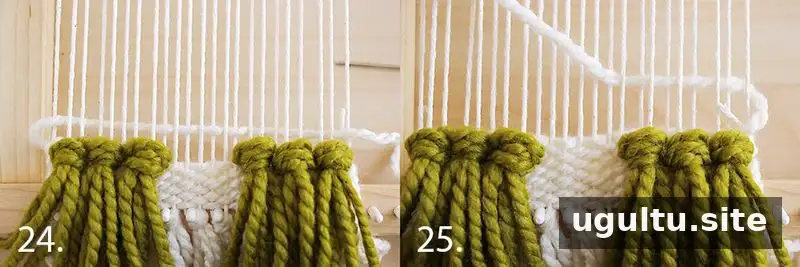
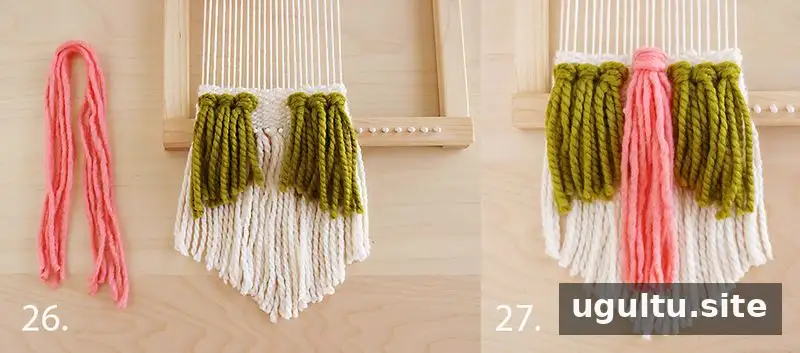
For another layer, use about six strands of chunky yarn, each about 15 inches long. Placing knots at a different height or length creates variation in the finished surface.
5. Make a Soumak Stitch
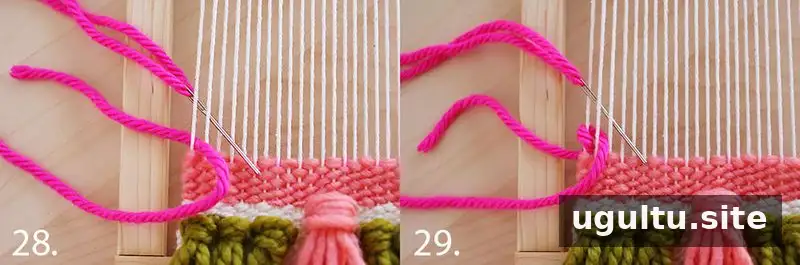
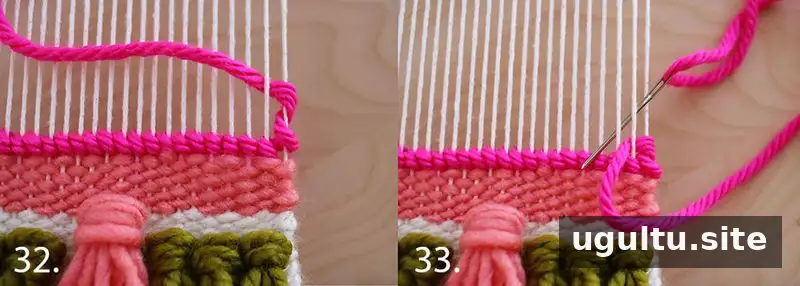
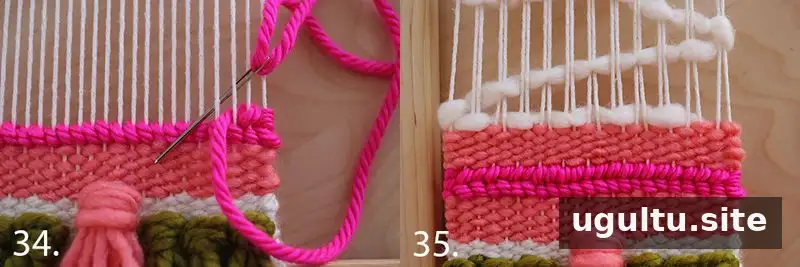
Soumak creates a raised, braided-looking line. Leave a 4-inch tail to secure later. Starting near an edge, bring the yarn up from beneath the outer warp strand, wrap around it, and bring the yarn up after the next strand. Continue by moving forward two warp strands and back one as you work across. The yarn should form a distinct textured line.
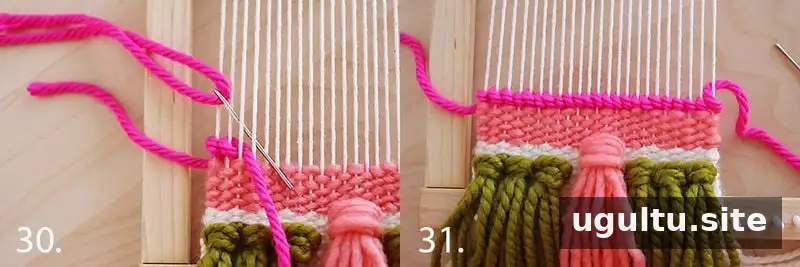
When working back in the opposite direction, wrap around the outer strand and follow the corresponding path across the row. Keep the wraps consistent and avoid pulling them so tightly that the warp narrows. Secure the tail on the back when the row is complete.
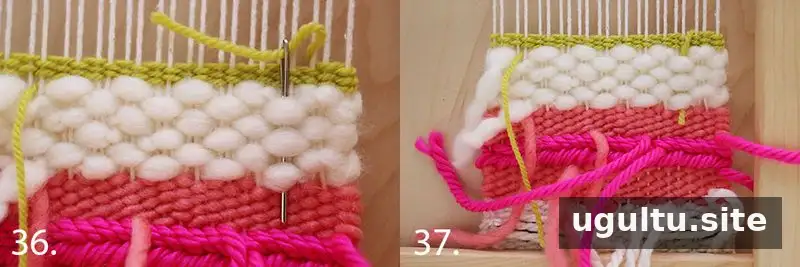
For another texture, weave chunky yarn over and under two warp strands at a time rather than one. Several rows of this pattern create a basket-weave effect. A few rows of thinner yarn afterward can help hold the thicker section in place.
6. Tidy the Back
Turn the piece over and thread each loose yarn tail through the back of nearby woven yarn using a tapestry needle. Trim the ends once they are tucked in. This usually makes a flatter, neater finish than tying loose ends together in a bundle.
How to Remove the Weaving from the Loom
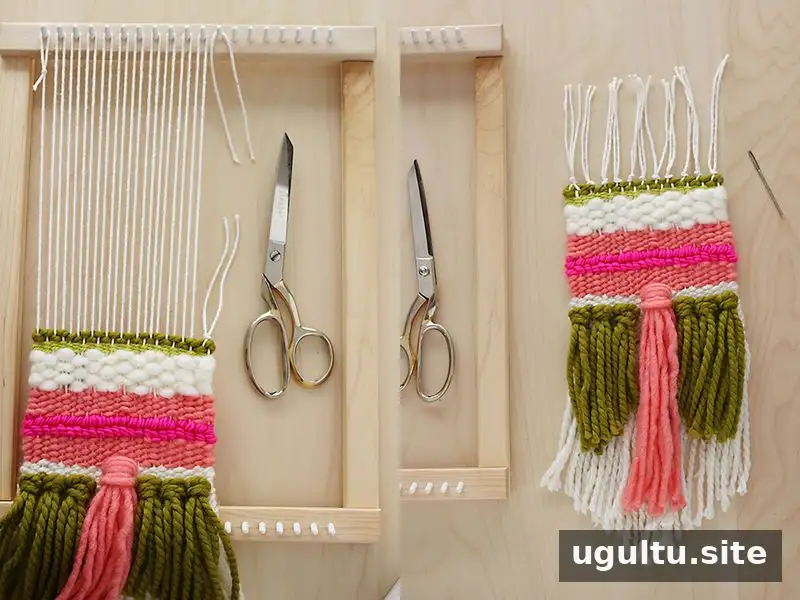
Turn the weaving face up. Carefully cut the warp strands in pairs, about 4–6 inches above the last woven row. Tie the ends securely, fold them toward the back, and tuck them in as you did with the yarn tails. The knots help keep the weaving from loosening. Once the strands are secured, gently lift the piece off the bottom pegs.
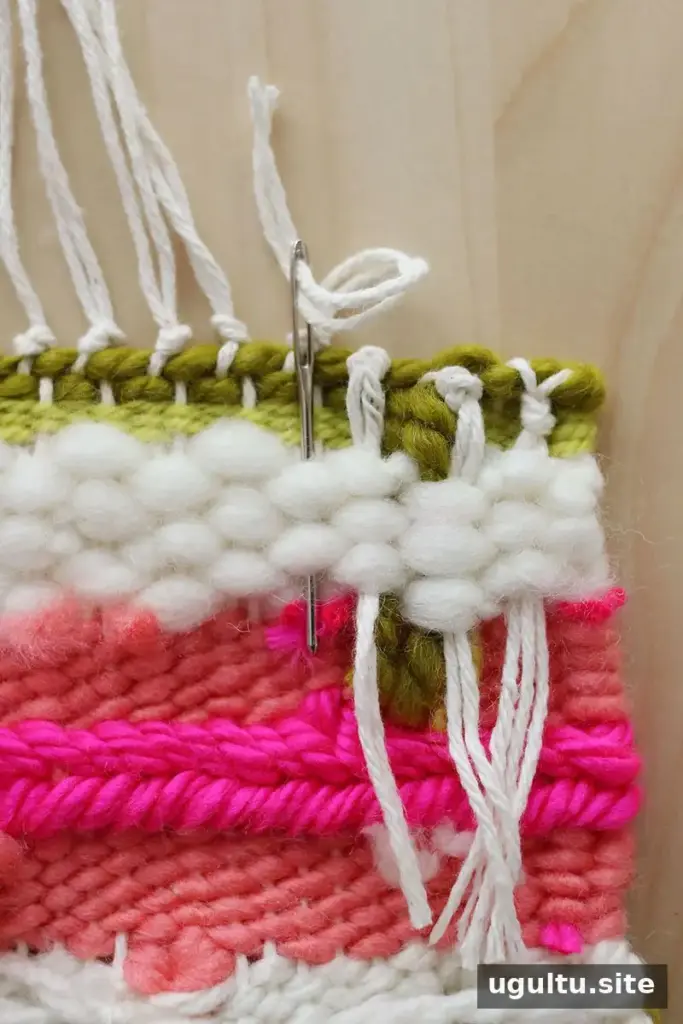
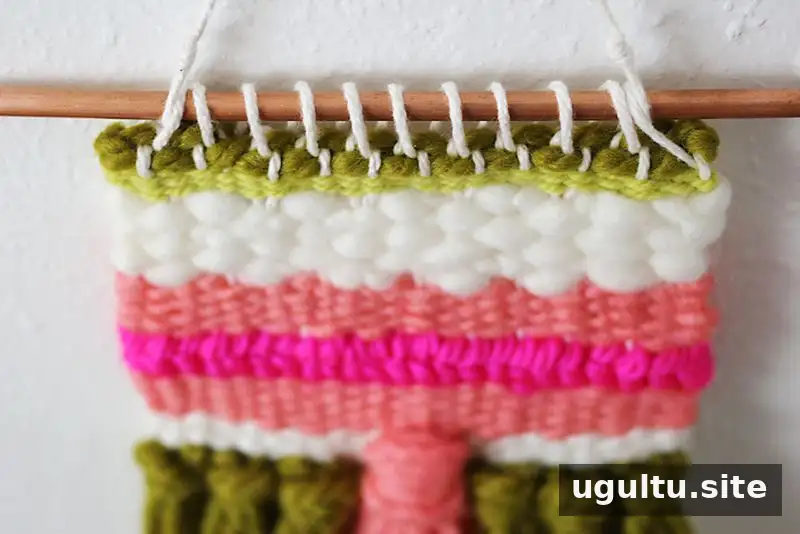
Tuck the remaining top warp ends behind the weaving. To attach the piece to a dowel, pipe, or piece of driftwood, tie a knot at one end of a length of warp yarn and stitch through the knotted strands, carrying the yarn up and over the hanging rod as you go.
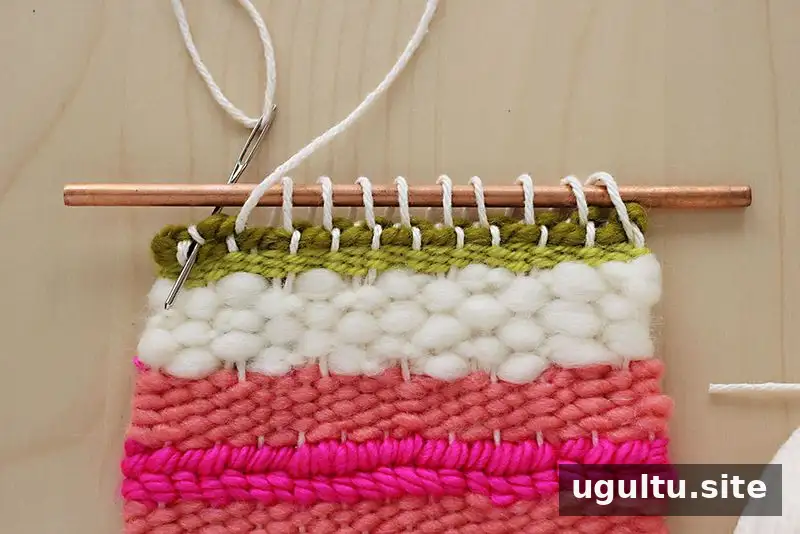
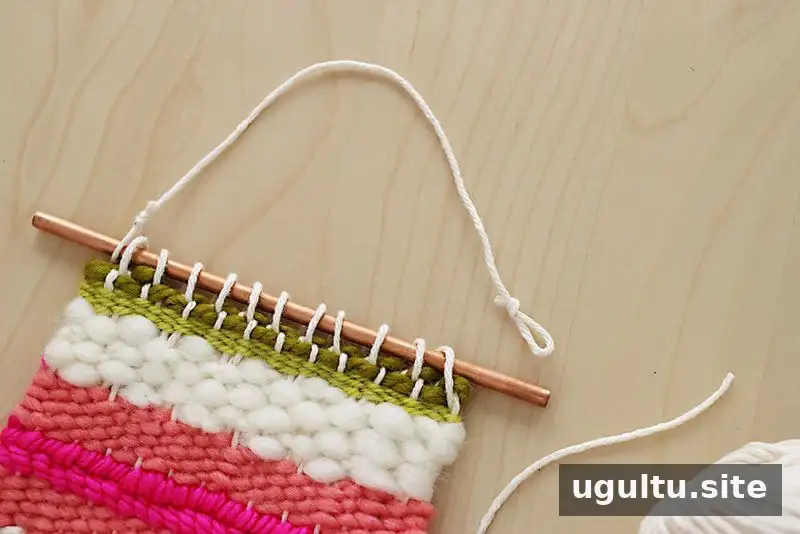
Make a simple hanging loop from yarn and attach it to the rod. Before hanging the piece, check that the knots and attachment points are secure and that the weaving hangs evenly.
Keep Practising the Basics
Once you understand how to set up a warp, weave plain rows, and secure loose ends, you can experiment with color, yarn weight, fringe, rya knots, and soumak. For a first project, focus on steady tension and a sturdy finish rather than trying to make every row perfectly identical. These fundamentals make weaving for beginners more manageable and provide a foundation for future projects.