
 admin
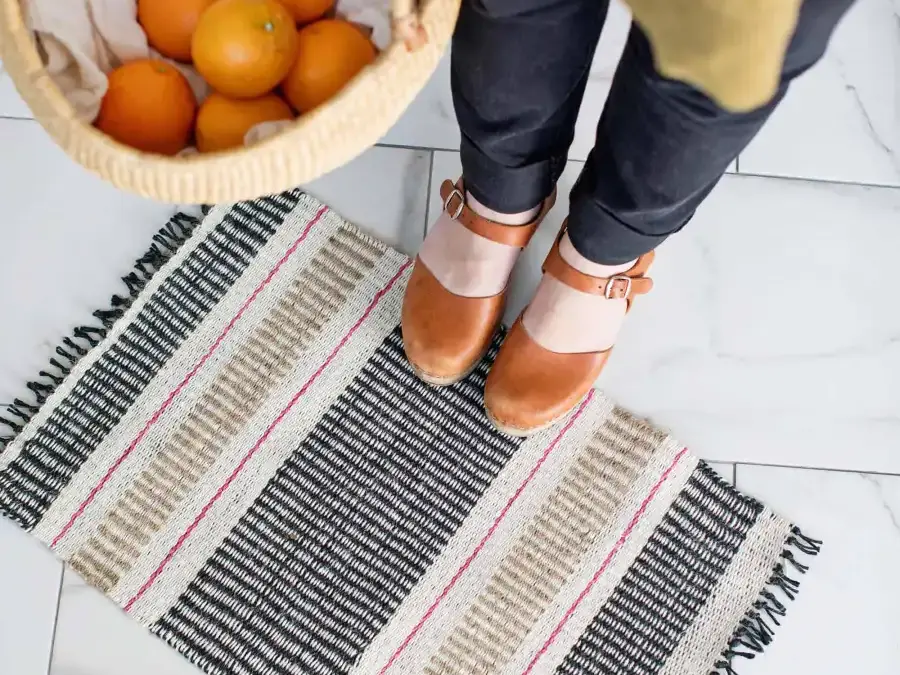
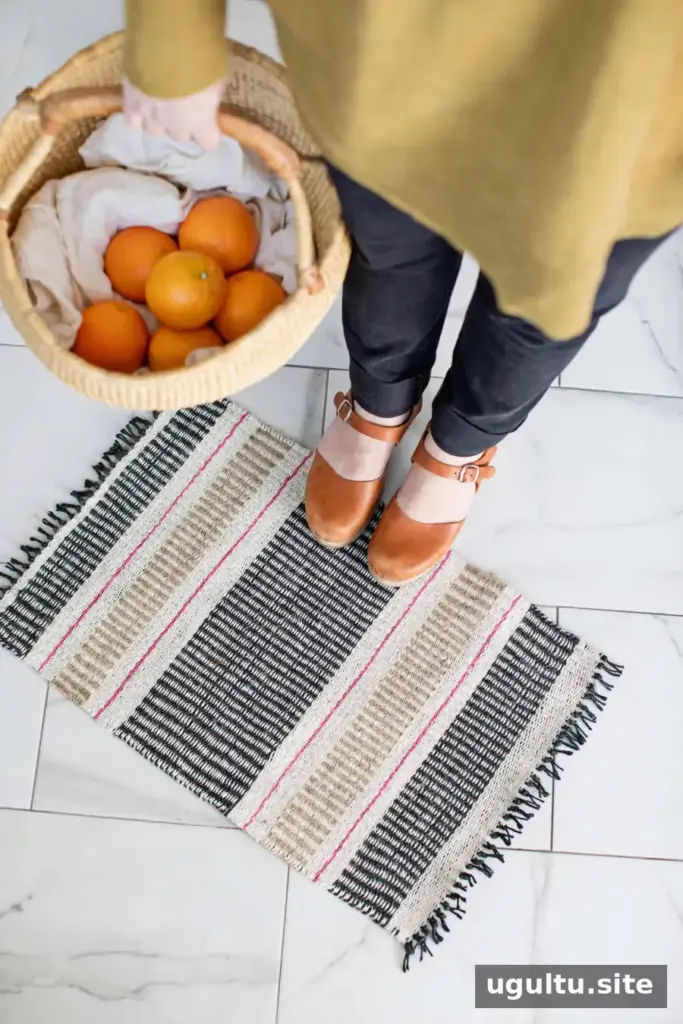
A woven jute mat is a practical project for exploring handweaving beyond wall hangings. This design combines plain weave with the pick-and-pick technique to create stripes and color blocks. It requires patience and some weaving experience, but the instructions below also explain the process for adventurous beginners.
The finished mat uses cream, black, natural, and pink jute. The project takes about 12 hours, so prepare a comfortable workspace and keep the yarn colors and tools within reach before you begin.
Materials for the Woven Jute Mat
Gather the following supplies before setting up the loom:
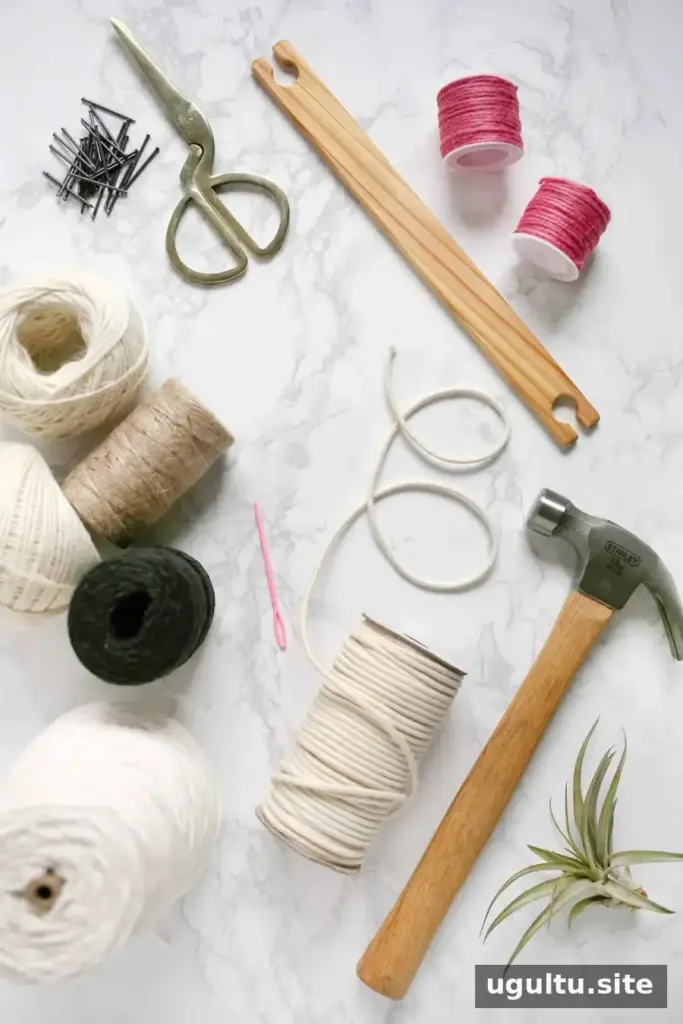
- Two 100 m rolls of 2 mm cream jute
- Three 100 m rolls of 2 mm black jute
- One 100 m roll of 2 mm natural jute
- One 10 m roll of 2 mm pink jute
- A paint stick or yardstick
- A 3-inch tapestry needle
- A fork, weaving comb, or beard comb
- Two 12-inch stick shuttles
Supplies for the DIY Loom
- Pine or MDF board, about 24 × 32 inches or larger
- Seventy 1.5-inch finishing nails
- Hammer
- Yardstick
- Pencil or chalk
Use a stable, flat board for the loom. Measuring and marking the nail positions before hammering helps keep the warp evenly spaced.
How to Weave a Jute Mat
Step 1: Build and warp the loom
About 2 inches below the top edge of the board, hammer in 33 finishing nails spaced roughly one-third of an inch apart. Measure 30 inches down from that row and add a second row of 34 nails.
Warp the loom with black jute. Begin with a loop knot at the left end of the bottom row of nails, carry the yarn across the loom, and finish with another loop knot at the bottom right. Keep the warp strands consistently tensioned without pulling them excessively tight.
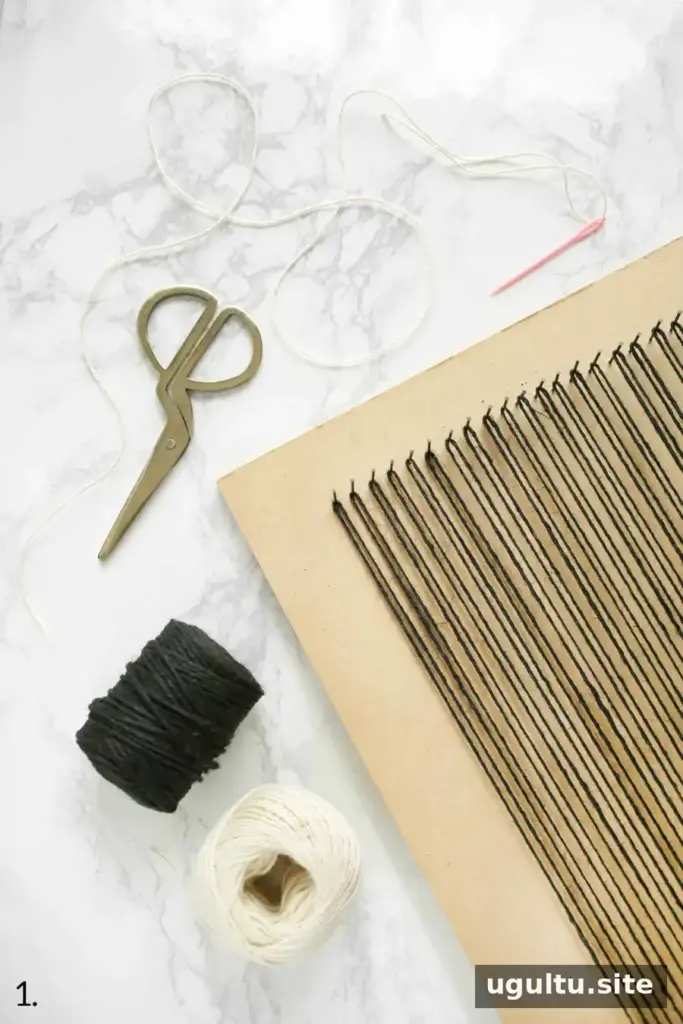
Step 2: Weave the first rows
Cut a 4-foot length of cream jute and thread one end through the tapestry needle, leaving an 8-inch tail. At the left side, pass the needle under the first side of the loop knot and over the second. Continue across the warp using an under-over pattern.
Finish the row at the last knot by going under its first side and over its second side. Weaving through the knots helps secure the edge and reduces the chance of the work unraveling.
As you move across, leave a slight arch of slack in the weft. Press the center of the arch down over the row of nails, then use your fingers, fork, or comb to settle the rest of the row evenly. This small amount of slack helps prevent the mat from drawing in at the edges.
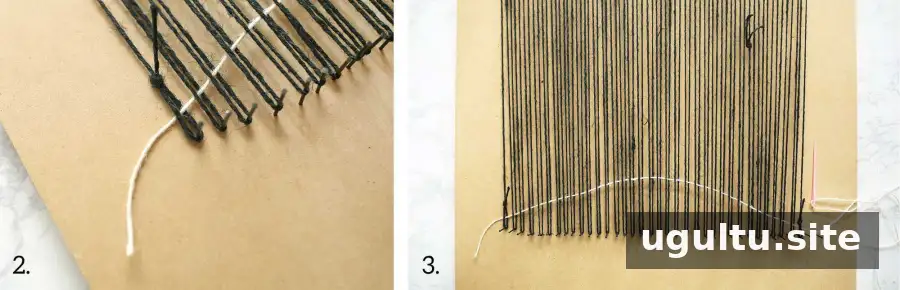
Steps 3–5: Continue plain weave
For the return row, reverse the over-under sequence of the row below. For example, if the first row passes over the outer warp strand, begin the next row by passing under it.
Continue weaving back and forth as the cream jute runs out. To keep the edges neater, begin a new row with fresh yarn rather than leaving a new tail at the end of a row. Let the loose tails point up instead of tucking them behind the warp; the pattern is designed to look the same on both sides.
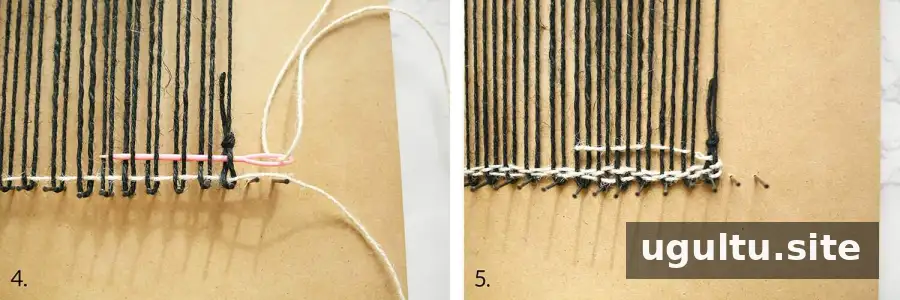
Steps 6–8: Prepare the stick shuttles
For larger areas of one color, wind more jute onto a stick shuttle. Hold the yarn against the center with your thumb, then wrap it in a figure-eight pattern around the left side 10 times. Repeat 10 figure-eight wraps on the right side and leave a 4-foot tail before cutting the yarn from the ball. The shuttle acts like a large needle and helps keep the jute from tangling.
Weave the shuttle through at least two warp strands shared with the previous weft row, then continue the established over-under sequence. Each new row should follow the opposite pattern of the row beneath it. Beat the weft down firmly and evenly with a comb or fork to create a dense mat. Continue until you use the yarn or reach a color block about 1.5 inches wide.
For the next section, load one shuttle with cream jute and another with black jute, winding each 10 times on both sides.
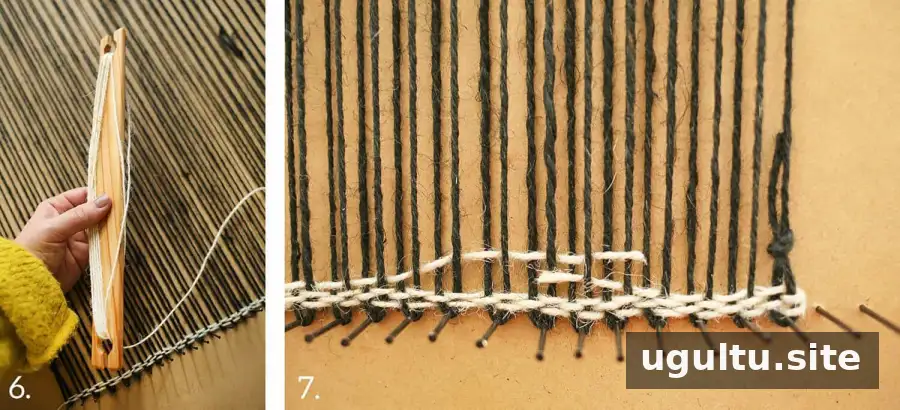
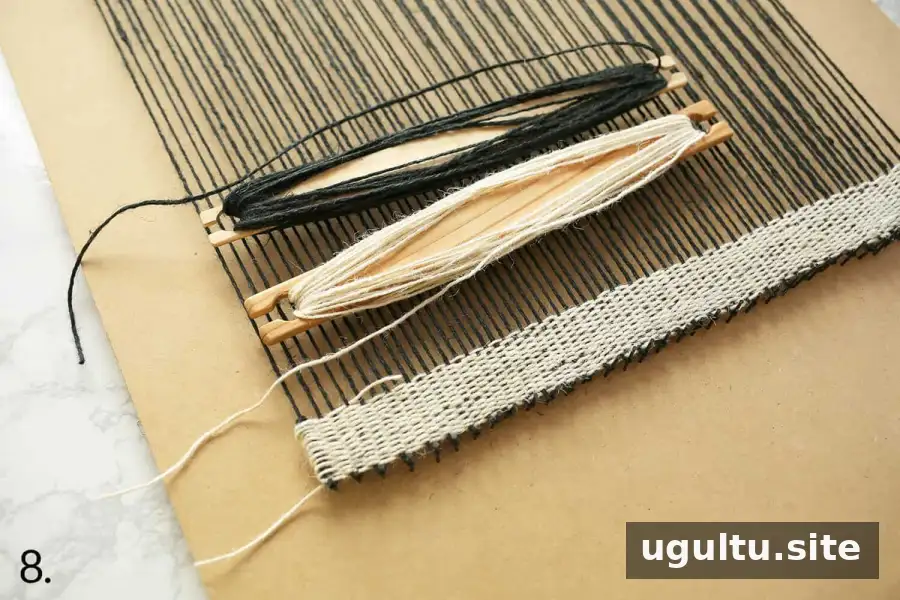
Steps 9–12: Create pick-and-pick stripes
Begin the pick-and-pick section with one plain-weave row of cream jute, alternating over and under. Set the cream shuttle aside. Starting from the same side, weave one plain-weave row of black jute using the reverse sequence. The cream row should end under while the black row ends over.
Pick up the cream shuttle and pass it over the black yarn where the shuttles meet. Weave back in the opposite direction from the black row beneath it. This makes the cream overs appear on the same warp strands. Next, weave a black row using the reverse of the cream pattern, while repeating the pattern of the previous black row. The black overs will then line up on the same warp strands.
At the outside edge, where the cream and black jute meet around a warp strand, keep the overlap relaxed and even. Avoid pulling it too tight or leaving it protruding. Continue alternating the two colors, beating each row down consistently. Finish the section with a cream row, then weave a few rows of black to secure it.
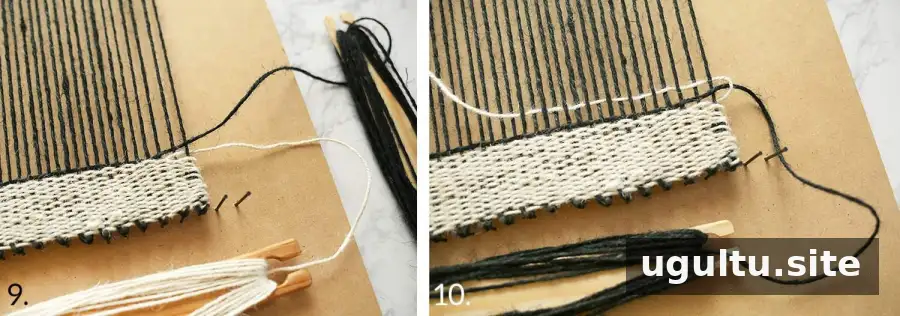
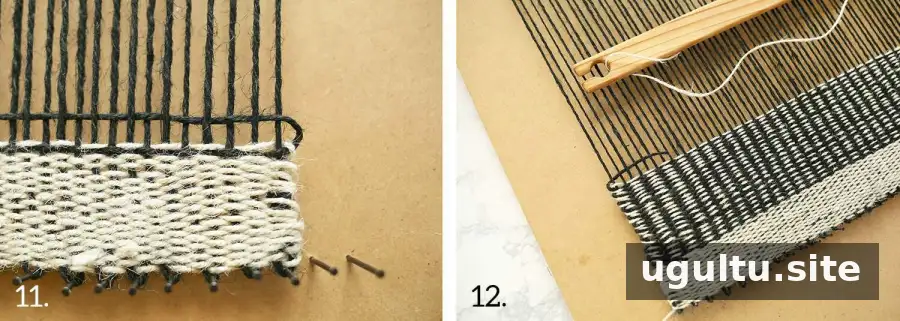
Color Sequence for the Mat
Follow this sequence to build the bands and central pattern. Measurements refer to the woven sections:
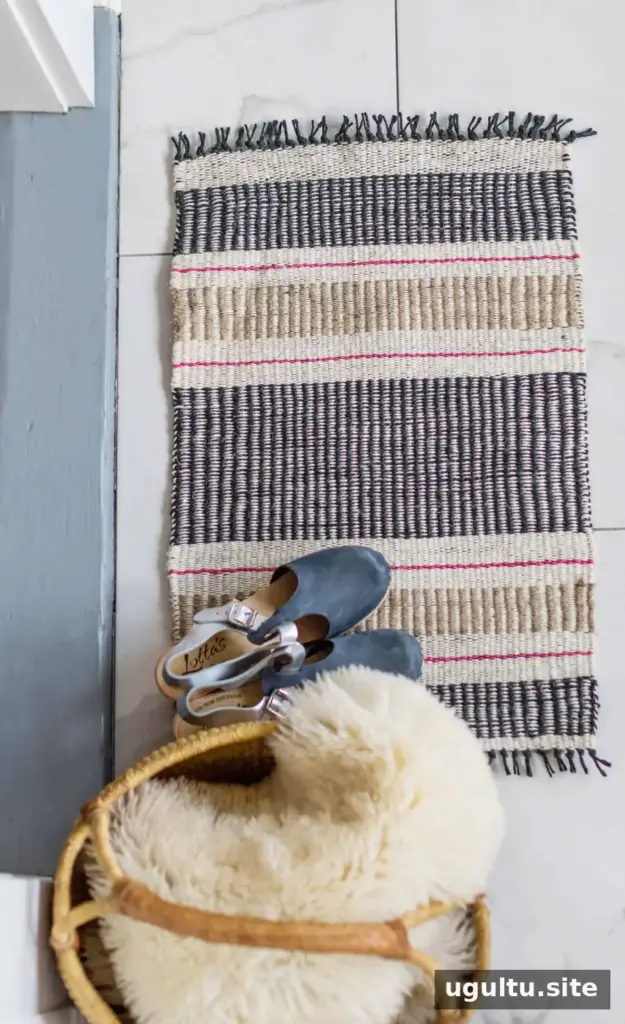
- Plain weave about 1 inch of cream jute.
- Cut 4 feet of pink jute and weave two plain-weave rows.
- Plain weave about 1 inch of cream jute.
- Use cream and natural jute for 2 inches of pick-and-pick.
- Plain weave about 1 inch of cream jute, then weave two rows of pink jute cut to 4 feet.
- Plain weave about 1 inch of cream jute.
- Use cream and black jute for about 6 inches of pick-and-pick, reloading the shuttles as needed. This forms the center of the mat.
- Plain weave about 1 inch of cream jute, then weave two rows of pink jute cut to 4 feet.
- Plain weave about 1 inch of cream jute.
- Use cream and natural jute for 2 inches of pick-and-pick.
- Plain weave about 1 inch of cream jute, then weave two rows of pink jute cut to 4 feet.
- Plain weave about 1 inch of cream jute.
- Use cream and black jute for 2 inches of pick-and-pick.
- Finish with about 1 inch of cream plain weave, or as much as possible while leaving roughly 2 inches between the weaving and the top nails.
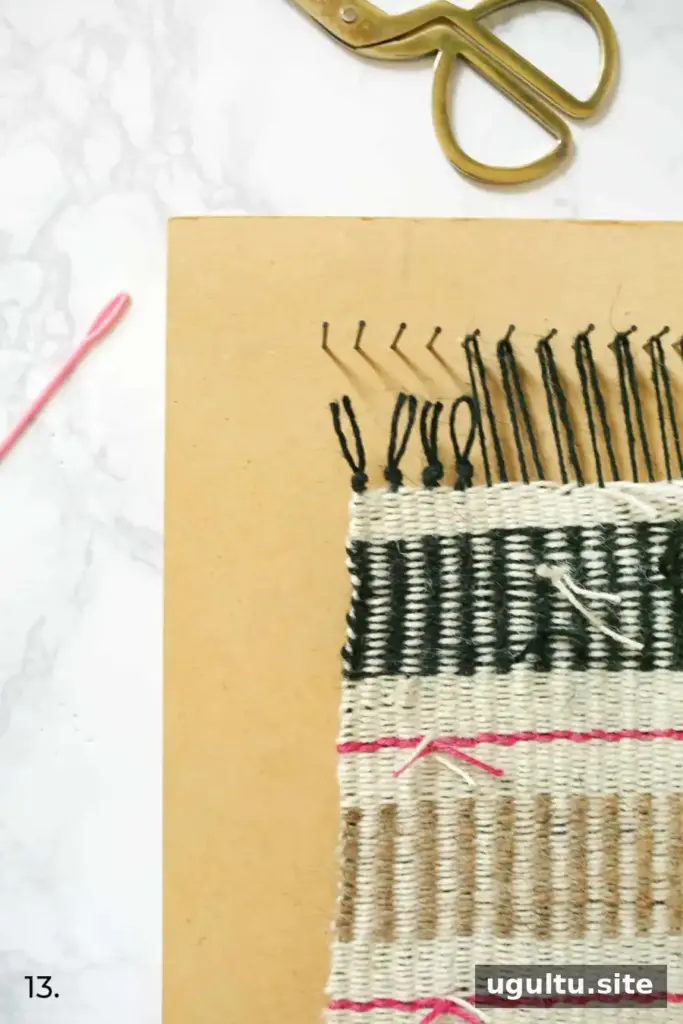
Step 13: Remove the mat and finish the ends
When the weaving reaches the top, lift the warp strands off the nails two at a time. Tie each looped pair together, then cut the loop at the top to leave two short strands. Repeat across the row.
To make the tasseled loops at the opposite end, cut 33 strips of black jute, each 6 inches long. As you remove each pair of warp strands from the bottom nails, pass one strip through the warp loop where the nail sat, bring its ends together, and tie a knot. Repeat across the bottom.
Finishing Tips and Smaller Project Option
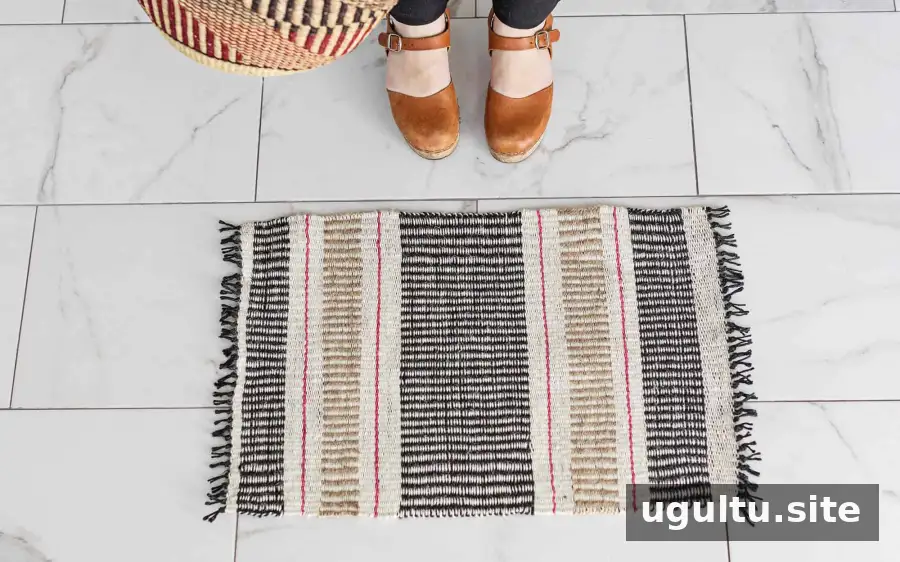
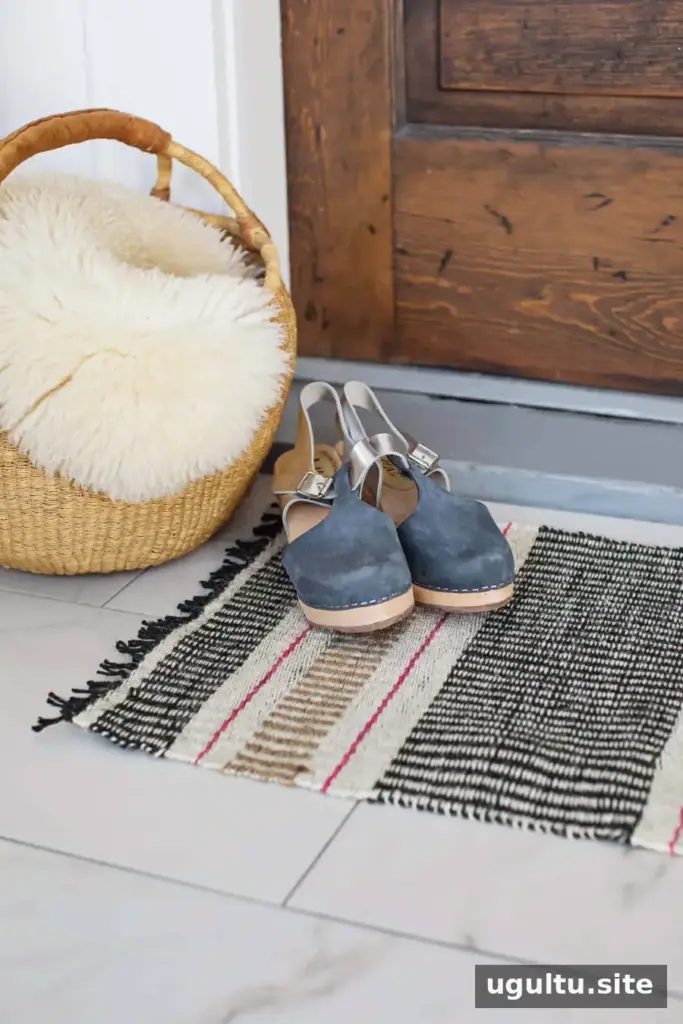
The finished mat has a dense weave and may take about 12 hours to complete. If you want to try the pick-and-pick technique with less weaving time, use a smaller frame loom to make coasters. Weave one coaster, leave about 4 inches of unwoven space, and then make another using the same warp strands.
Use your preferred jute colors if you want to adapt the design. Keep the rows evenly beaten and check the edge tension as you work, especially where two shuttles meet. These small checks help the finished piece lie more evenly.
— Rachel


