
 admin


A heart clutch DIY project is a fun way to add a bright, personal accessory to an outfit. This pink-and-white design takes inspiration from conversation heart candy, but its shape and customizable lettering make it suitable for use beyond Valentine’s Day. Choose a phrase that suits your style, then follow the steps below to cut, assemble, and finish the clutch.
Supplies for a Heart Clutch DIY
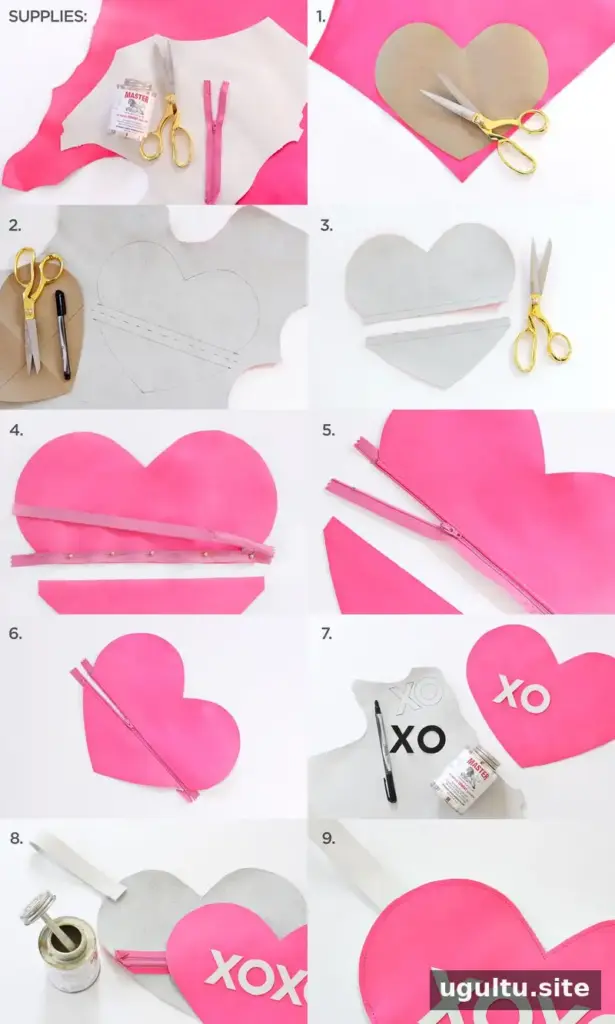
Gather these materials before you begin:
- Pink and white leather, real or faux
- Leather glue
- Pink zipper
- Fabric scissors
- Craft paper
- Leather needle for a sewing machine
A zipper foot is also useful for sewing close to the zipper. Before cutting, check that the leather is suitable for your machine and can be sewn through in two layers.
How to Make the Heart Clutch
- Create the pattern. Cut a heart from craft paper to use as a template. Trace the full heart onto the pink leather and cut it out for the front panel.
- Mark the zipper opening. Draw a line near the middle of the paper heart. Trace the top section onto the leather. Move the template down one inch and trace the bottom section. The extra space between the heart halves provides room for the zipper while preserving the heart shape. Draw a dotted line down the middle of this one-inch gap.
- Cut the heart halves. Cut out the traced top and bottom sections, then cut along the dotted line.
- Sew the first side of the zipper. Open the zipper and place it face down. Align its left edge with the left edge of the top heart piece and pin it in place. Using a zipper foot and a leather needle, sew the zipper to the panel. The zipper placement in this design was sized for a 9-inch zipper. If using a longer zipper, position it so the excess extends beyond the edge.
- Secure the zipper fold. Fold the zipper back after attaching that side. Change to a standard presser foot and sew about 1/4 inch from the zipper to hold the fold in place.
- Attach the other side. Repeat the zipper-sewing process with the second heart half so the two pieces can close together.
- Add the lettering. Cut letters from white leather and glue them onto the front panel. For even, consistent lettering, print the chosen font at the desired size, cut out the paper letters, and trace them onto the leather before cutting.
- Make and attach the handle. Cut a strip of leather about one inch wide and sew it into a loop. Glue the loop to the inside edge of the back heart panel. Trim, fold, and hand-sew the excess zipper inside the panel.
- Join the panels. Apply glue around the outer edges of the wrong sides of both heart pieces and press them together. Let the glue dry, then sew around the clutch with a 1/4-inch seam allowance.
Choosing and Sewing Leather
For real leather, choose pink material that is thick enough to hold its shape but thin enough to sew through two layers on your machine. The pink and white leather should both keep their shape and avoid fraying at the cut edges. Faux leather can also be used; test a small scrap with your machine and needle first to check how it feeds and stitches.
Take care when sewing near the zipper and around the heart’s curves. Keep the edges aligned, and avoid pulling the material as you sew, which can distort the shape. Allow the glue to dry before stitching the joined panels.
Customize Your Finished Clutch
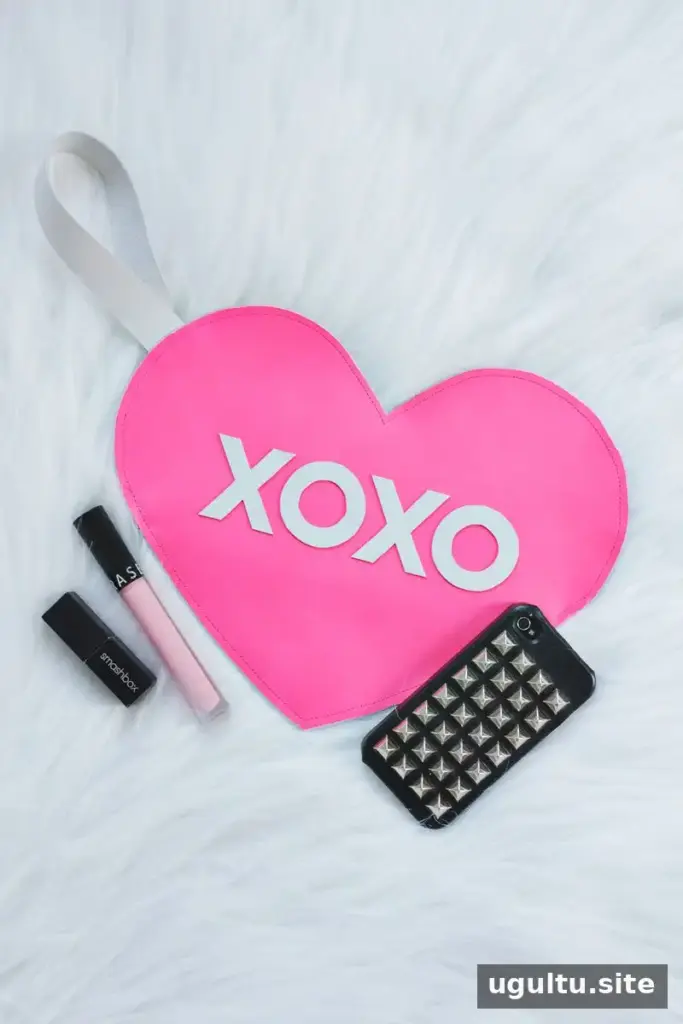
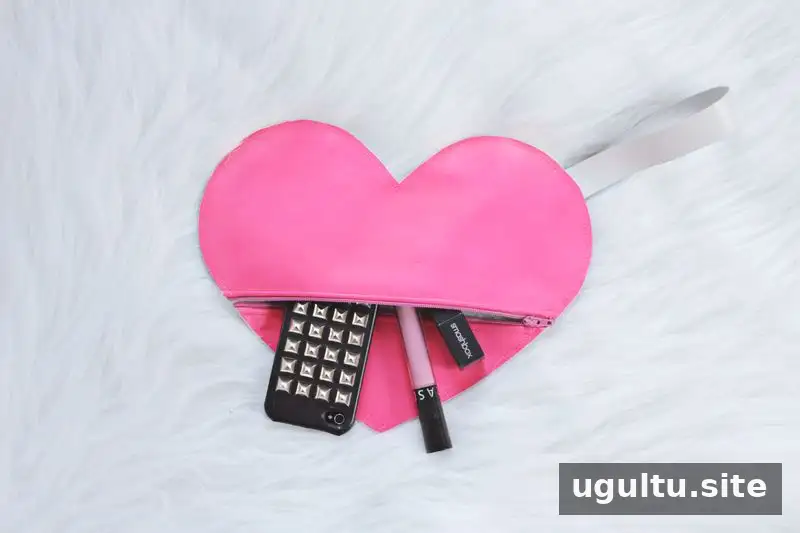
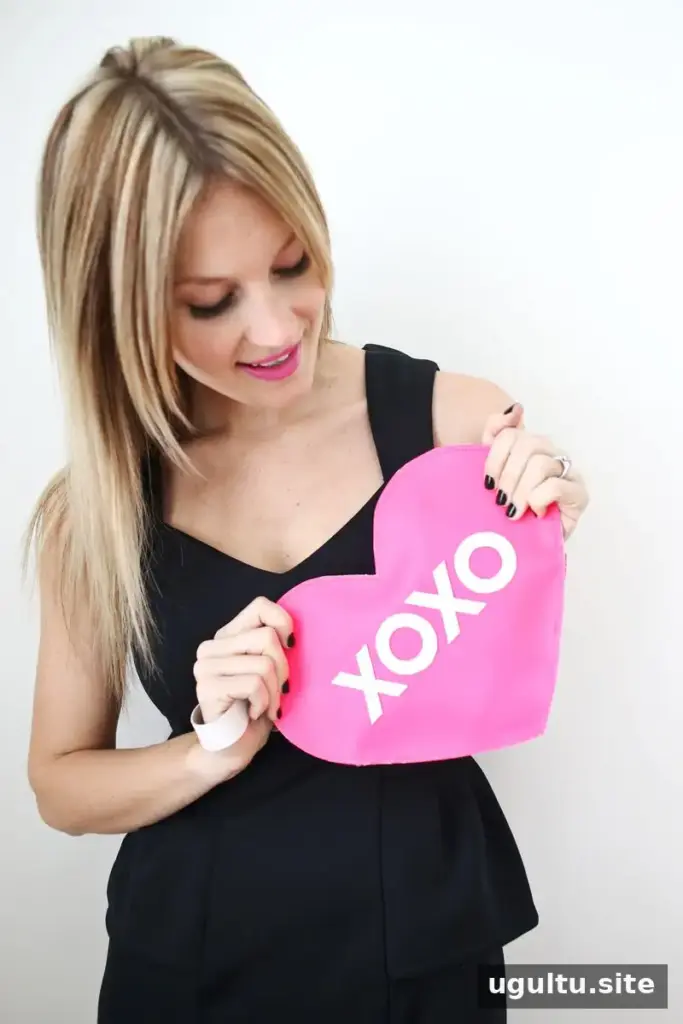
The conversation-heart look is only a starting point: the front lettering can be changed to suit the occasion or the person carrying the bag. A short phrase such as “Clutch Me” is one option, while initials or another brief message can make the design your own. The finished heart clutch DIY can be styled for Valentine’s Day or carried as a playful accessory throughout the year.
— Laura


